Why this guide matters for Airtable users
Airtable is mission-critical for teams managing operations, projects, client work, and business data. But here's the reality: a surprising number of teams experience data loss from accidental deletion, human error, or system issues.
This comprehensive guide shows you:
✓ How to safely delete and restore data in Airtable
✓ What Airtable's native recovery can and CAN'T do
✓ How to prevent permanent data loss
✓ A complete backup strategy for business continuity
Who this guide is for:
- IT Administrators managing Airtable for their company
- Operations Managers protecting business-critical data
- Project Managers responsible for team workflows
- Compliance Officers ensuring data retention requirements
👉 Start your 7-day free trial at ProBackup: https://app.probackup.io/onboarding
Understanding Airtable's data structure
The hierarchy of Airtable data
Before you delete anything, understand how Airtable organizes data. Deletion flows downward — removing a high-level container removes everything inside it.
Airtable Data Hierarchy:
Workspace
└── Base
    ├── Table
    │   ├── Records (rows)
    │   ├── Fields (columns)
    │   ├── Record comments
    │   └── Attachments
    ├── Views
    ├── Interfaces
    ├── Automations
    └── Extensions
Important: Deleting a Workspace or Base removes:
❌ All bases, tables, and records inside it
❌ All comments and communication history
❌ All file attachments
❌ All views, interfaces, automations, and extensions
❌ All custom field data and record history
How to delete data in Airtable
Best practice: Archive vs. Delete
🟢 Archive / Hide: Recommended 99% of the time
- Removes item from active view without deleting data
- Preserves all data and history
- Can be restored at any time
- No permanent consequences
🔴 Delete: Use with extreme caution
- Moves to Trash with a limited retention window
- Permanently erased after retention period expires
- Cannot be undone once trash is emptied
How to delete records
- Select the record(s) you want to delete in any table view
- Right-click and select Delete record, or press the Delete/Backspace key after selecting
- Confirm the deletion in the popup
- The record moves to the base trash — recoverable for 7 days
How to delete a field (column)
- Click the dropdown arrow on the field header
- Select Delete field
- Confirm the action
- Field goes to base trash — recoverable for 7 days
How to delete a table
- Right-click the table tab at the top of the base
- Select Delete table
- Confirm the deletion
- Table goes to base trash — recoverable for 7 days
How to delete a base
- From the Airtable home screen, right-click the base card
- Select Delete base
- Confirm the action
- Base moves to workspace trash — recoverable for 30 days (up to 180 days on Enterprise)
How to delete a workspace
- From the Airtable home screen, click the workspace name
- Open workspace settings
- Scroll to the danger zone and select Delete workspace
- Confirm the deletion
- Workspace moves to trash — recoverable for 30 days
How to restore data in Airtable
Airtable has two levels of trash: base-level trash (tables, fields, records — 7-day window) and workspace-level trash (bases and workspaces — 30-day window).
How to restore deleted records, fields, or tables (base trash)
- Open the base where data was deleted
- Click the base history icon (next to "Share" in the top-right corner)
- Click Trash
- Find the item you want to recover
- Click Restore next to it
How to restore a deleted base or workspace (workspace trash)
- Go to your Airtable home screen
- Click your profile icon in the top-right corner
- Select Trash
- Find the deleted base or workspace
- Click Restore
Trash retention limits by data type
Airtable snapshots: your safety net for base-level recovery
Airtable automatically takes snapshots of your bases based on activity and also lets you take manual snapshots. A snapshot captures everything in a base: tables, records, views, interfaces, automations, and extensions.
Snapshot retention by plan
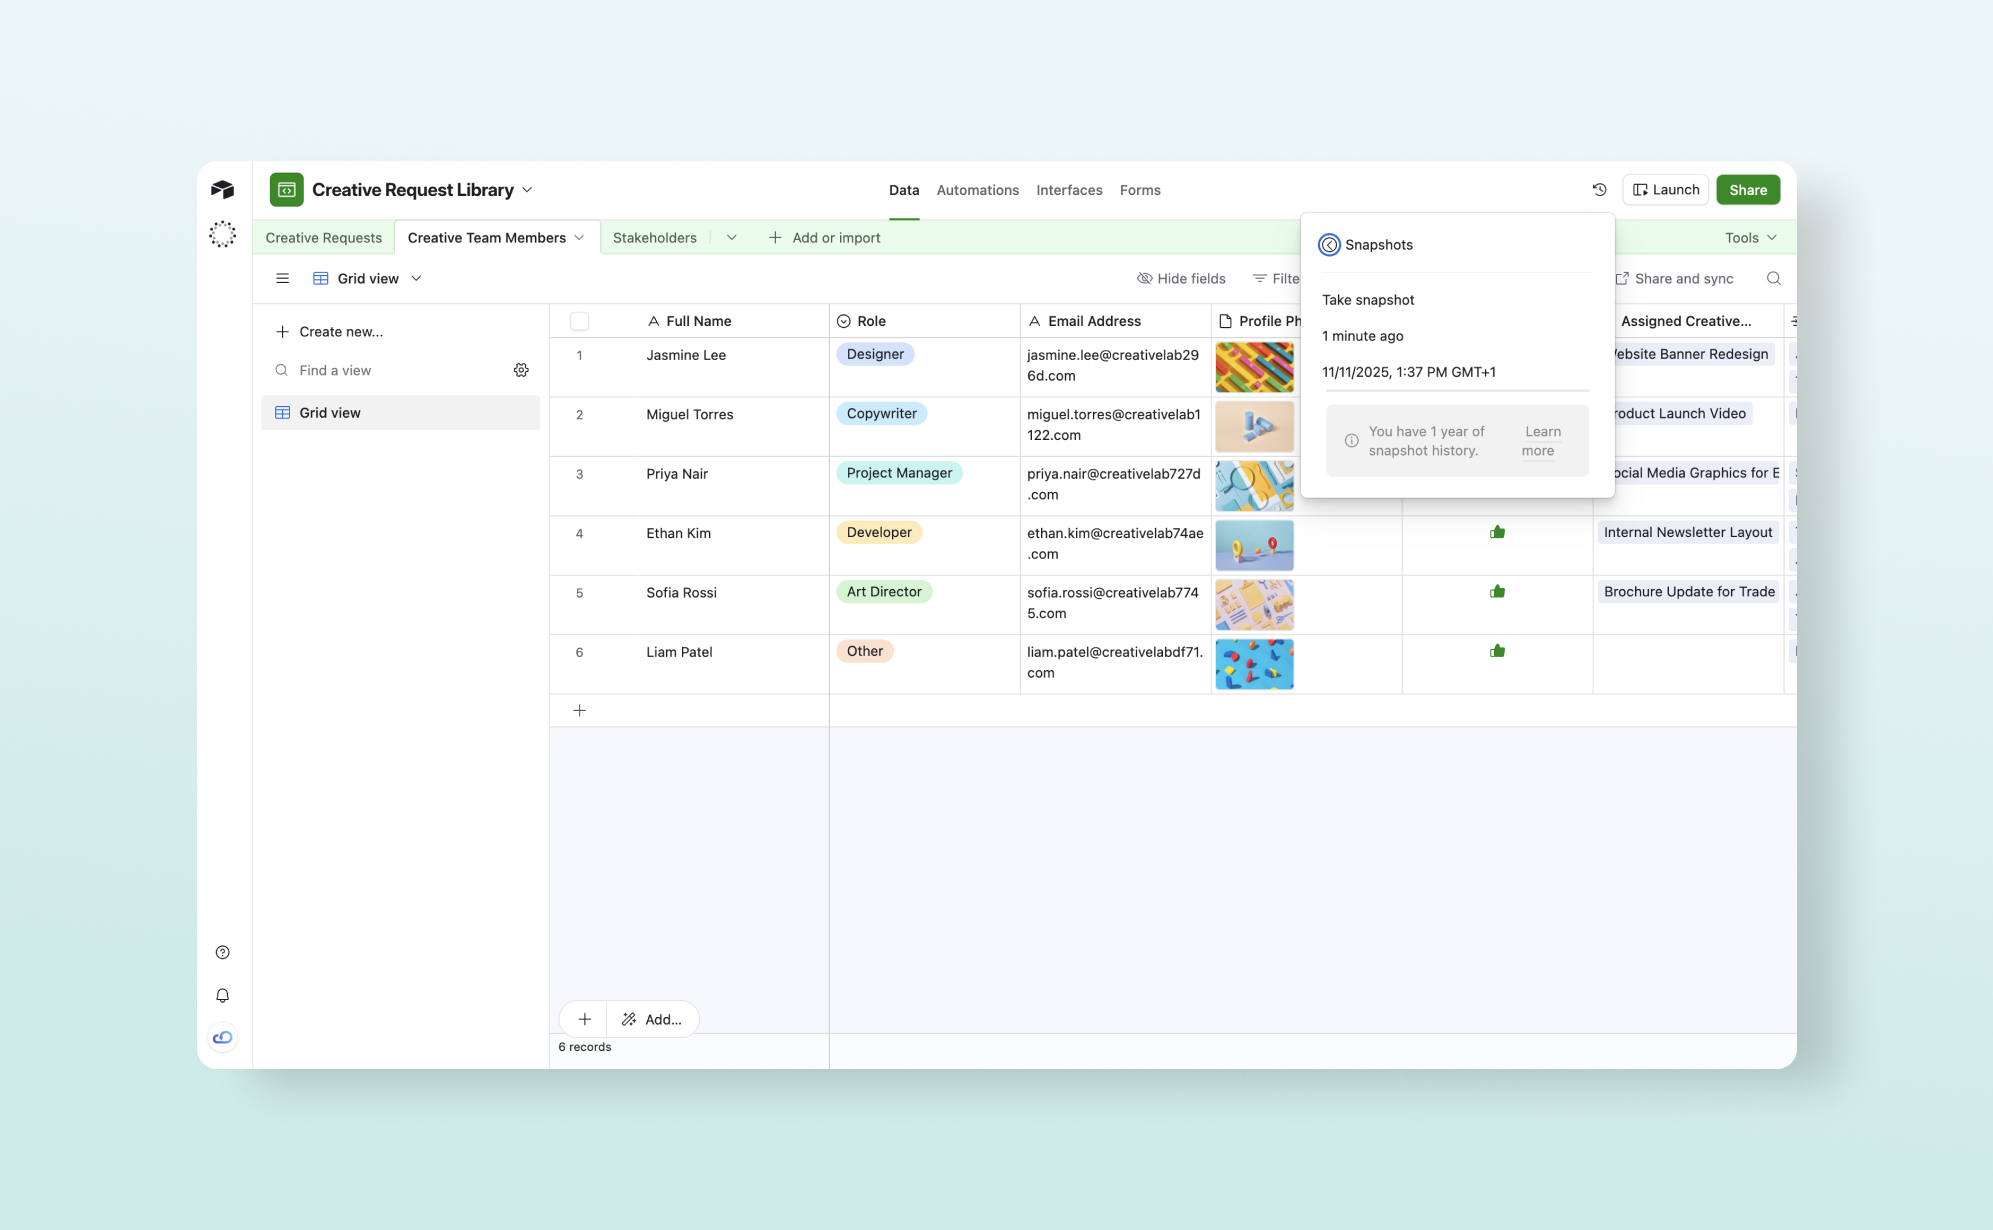
How to take a manual snapshot
- Open the base you want to snapshot
- Click the base history icon in the upper-right corner
- Click Snapshots, then Take a snapshot
How to restore from a snapshot
- Open the base you want to restore
- Click the base history icon in the upper-right corner
- Select your preferred snapshot
- Name the restored base and click Create
⚠️ Important: Restoring a snapshot creates a new base — it does not overwrite your existing one. Your original base is unaffected. The new base will have a new base ID, though record, view, table, and interface IDs are preserved. Restored bases will not have revision history but will include record comments.
What snapshots can and can't do
What can't be restored natively in Airtable
Airtable's trash and snapshot features are helpful for immediate mistakes, but they have critical limitations that can lead to permanent data loss.
A. Short trash windows at the record/field level
Base trash only retains deleted records, fields, and tables for 7 days. For workspace-level items (bases), the window is 30 days — or as few as 14 days if the base was sitting in a Free plan workspace at the time. Once the window closes, the data is gone.
B. No version history for individual cell edits
Airtable does not offer rollback for bulk data changes. You can review what changed in a record's revision history, but you cannot one-click revert a field to how it looked yesterday across thousands of records.
Common causes of silent data corruption:
- ✗ A broken automation overwrites field values across all records
- ✗ A third-party integration syncs incorrectly and bulk-updates statuses
- ✗ An API script runs against the wrong base
- ✗ A bulk import pastes incorrect data over existing content
C. Snapshots can't restore granular items
Restoring a snapshot brings back the whole base as a new copy — there's no way to extract a single record or table from a snapshot without manually copying it over.
D. What Airtable support can and cannot do
Common data loss scenarios & solutions
Scenario 1: "I accidentally deleted a base with months of client work"
What happened: A team member deleted an active client base instead of archiving it. They noticed 3 weeks later.
Native solution:
✓ Go to workspace trash (profile icon → Trash)
✓ Find the base and click Restore
✓ All tables, records, and history come back
Time to fix: 5 minutes — if within 30 days
If it happened 31+ days ago:
✗ Data is permanently gone
✗ Must reconstruct from emails, exports, or memory
Scenario 2: "Someone deleted a table inside an active base"
What happened: A collaborator deleted a table thinking it was a duplicate. The team noticed 10 days later.
Native solution:
✗ Base trash only retains deleted tables for 7 days
✗ After 7 days, table and all its records are permanently gone
✗ Airtable support cannot recover it
Scenario 3: "Our automation overwrote all our records"
What happened: An Airtable automation had a logic error and set the "Status" field on 500 records to the wrong value. The records exist — the data inside them is just wrong.
Native solution:
✗ Records weren't deleted, so trash doesn't help
✗ No version rollback for bulk field changes
✗ Must manually correct each record or re-import from a CSV
Time to fix: Hours
Scenario 4: "We need to prove what a client approved 6 months ago"
What happened: A client disputes the original project scope. You need to show what the Airtable base looked like when sign-off happened.
Native solution:
✗ Snapshots exist — but only for up to 3 years on Enterprise (2 weeks on Free)
✗ No way to view "what the base looked like on a specific date" in the UI without restoring a full copy
✗ Restored snapshot creates a new base - not directly shareable as a point-in-time audit trail
Scenario 5: "A departing employee deleted all their bases before leaving"
What happened: An admin-level employee deleted 5 bases and emptied the workspace trash before their last day.
Native solution:
✗ If trash was manually emptied, data is immediately gone — the 30-day window doesn't apply
✗ Airtable support cannot recover from an emptied trash
✗ No audit trail to confirm what existed before
Quick reference: "I lost data — what should I do?"
Why Airtable's native tools aren't enough for professional teams
Native Airtable recovery is a safety net for immediate mistakes — not a disaster recovery plan. Here's how it stacks up:
Compliance & data retention
Data retention requirements by industry
GDPR Compliance: the "Right to Be Forgotten"
When an EU citizen requests deletion of their personal data, you must delete it from both production systems and backups, and document it within 30 days.
How this works with Airtable + ProBackup:
Step 1: Delete user data from Airtable — remove the person from your workspace, delete their records, and purge personal data from custom fields.
Step 2: Request deletion from ProBackup — open a support ticket specifying the user and date range. ProBackup purges that data from backup storage.
Step 3: Export a deletion certificate from ProBackup for your GDPR compliance documentation.
👉 Read our full GDPR guide: Handling GDPR Deletion Requests in Your Backup System
SOC 2 & ISO 27001: what auditors look for
Protect your Airtable tables today
Don't wait for a data loss disaster to implement backup. The most common causes — accidental deletion, automation errors, and integration mishaps — can strike any team at any time.
ProBackup for Airtable gives you:
✓ Automated daily backups of all your Airtable data
✓ Unlimited retention (no expiring windows)
✓ Point-in-time recovery (restore from any date)
✓ Granular restore (one record, one table, or everything)
✓ Google Drive sync (you own your data)
✓ SOC 2 Type II certified (enterprise-ready)
✓ 5-minute setup (no technical knowledge needed)
👉 Start your 7-day free trial at ProBackup: https://app.probackup.io/onboarding