
Read our blog
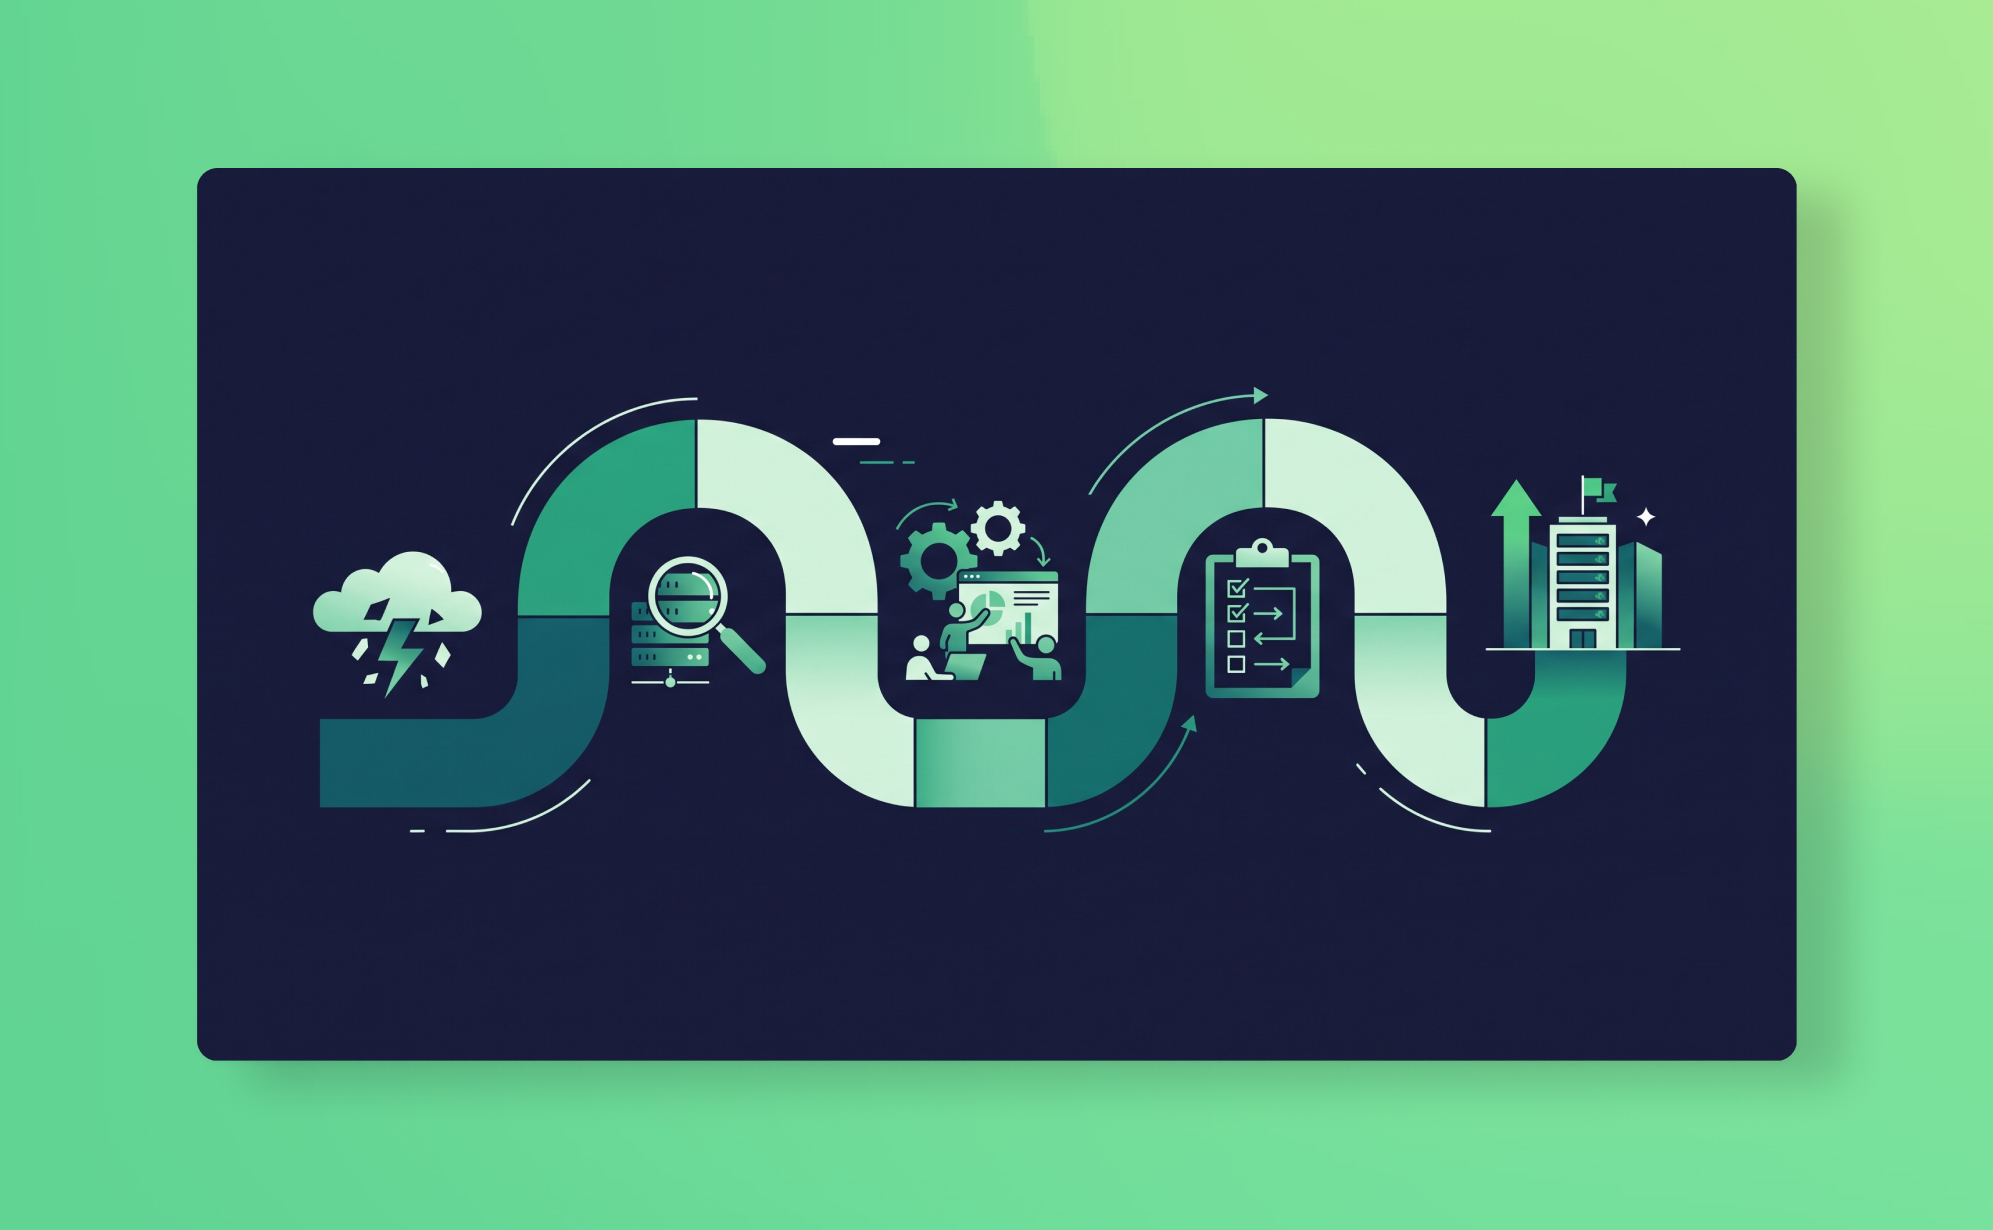
How to build a SaaS disaster recovery plan, step by step

Your backup policy documents the rules. A disaster recovery plan documents what you actually do when things go wrong.
They're different documents for different moments. The backup policy sits in your internal wiki. It tells you what gets backed up, how often, who owns it. It's written when things are calm and consulted during audits. The disaster recovery plan is what you open at 11pm when your ops lead calls to say the project board is gone. It tells you, step by step, what to do in the next two hours.
Most teams have something resembling a backup policy. Almost none have a disaster recovery plan for their SaaS apps. They assume they'll figure it out when it happens. That assumption fails in two ways: you make worse decisions under pressure, and the person who needs to act might not be the person who knows where the backups are. And because your SaaS provider won't be doing this for you, the plan needs to exist on your side.
This post walks you through building one. It's structured as a sequence of steps because that's how a DRP works: you don't improvise, you follow the plan.
What a SaaS disaster recovery plan is (and isn't)
A DRP for SaaS apps is a documented, tested procedure for restoring data and resuming normal operations after an incident.
It is not a backup policy (that's the governance document), a business continuity plan (which covers broader operational resilience, not just data), or an IT incident response plan (which covers security breaches at the system level). Each of those is a different document with a different scope.
Your SaaS DRP is narrower and more operational. It answers: which specific scenarios might affect our SaaS data, who does what when they happen, and how do we restore things in the right order. For most teams it fits on two pages. It should be findable when the person who wrote it is unavailable.
Step 1: Define your threat scenarios
Generic "data loss" is not a useful planning unit. The actions you take after an accidental bulk deletion are completely different from the actions you take after a ransomware attack. Start by listing the specific scenarios your plan needs to cover.
The six most common for SaaS-dependent teams:
Accidental bulk deletion. A team member deletes a project, board, or significant set of records. The most frequent scenario. Usually discovered within hours. Recovery is typically straightforward if backups exist.
Bad import or integration error. A CSV import overwrites field values across hundreds of records. A third-party integration misfires and clears or corrupts data. Nothing was deleted, so the recycle bin won't help. These are among the most common data loss scenarios and among the hardest to detect quickly.
Compromised account. A team member's credentials are stolen. The attacker, or the compromised employee, deletes or exports data before the account is locked. The Snowflake breach in 2024 showed this pattern at scale: stolen credentials, no MFA, significant data loss across 160+ organisations. Your ransomware protection posture matters here.
Malicious insider. A departing employee with admin access systematically deletes data before leaving. This is different from an accident: the deletion is intentional and may include emptying the recycle bin to eliminate the most obvious recovery path.
Provider outage. Your SaaS app is unavailable for an extended period. This isn't a data loss scenario in the traditional sense, but if your team needs to access data during the outage (for client meetings, calls, ongoing work), your DRP should cover how to access it. Google Drive sync creates a readable copy of your backup data that's accessible even if the source app and ProBackup are both temporarily down.
Silent data corruption. Data is modified incorrectly over days or weeks before anyone notices. The recycle bin has long expired by the time the problem is found, and the clean snapshot needed may be weeks in the past.
For each scenario, document: how you'd detect it, the likely data impact, and the approximate time sensitivity (how long before the recovery window closes or the business impact becomes critical).
Step 2: Set your RTO and RPO per app
Before you can plan a recovery, you need to know what "recovered" means. That requires two numbers per app.
Recovery Time Objective (RTO) is how long the team can function without the data. Recovery Point Objective (RPO) is how much data loss is acceptable, measured in time since the last clean snapshot.
For a quick DRP, you don't need to calculate these for every app. Focus on your Tier 1 apps (the ones you identified in your SaaS data protection audit) and document a realistic RTO and RPO for each.
A practical format for setting these is to think about operational dependency: the tighter the RTO, the more the team is blocked without that data. CRM data tends to block client-facing work within hours. Project boards can usually wait a day. Knowledge bases rarely cause a crisis if they're down overnight.
AppRTORPONotesAsana4 hours24 hoursSales team blocked after half a dayHubSpot2 hours24 hoursClient calls require deal historyMonday.com8 hours24 hoursCan reconstruct daily standup from memoryNotion24 hours72 hoursKnowledge base, non-urgent
These numbers shape your recovery prioritisation. When two things need restoring at once, you restore the app with the tighter RTO first.
Step 3: Map your recovery resources
When an incident happens, whoever is managing the recovery needs to know exactly where to go and what to use. Document this before you need it.
For each Tier 1 app, record:
- Backup tool and login URL. Where is the backup vault? What credentials are needed? (Don't store passwords in the DRP document itself, but note where they're held, e.g. "1Password vault, Ops team folder.")
- Who has restore access. Name specific people, not roles. "Head of IT" is useless if that person is the one who just left.
- Snapshot location. For ProBackup users: Home page, then "Go to..." for the relevant app. For Google Drive sync users: the backup folder structure in Drive, organised by app and project.
- Escalation contact. If the primary restore person can't be reached, who is second?
- Backup tool support contact. For ProBackup: support is available via the in-app chat and at support.probackup.io. For incidents where the volume or complexity is high, Pro and Premium plans have priority support.
This section of your DRP should be a single reference page someone can scan in under two minutes.
Step 4: Write your incident response runbook
This is the core of the DRP. A runbook is a documented, sequential procedure that anyone on the team can follow. It removes decision-making under pressure and ensures nothing important gets skipped.
The sequence for most SaaS data loss incidents follows six stages:
1. Detect
Establish that an incident has occurred. Common signals: a team member reports missing data, a ProBackup smart alert fires indicating unusual deletion activity, a weekly status email shows a spike in deletions. Document who receives alerts and who is responsible for triaging them.
2. Assess
Before acting, understand the scope. What data is affected? Which app, which workspace, which records? When did it happen (or when might it have started)? Is it still ongoing (e.g. a misfiring integration still running) or contained? Stopping an ongoing cause before restoring prevents restoring data into a still-broken state.
3. Contain
If the cause is still active, stop it. Revoke access for a compromised account. Disconnect the misbehaving integration. Pause imports that are still running. A restore is pointless if the same thing will happen again immediately.
4. Restore
Using your documented recovery resources, identify the correct snapshot date, select the affected items, and trigger the restore. For ProBackup: navigate to the vault, select the snapshot date preceding the incident, identify affected records, and use "Restore as new records" to create copies without overwriting current data. Track progress in the Restore Report. See the full step-by-step procedure in how to test your SaaS backups, which covers the same navigation path used in a real restore.
For silent corruption scenarios where the start date is unknown, work backwards through available snapshots from the most recent until you find a clean version of the affected data.
5. Verify
Don't close the incident until someone has confirmed the restored data is accurate. This should be the person who knows the data well enough to spot something wrong: the project owner, the account manager, whoever works in that workspace daily. Check field values, comments, attachments, and any related records.
6. Document
Record what happened: the timeline, cause, data affected, snapshot date used, who performed the restore, time to resolution, and whether any data was unrecoverable. This log serves three purposes: it improves your next response, it's evidence for compliance audits (SOC 2's Availability criterion and ISO 27001 Annex A.12.3 both require incident documentation), and it's the input for a post-incident review to prevent recurrence. Store it alongside your restore test log.
Step 5: Assign roles and contacts
A runbook without names is a procedure without owners. For each stage of the runbook, assign a primary and a backup person:
RolePrimaryBackupIncident detection / triage[Name][Name]Scope assessment[Name][Name]Containment (access revocation)[Name][Name]Restore execution[Name][Name]Data verification[Name][Name]Stakeholder communication[Name][Name]Incident documentation[Name][Name]
Also document your escalation path. If the primary restore person can't be reached within [30 minutes], who do they escalate to? Who has authority to make the call to involve external support or notify affected clients?
For out-of-hours incidents, include personal contact numbers or Slack handles that work when email is too slow. Data loss at 9pm doesn't wait until Monday.
Step 6: Test the plan
A disaster recovery plan you've never tested is an untested assumption. Run a tabletop exercise once a year: gather the relevant people, walk through a realistic scenario ("it's Monday morning, someone reports the HubSpot pipeline is empty"), and talk through each stage of the runbook. Who would do what? What would they need? Where would the friction be?
Tabletop exercises are low-cost and reveal gaps in the plan without the pressure of a real incident. Common things they surface: missing contact numbers, unclear ownership at the containment stage, backup access held only by someone who's since left the company.
Once a year, run a live drill: trigger an actual restore from a real snapshot, time the process end to end, and document how long each stage took. If your RTO for HubSpot is two hours and your live drill takes four, you've found the gap before it matters.
After any real incident, treat it as a drill debrief. Update the runbook based on what actually happened versus what the plan assumed.
Template: SaaS DRP one-pager
Below is a condensed template. A working DRP doesn't need to be long. It needs to be findable, current, and specific enough to act on.
[Organisation name] SaaS disaster recovery plan
Version: 1.0 | Owner: [Name, Role] | Last tested: [Date]
Covered apps: [List Tier 1 SaaS apps]
Recovery objectives:
AppRTORPO[App][e.g. 4 hours][e.g. 24 hours]
Recovery resources:
AppBackup toolRestore accessEscalation[App][e.g. ProBackup][Names][Name, contact]
Threat scenarios covered: Accidental deletion / Bad import or integration error / Compromised account / Malicious insider / Provider outage / Silent data corruption
Incident response sequence:
- Detect: [who receives alerts, how incidents are reported]
- Assess: [who assesses scope, what information is gathered]
- Contain: [who revokes access or stops the cause]
- Restore: [who performs the restore, backup tool used, procedure reference]
- Verify: [who confirms data accuracy]
- Document: [where the incident log is recorded]
Roles and contacts:
RolePrimaryBackupOut-of-hours contactTriage[Name][Name][Signal/mobile]Restore[Name][Name][Signal/mobile]Verification[Name][Name][Signal/mobile]Communications[Name][Name][Signal/mobile]
Related documents: [Link to backup policy] | [Link to SaaS data protection audit] | [Link to restore test log]
What to do next
Getting to this point means you've thought seriously about what recovery actually looks like: who acts, in what order, with what tools. That's the work most teams skip. The next step is making sure the backup infrastructure your runbook relies on is actually in place.
If you already have a backup policy in place, the DRP is the natural next document: same apps, same ownership, different purpose. Start with the roles and contact table and the RTO/RPO table from your audit, then build the runbook around them.
If you haven't yet set up independent automated backups, there's no point building a runbook that points to a backup vault that doesn't exist. Start a free trial of ProBackup, get your first snapshot running, then build the plan around that. Setup takes about three minutes per app. Plans start at $25/month (billed yearly) and cover 19+ platforms under a single licence.
See how other teams have used ProBackup when they've actually needed to recover on our success stories page.
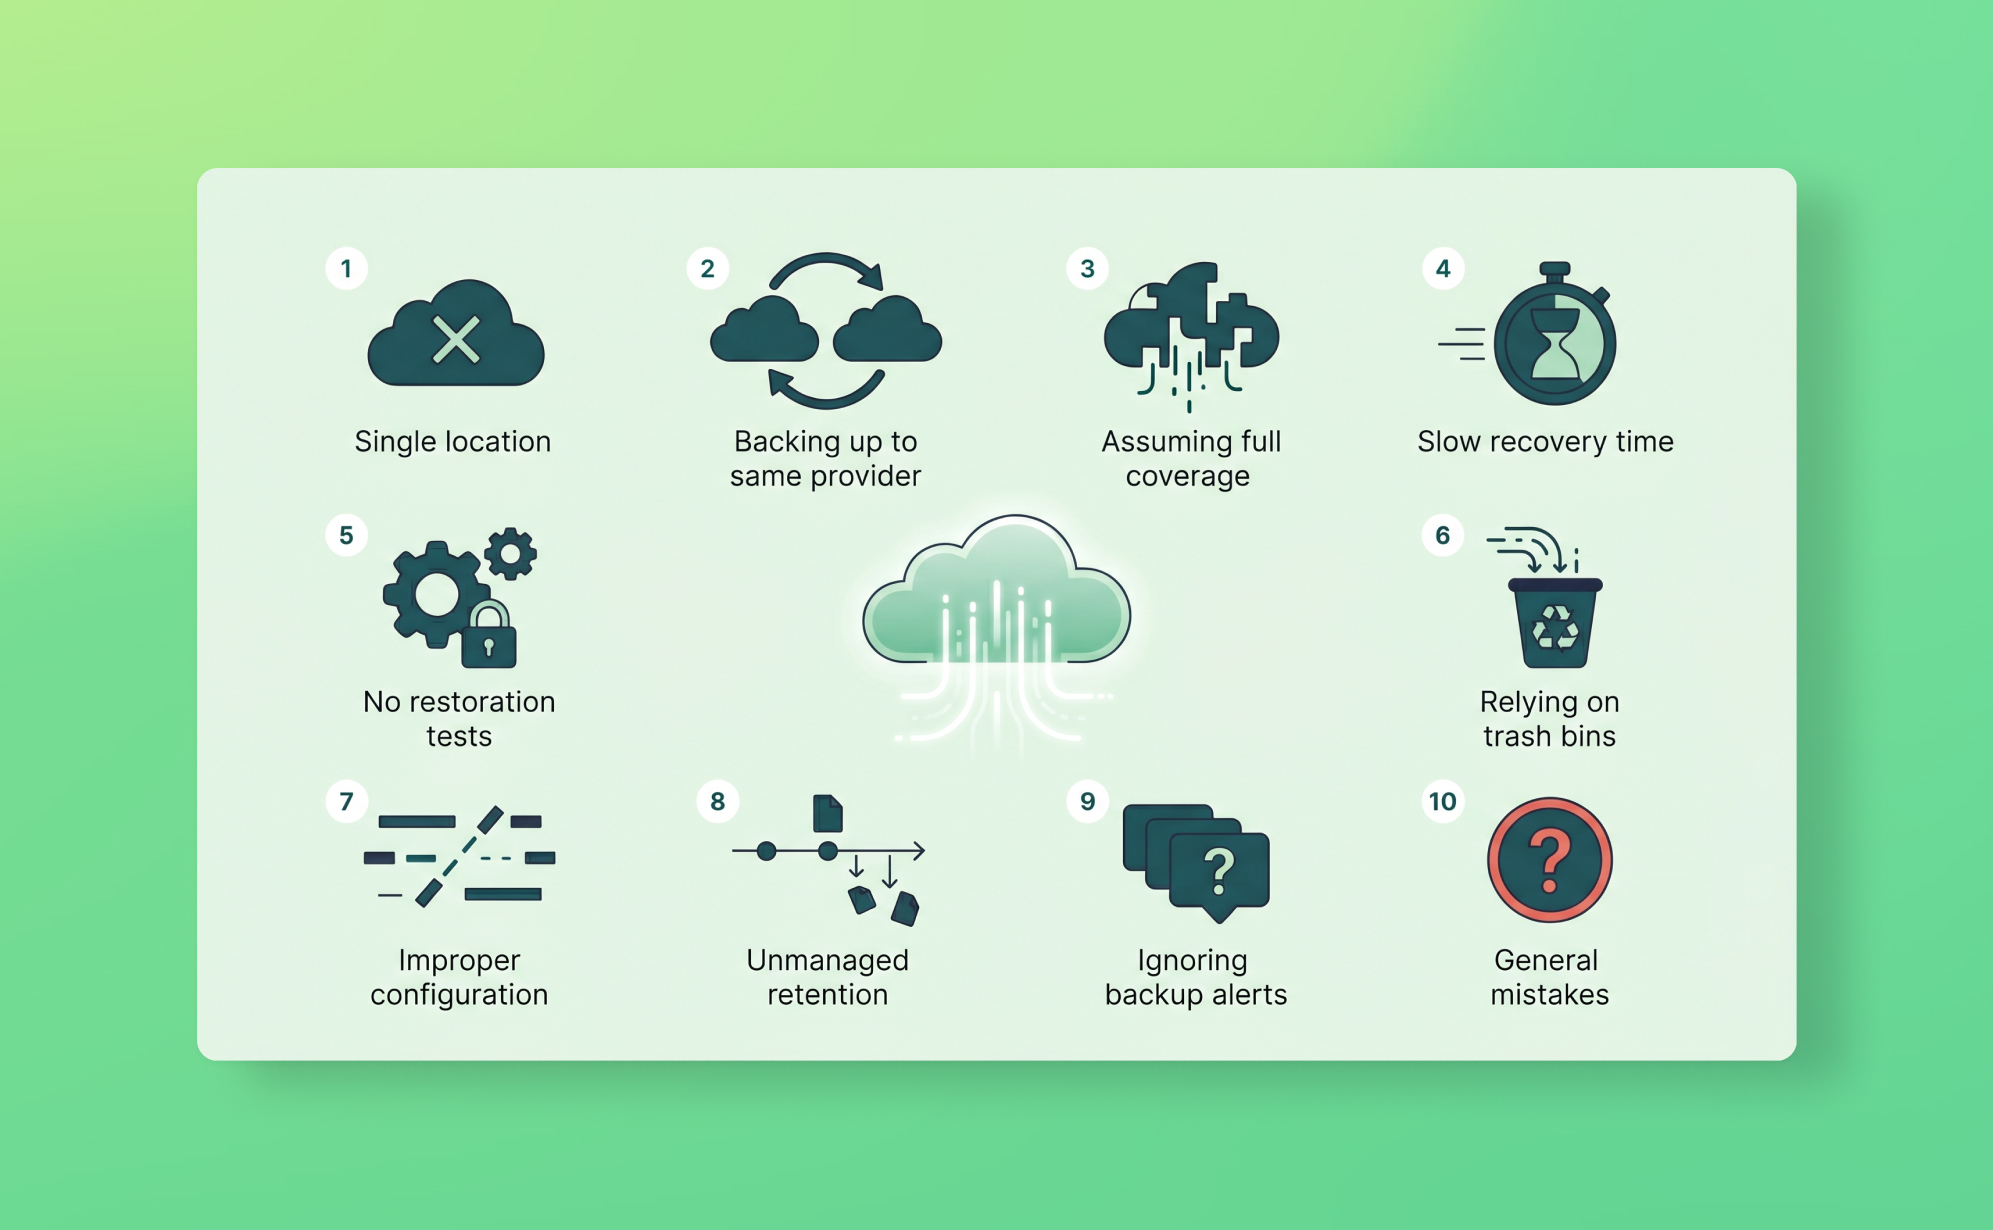
The 10 common SaaS backup mistakes that leave your data unprotected

Most teams that experience a serious SaaS data loss had backups. Or thought they did. The problem usually isn't that nobody set anything up. It's that what they set up had a gap nobody noticed until something broke.
These are the ten mistakes we see most often, and the ones that are most likely to matter when you actually need to recover something.
Mistake 1: Assuming your SaaS provider backs up your data
This is where almost every other mistake starts. The assumption feels reasonable: your data is in the cloud, the provider runs the cloud, so surely they're looking after it.
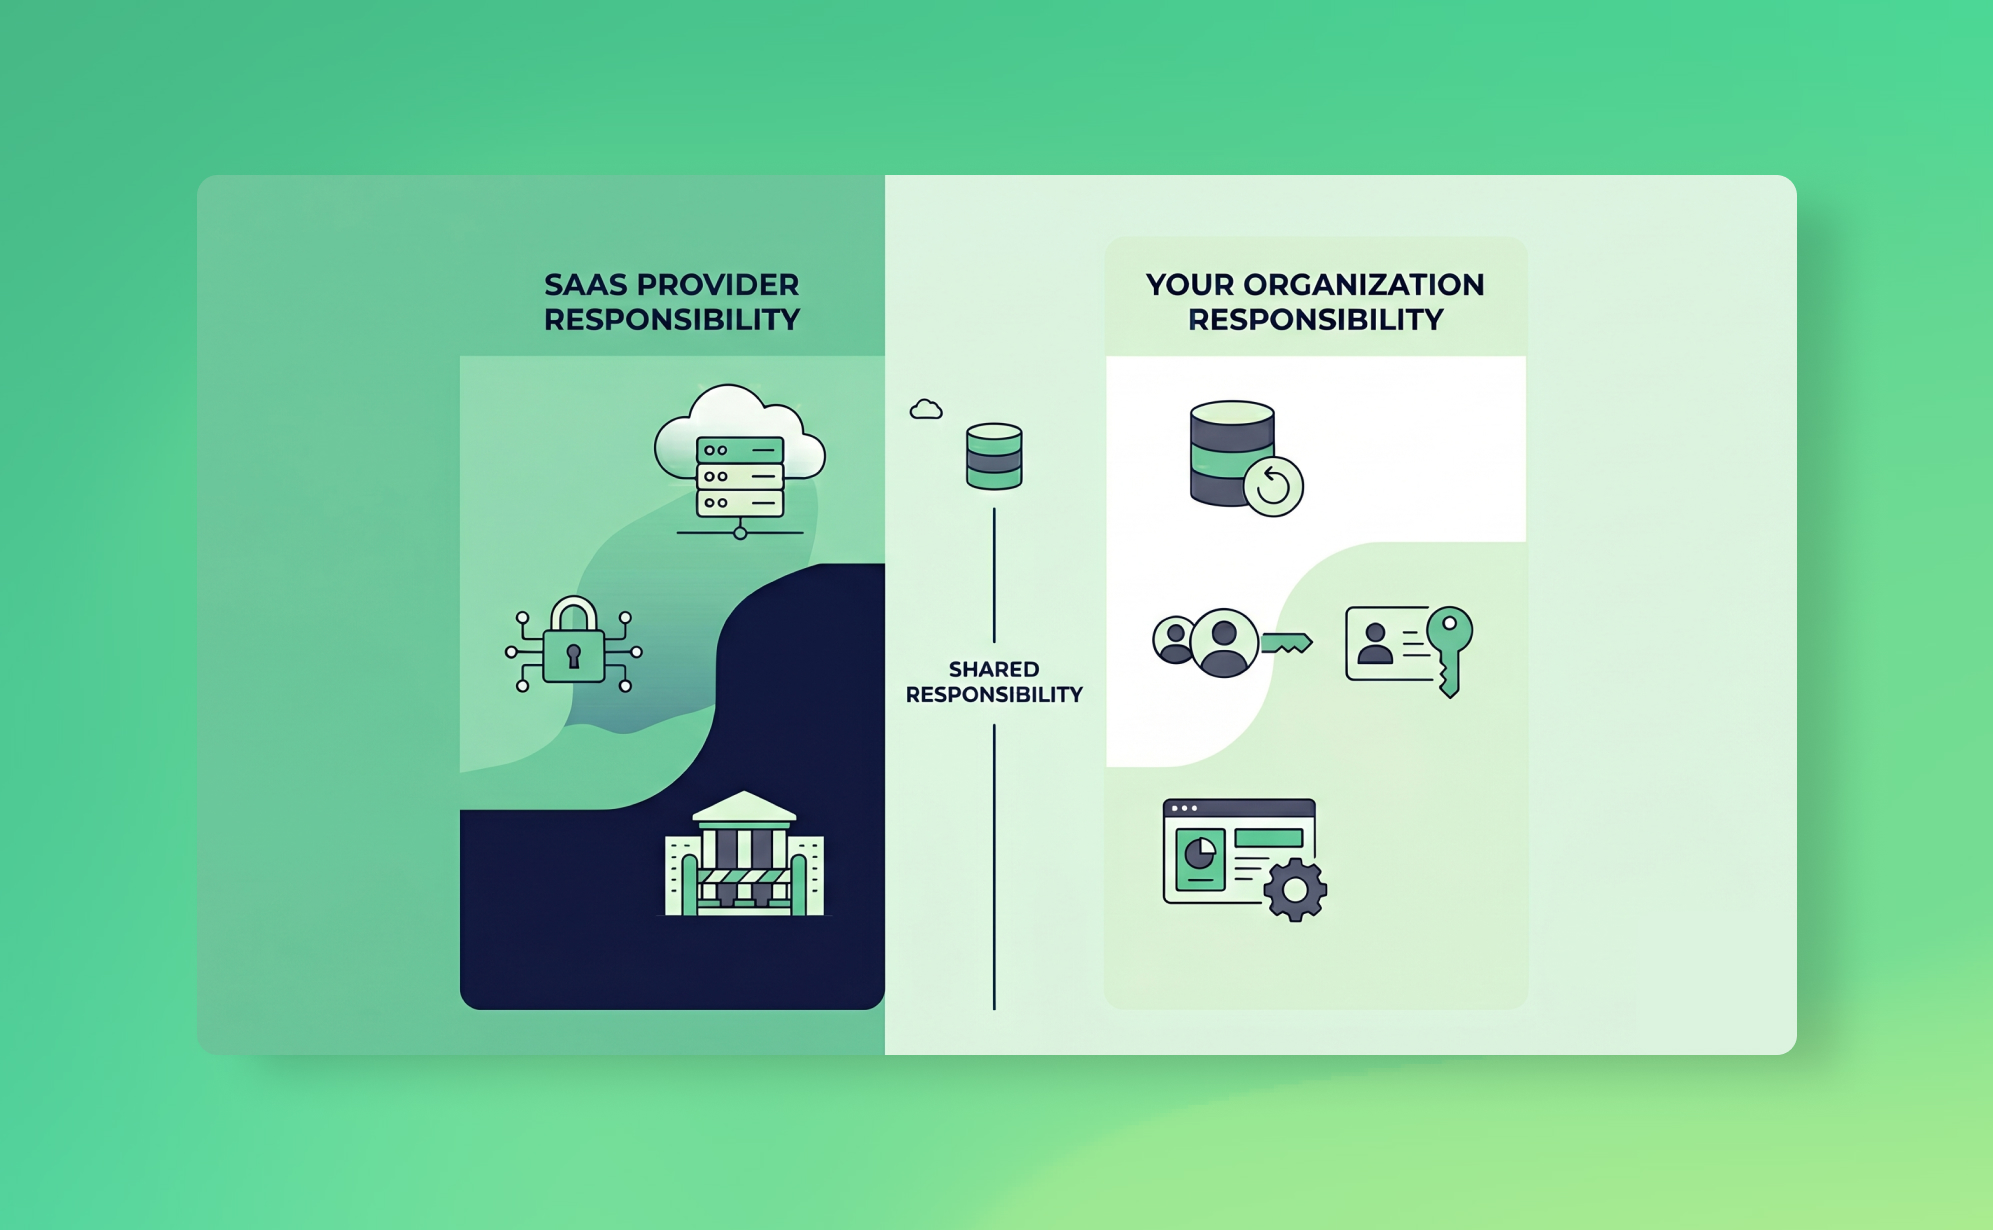
They are, but not in the way you'd hope. The shared responsibility model means your SaaS provider protects the platform infrastructure. If their servers fail, they recover. What they don't protect is what happens inside your account: accidental deletions, bad imports, malicious actions by someone with access, integration errors that overwrite data silently.
Providers state this clearly in their terms of service. Most customers never read those terms until something goes wrong. Asana's terms explicitly state that users are responsible for maintaining copies of their own content. Monday.com's data policy is similar. So is HubSpot's. The shared responsibility clause is in there; it's just in the kind of language nobody reads voluntarily.
The practical consequence: when data disappears from your workspace, your provider's infrastructure backup won't help you. That data was never part of what they were backing up. Support will confirm the deletion happened, sometimes tell you who did it, and wish you luck.
Mistake 2: Relying on the recycle bin as a backup
The recycle bin works just often enough to create a false sense of security. Someone deletes a task, finds it in the trash, restores it, and moves on. The next time something goes wrong, they expect the same thing to work.
Most platforms cap recycle bin retention at 30 days. Trello has no recycle bin for deleted cards at all. But the expiry window isn't even the main problem. Recycle bins don't cover bulk overwrites from bad imports, field configuration changes, automation errors, or anything modified rather than deleted. If a CSV import overwrites 300 custom field values with wrong data, nothing goes to the trash because nothing was deleted. The platform sees an update, not a deletion, and the recycle bin is blind to it.
Recycle bins are undo buttons. They handle "I just deleted this by accident." They are not data protection.
Mistake 3: Only backing up some of your apps
This one is less obvious, and more common than it sounds. A team connects their primary project management tool to a backup solution, considers it handled, and stops there. Meanwhile, three other apps containing business-critical data sit entirely unprotected.
It happens gradually. The backup gets set up when the company is small and only has a few critical tools. The SaaS stack grows. Nobody loops back. The SaaS audit that would catch this never happens.
The result: partial coverage that looks like full coverage. You have a backup, so you feel protected, but two of your five critical apps are completely exposed. The CRM that holds three years of client history. The HubSpot portal where your sales team logs every deal interaction. Neither of them in scope.
This is also where private workspaces create a specific gap. In tools like Asana, ClickUp, and Trello, backup scope is workspace-level. If the person who set up the backup doesn't have access to another team member's private workspace, that data isn't included. The backup runs, the status emails look clean, and nobody knows there's a gap until someone asks for data from a workspace that was never in scope. A team leader who kept all her client notes in a private Asana project leaves the company. Her successor asks where the project history is. The answer is: it was never backed up.
Mistake 4: Never testing your restores
Having backups you've never tested is roughly equivalent to having a fire extinguisher you've never checked is charged. It might work when you need it. It might not. You have no way to know.
The problem compounds under pressure. The worst time to figure out how a restore works is during an actual incident, when someone is standing behind you asking what's happening and the client is waiting for an update. The mechanics of navigating the vault, selecting a snapshot, choosing the right restore method, finding the restored items in your app: none of these should be learned for the first time in that moment.
Testing takes about 20 minutes and reveals things you wouldn't otherwise know: which data types can't be restored due to API limitations, how long a large restore actually takes, what the restored items look like in your app. Run one quarterly. Document the result. That log is also what SOC 2 and ISO 27001 auditors will ask for.
Mistake 5: Ignoring metadata, comments, and attachments
Teams often think of their data as the records: the tasks, items, contacts, deals. The fields that live in those records. But a lot of the operational value is in the context around them: comments where decisions were made, file attachments that document deliverables, activity logs that show who changed what and when.
Not all backup tools capture this, and not all platforms expose it through their API. This is worth checking specifically.
For example, Asana's API doesn't expose comments on subtasks, so those can't be backed up. Files attached to Asana tasks via Dropbox, Google Drive, or OneDrive links aren't captured either, only files uploaded directly. In Monday.com, files uploaded directly to an item (rather than through a file column) aren't included. In Trello, Power-Ups and automation rules aren't accessible through the API at all.
There's also a character limit worth knowing: ProBackup captures the first 2,500 characters of any text field or comment. For most comments that's fine. For long project notes or detailed descriptions, content beyond that threshold isn't stored.
None of these are bugs. They're API limitations that every backup tool working with these platforms will hit. The mistake is assuming everything is captured when some of the most contextually rich data isn't.
Mistake 6: No retention policy
Daily backups with 30 days of retention sound reasonable until you face the most common real-world failure mode: the problem that nobody notices for six weeks.
A misconfigured integration silently overwrites a field across hundreds of records. A former employee deleted a project's history before leaving. Someone changed a custom field configuration and removed several options that tasks were assigned to. None of these are obvious immediately. Teams often don't notice until a client asks a question, a report looks wrong, or someone goes looking for something that should be there.
If your backup retention is shorter than your detection window, the clean snapshot you need is gone before you realise you need it.
Setting a meaningful RPO requires thinking about your worst-case detection time, not your average case. If your team might not notice a data problem for two months, you need at least two months of retention. For compliance-driven teams, the requirement is typically longer. SOC 2 and ISO 27001 both expect you to document your retention policy and justify it against your recovery objectives, not just set a default and leave it.
Retention settings also need to be protected. In most backup tools, reducing the retention period permanently deletes older snapshots. This should require explicit approval from the policy owner, not just anyone with admin access.
Mistake 7: Backing up to the same provider
This is the most technically interesting mistake, and the one most likely to cause complete, unrecoverable data loss.
The scenario: your SaaS app and your backup are both hosted by the same cloud provider, sometimes even under the same account. When the provider has an incident, both the source data and the backup go down together. When a malicious actor gains access to your account, they can reach both. Your backup isn't independent. It's just a copy stored in the same blast radius.
CodeSpaces, a code-hosting provider built on AWS, learned this in 2014. An attacker gained access to their AWS control panel and systematically deleted all EBS snapshots, S3 buckets, and machine images. CodeSpaces had backups. They were stored in the same AWS account. The company shut down permanently within 24 hours.
This pattern applies at a smaller scale every time someone uses their SaaS provider's built-in export feature as their "backup." The export lives in Google Drive, which is authenticated with the same Google account as the workspace. The workspace gets compromised; the export goes with it.
A genuine independent backup means different infrastructure, different authentication, different provider. ProBackup stores all backup data in AWS Dublin with AES-256 encryption, using access tokens that are completely isolated from your SaaS accounts. Compromising your Asana or Monday.com account gives an attacker no pathway to your ProBackup data.
Mistake 8: No team access controls on backup data
Who can access your backup vault? Who can trigger a restore? Who can see what data was deleted and when?
Most teams set this up for their primary admin and never think about it again. The result is that either too many people have restore access (including former employees), or too few people do (so if the primary admin is unavailable during an incident, nobody else can do anything).
Access controls on backup data deserve the same attention as access controls on the source platform. In ProBackup, the admin user has full access. Invited users can be granted per-platform permissions at three levels: view only, export, or full restore. These should be set deliberately, not left at defaults.
Offboarded employees are a specific risk. If someone with restore access leaves the company and their backup account isn't deactivated, they have access to a historical record of your organisation's data, including things deleted months before they left. That's a data exposure problem, not just a security hygiene issue. GDPR's principle of data minimisation applies here: access to personal data should be limited to those who currently need it.
Two-factor authentication on backup tool accounts is non-negotiable. It's the same lesson the Snowflake breach taught at scale: stolen credentials are common, MFA stops them from being useful.
Mistake 9: Forgetting about compliance requirements
Backup is often treated as an operational concern rather than a compliance one. That's a mistake for any organisation subject to GDPR, SOC 2, ISO 27001, or sector-specific regulations.
SOC 2's Availability trust service criterion requires demonstrable evidence that you can restore data within documented recovery objectives. An auditor will ask for your backup policy, status reports showing backups are running, and records of restore testing. "We have backups" isn't evidence. Documented procedures and test logs are.
ISO 27001 Annex A.12.3 requires documented backup procedures including scope, frequency, retention, and regular testing. The standard also requires that backup storage be "adequately protected," which means physical security, encryption, and access controls.
GDPR adds a specific wrinkle: when a data subject requests deletion under Article 17, you must delete their data from live systems. But that data may persist in backup snapshots until the retention period expires. Your backup policy should document this as a known behaviour and, if your compliance obligations require it, define a process for removing personal data from backups on request.
Teams that treat backup as pure ops and never connect it to compliance often discover the gap during an audit rather than before one.
Mistake 10: No monitoring between backups
Daily backups are a 24-hour safety net. But between backups, things happen. A disgruntled employee mass-deletes 400 tasks on a Tuesday afternoon. An integration misfires and clears a column across an entire board. Someone with admin access empties the recycle bin.
Without monitoring, none of this surfaces until the next backup cycle, by which time the window for catching it in real time has closed. If you notice on Wednesday that your Tuesday afternoon was catastrophic, you can restore from Tuesday morning's snapshot and lose a few hours of work. That's recoverable. If you notice on Friday because someone finally went looking for a task that should have been there, you're in a different situation: multiple days of legitimate work happened on top of the corrupted state, and disentangling what to restore is significantly harder.
Proactive alerts close this gap. ProBackup's smart alert system notifies you when unusual deletion activity is detected, for example a spike where far more items than normal are removed in a short window. On Pro and Premium plans, weekly status emails summarise backup health, storage usage, and recent deletion activity across all connected platforms.
Monitoring doesn't replace backups. It shortens the detection window that determines whether a restore is a quick fix or a complex, multi-day reconstruction.
Quick reference: the 10 mistakes at a glance
| # | Mistake | Risk level | Fix |
|---|---|---|---|
| 1 | Assuming your provider backs up your data | Critical | Understand the shared responsibility model; don't rely on provider ToS |
| 2 | Relying on the recycle bin | High | Treat the bin as undo, not backup; use independent daily backups |
| 3 | Only backing up some of your apps | High | Audit your full SaaS stack; include private workspaces |
| 4 | Never testing restores | High | Run a quarterly restore test; document results |
| 5 | Ignoring metadata, comments, and attachments | Medium | Check per-platform API limitations; know what's excluded |
| 6 | No retention policy | High | Set retention to exceed your worst-case detection window |
| 7 | Backing up to the same provider | Critical | Use independent infrastructure with separate authentication |
| 8 | No access controls on backup data | Medium | Assign permissions deliberately; deactivate offboarded users; enforce 2FA |
| 9 | Forgetting compliance requirements | Medium | Connect backup to SOC 2, ISO 27001, and GDPR obligations; document everything |
| 10 | No monitoring between backups | Medium | Enable smart alerts and weekly status reports |
What to do now
If any of these mistakes apply to your current setup, the fix is usually simpler than it looks.
Run a SaaS data protection audit to find your coverage gaps. Write or update your backup policy to document scope, retention, ownership, and access controls. Run a test restore if you haven't done one recently.
If you don't yet have independent, automated backups for your SaaS stack, start a free trial of ProBackup. Setup takes about three minutes per app and covers 19+ platforms under a single licence, including Asana, Monday.com, ClickUp, Trello, Notion, HubSpot, Jira, Airtable, and Slack. Plans start at $25/month (billed yearly).
See how other teams have used ProBackup to recover from real data loss on our success stories page.
How to test your SaaS backups (before you actually need them)
The worst moment to discover your backup doesn't work is when you're already in an incident. Your Asana workspace is corrupted, the client is waiting for an update, someone is standing behind you asking what's happening, and you're clicking around in a backup tool you haven't opened in six months trying to figure out what "restore as new records" means.
This happens more than it should. Not because teams don't have backups, but because they never test them. Setting up automated backups feels like the finish line. It isn't. A backup you've never tested is an assumption, not a safeguard.
Testing takes about 20 minutes. It's non-destructive. It answers the questions you don't want to be answering for the first time during a real incident: where do I find the snapshot? What do I restore? How long does it take? Where do the restored items appear? What if the data looks wrong?
This post walks you through the full process.
Why backup testing gets skipped (and why that's a problem)
The common reasons are predictable. "We have backups running, so we're covered." "We'll figure it out if it ever happens." "It would take too long."
None of these hold up. A backup that runs successfully every night doesn't guarantee the data inside it is usable. APIs have limitations. Some data types can't be restored due to platform constraints. Certain field values don't survive the restore process. You won't know any of this until you actually try restoring something.
There's also the time pressure problem. During a real incident, people are stressed, decisions need to be made quickly, and the person doing the restore is probably not the person who set up the backup tool. If nobody has ever done a restore before, the learning curve hits at exactly the wrong moment.
A quarterly test costs 20 minutes. An untested restore during a live incident can cost hours, and sometimes data you can't recover at all.
What you're actually testing
Before running a test, be clear on what you're trying to verify. A good backup test answers four questions:
Is the data there?
Can you find a clean snapshot from a recent date? Is the data you'd want to restore actually in the backup vault?
Is the data complete?
When you look at a backed-up record, are the field values, comments, files, and related items all present? Or are there gaps you'd expect to be filled?
Does the restore work end to end?
Can you trigger a restore, have it complete successfully, find the restored items in your SaaS app, and verify they match the original?
How long does it take?
For a single record, for a project, for a larger set of items. This is your RTO data point. If restoring 200 tasks takes 40 minutes, that's your RTO for that scenario, and you should know it now.
What to test
Don't try to test everything in one session. Pick a representative sample across the data types your team relies on most.
A useful test set for a first run:
- One task or record with comments, attachments, and custom field values (tests field-level restore fidelity)
- One project or board from a few weeks ago (tests point-in-time snapshot integrity and project-level restore)
- One recently deleted item still within the retention window (tests deleted-item recovery)
- One item deleted long enough ago that it's gone from the platform's own recycle bin; this tests the core value proposition of an independent backup (see why SaaS recycle bins aren't enough)
That last one is the most important. If your backup can recover something the platform's native recycle bin can no longer see, you know the independent backup is doing what it's supposed to.
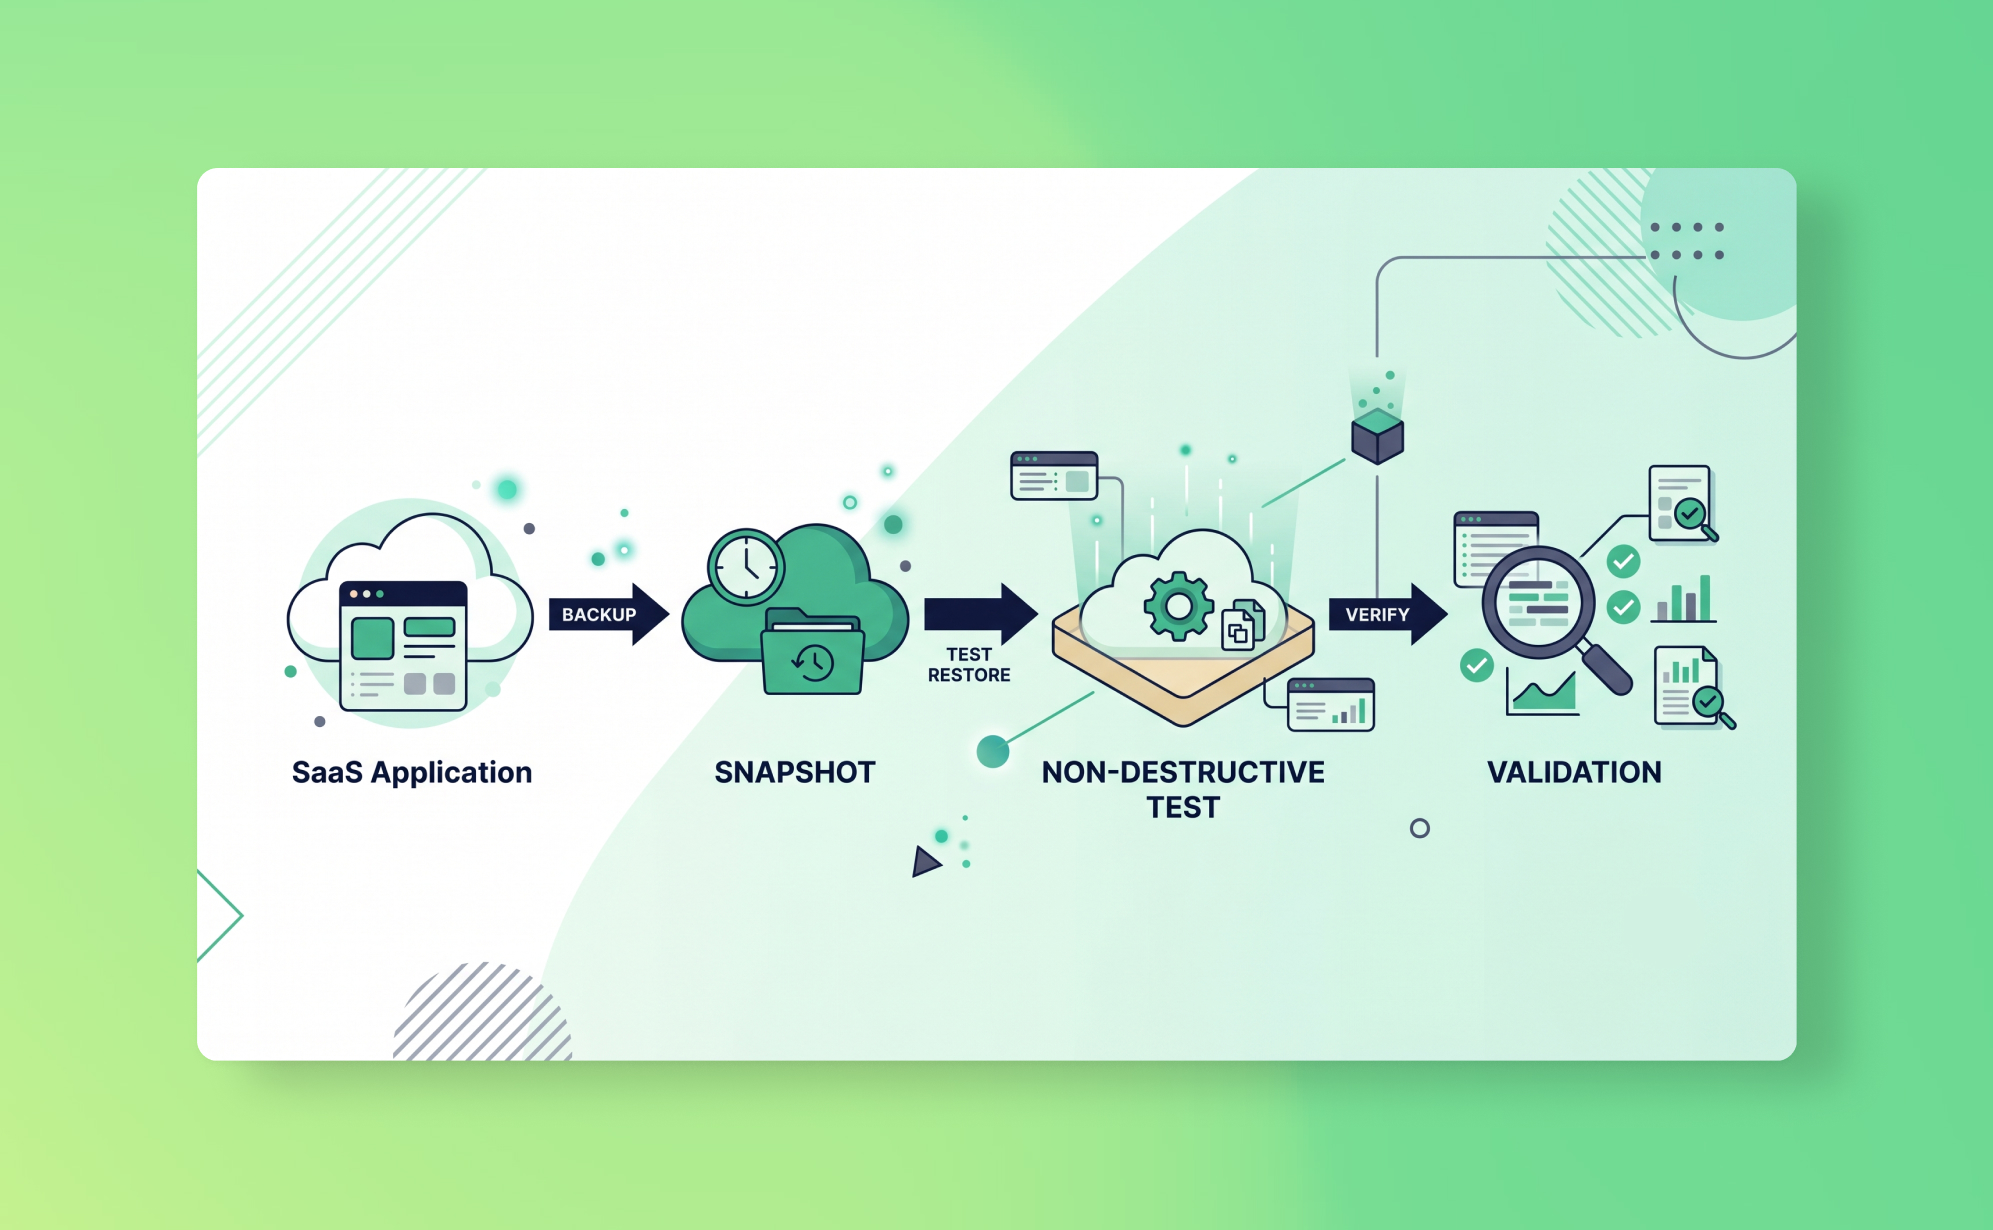
How to run a test restore in ProBackup
The process is the same for any platform you have connected.
Step 1: Open the vault and navigate to your data.
On the Home page, click "Go to..." for the app you want to test. In the left sidepane, navigate to the workspace, folder, project, or board that contains the data you want to restore. Switch between data type tabs (tasks, comments, files, and so on) to browse what's captured.
Step 2: Select a snapshot date.
Use the date filter to select a past snapshot, the further back the better for a meaningful test. If your retention is six months, try a snapshot from two months ago. This confirms both that the snapshot exists and that the data looks as expected.
Step 3: Select the records and click "Restore..."
Select one or more records and click "Restore..." at the bottom of the screen or via the preview panel. A restore pane opens on the right. Before confirming, check two things:
Restore location: confirms where the restored items will appear. This is set automatically based on the original location.
Restore method: choose between "Restore as new records" (creates copies alongside existing data, the safest option and the right choice for testing) and "Overwrite existing records" (updates existing records with backed-up field values, useful for rolling back changes to a record that still exists). For testing, always use "Restore as new records." Nothing gets overwritten, and you can delete the test copies once you've verified them.
Also review "Restore constraints" at the bottom of the pane. This lists any data types that can't be restored due to API limitations for that platform. For example, Asana tasks can't have formula fields or read-only custom fields restored. This is important to note in your test log as a known limitation.
Step 4: Track progress and find restored items.
After confirming, go to Reports > Restore Report to follow progress. Large restores can take a few minutes. Once complete, open your SaaS app:
- Restored projects and boards appear with "restore" and the date appended to the name, for example "Q3 Campaign (restore 2026-04-15)." Find them in the relevant workspace.
- Restored tasks and records appear as new items in the original project or board. Sort by creation date to find them quickly.
- Restored comments appear as new entries in the related record.
Step 5: Verify the data.
Compare the restored items against what you'd expect. Check field values, comments, files, and any custom fields that are central to how your team uses the app. Note anything that's missing or looks wrong. Some gaps are expected (known API limitations), and some might be surprises worth investigating.
Step 6: Delete the test copies.
Once you've verified the restored data, delete the test copies to keep your workspace clean. The original data is untouched throughout this process.
What to do when a test reveals missing data
Not every restore test comes back clean. Sometimes you'll find data types that are missing or field values that didn't survive the restore. Before treating this as a backup failure, check whether it's an expected API limitation.
ProBackup's restore pane shows "Restore constraints" before you confirm a restore. These are the known limitations for that platform and data type. For Monday.com, for example, subitems, relationship fields, and mirror fields can't be restored. Button columns, lookup columns, and board-relation columns are also excluded due to API constraints. For Asana, formula fields and read-only custom fields can't be restored.
If missing data falls within these documented constraints, it's a known limitation, not a bug. Document it in your test log so it's captured as an explicit gap in your coverage, and evaluate whether a manual workaround (like a scheduled export of those specific field types) can compensate.
If missing data falls outside the documented constraints, something unexpected is happening. Check the Restore Report for any errors. If the report shows failures or partial restores that don't match the known limitations, contact ProBackup support with the restore report details.
Either way, the point of testing is to discover these things now, not during a real incident.
Keeping a test log
Every test should be documented. Not because it's bureaucratic box-ticking, but because the test log is your evidence during an audit, your reference when something goes wrong, and your record of known limitations.
For each test, record:
- Date of test
- Platform tested
- Snapshot date used
- Data types tested (tasks, comments, files, custom fields)
- Restore method used
- Time from trigger to completion
- Pass / Fail
- Notes: what matched, what was missing, whether missing data was a known API limitation or an unexpected gap
If you're using the backup policy template from our SaaS data backup policy post, Appendix A already has a restore test log table you can fill in. Use it. Auditors asking for SOC 2 or ISO 27001 evidence will want to see exactly this, and under GDPR Article 32, the ability to restore data "in a timely manner" is meaningless unless you can demonstrate you've actually tested it.
How often to test
Quarterly is the right cadence for most teams. That's frequent enough to catch configuration drift and infrequent enough that it doesn't become a burden.
Rather than testing the same app every quarter, rotate through your stack so all critical platforms get covered over the course of a year. If you've done the SaaS data protection audit and categorised your apps by tier, a simple four-quarter rotation works well:
- Q1: Your primary project management tool (Asana, Monday.com, ClickUp, or Jira). This is typically the highest-criticality app and the one most likely to surface API limitation surprises.
- Q2: Your CRM (HubSpot, Pipedrive, or similar). Focus on records with comments, associated files, and activity history, since these are the data types most likely to have restore constraints.
- Q3: Your knowledge base or collaboration tool (Notion, Confluence, Slack). Test from a snapshot that's at least two months old to verify retention depth.
- Q4: Any remaining Tier 1 apps, plus a spot-check on a Tier 2 app you haven't tested before.
By the end of the year, every critical platform has had a dedicated test, and you've built enough familiarity with the restore process that doing it under real pressure won't feel like the first time.
Test more frequently if you've recently changed something: added a new platform, changed retention settings, updated workspace permissions, or onboarded a significant number of new users. Any of these can affect backup scope in ways that aren't immediately obvious.
Also test after any real incident. If you restored data to fix an actual problem, document the experience while it's fresh: how long it took, where the friction was, what you'd do differently. That's more useful than any scheduled test because it's based on a real failure mode in your specific environment.
Beyond testing: proactive monitoring
Testing is periodic. Monitoring is continuous.
ProBackup's smart alerts notify you when unusual deletion activity is detected, for example a spike where 50 tasks disappear in an hour, or a board is deleted by someone who doesn't normally delete things. On Pro and Premium plans, you also receive weekly status emails summarising backup health, recent changes, and storage usage across all connected platforms.
These two things together (proactive alerts and weekly status reviews) help close the detection gap that makes slow-burn data loss so dangerous. If you know about a problem within hours rather than weeks, the right snapshot is much easier to find. The test confirms the backup works. The monitoring helps you catch problems early enough that the backup matters.
Proactive alerts and weekly reports are available on Pro and Premium plans.
What to do next
If you haven't run a restore test since setting up your backups, do one this week. Pick one platform, pick a snapshot from a few weeks ago, restore a small set of records, verify them, and document the result. It takes 20 minutes and tells you more about your actual data protection posture than any configuration page.
If the test surfaces gaps (known API limitations you weren't aware of, retention windows that don't cover the period you need, workspaces that fell out of scope), address them as part of your backup policy review.
If you don't yet have automated backups in place and you're still relying on the platform's native recycle bin, start a free trial of ProBackup. Setup takes three minutes per app. Your first snapshot runs within 24 hours. See how other teams use ProBackup when things actually go wrong on our success stories page.

How to build a SaaS data backup policy for your organisation

Your head of marketing left last month. Her private Asana workspace, three years of campaign briefs, launch timelines, and vendor contacts, wasn't included in the backup scope. Nobody knew until the new hire asked where the Q3 launch plan was. The IT admin checked the backup tool: it was only connected to the shared Engineering and Product workspaces. Marketing's data was never covered.
This is a policy problem, not a technology problem. The backup tool worked fine. It just wasn't configured to cover everything that mattered, and nobody had documented what "everything" meant.
The shared responsibility model means your SaaS provider protects the platform, not your account data. But even teams that understand this and have a backup tool in place often lack a written policy. Without one, backup decisions get made ad hoc: the ops lead sets up a manual CSV export "just in case," the IT admin connects a backup tool to two apps but forgets the third, the new hire doesn't know backups exist at all.
A SaaS backup policy fixes that. It documents what gets backed up, how often, who's responsible, and what recovery looks like. It's not a hundred-page governance document. It's a page or two that makes sure the right things happen consistently, especially when the person who originally set them up is on holiday or has moved on.
Why every organisation needs a SaaS backup policy
The obvious reason is data protection. But the practical reason is accountability.
Without a written policy, there's no clear answer to basic questions. Which SaaS apps are backed up? All of them, or just the ones someone remembered to connect? How long are backups retained? Does anyone test restores? What happens when a new app gets added to the stack?
These questions don't matter until something goes wrong. Then they matter a lot. The team that deleted a project board six weeks ago needs to know if a clean backup exists. The CFO preparing for a SOC 2 audit needs to show documented backup procedures. The departing employee's manager needs to know whether private project data was included in the backup scope.
A policy also protects against the bus factor. If your backup setup lives entirely in one person's head, it's not a system. It's a single point of failure. A written policy means anyone on the team can understand, verify, and maintain the backup process.
What a backup policy should cover
At its simplest, a backup policy answers: what gets backed up, how often, how long backups are kept, who's responsible, who can access restore functions, and how you verify it all works. That's it. The sections below walk through each of those decisions with the specific choices you need to make and document.
Defining scope: which apps, which data
Start by listing every SaaS app your organisation uses that contains business-critical data. Not just project management tools. Think about your CRM, knowledge base, helpdesk, design tools, communication platforms, and any app where losing data would cause real pain.
For each app, document what data types you're backing up. This matters because no backup tool covers everything. API limitations mean certain data types are inaccessible. Automations, dashboard configurations, and some file types typically can't be backed up in apps like Trello, ClickUp, or Monday.com. Your policy should be honest about these gaps so nobody is surprised later. And don't assume the app's native recycle bin fills the gaps: most recycle bins expire after 30 days and don't cover field-level changes at all.
Your scope definition should also cover workspace selection. In tools like Asana, ClickUp, and Trello, backup scope is controlled at the workspace level. If your organisation has workspaces owned by different departments, you need to ensure each one is included. This sometimes requires inviting additional team members to authorise the backup tool so their private workspaces are covered.
Setting backup frequency and retention
These two settings define your Recovery Point Objective (RPO): the maximum amount of data you can afford to lose.
Frequency: For most SaaS apps, daily backups are the right balance between risk reduction and practicality. Real-time backup sounds better in theory, but SaaS APIs have rate limits that make continuous backup impractical at scale, and the marginal improvement in RPO rarely justifies the cost. Daily snapshots give you a 24-hour RPO, which covers the vast majority of SaaS data loss scenarios.
Retention: This is how long each snapshot is kept. Retention determines how far back you can recover. If someone corrupts data via a bad import and nobody notices for two months, you need a snapshot from before that import. Short retention (30 days) won't help. Longer retention (6 months, 2 years, or more) gives you the safety margin to handle slow-discovery problems.
Your policy should specify both the minimum backup frequency and the minimum retention period. It should also specify who can change these settings, because reducing retention in ProBackup (or any backup tool) is a destructive action that permanently deletes older snapshots. If your organisation follows the 3-2-1 backup rule (three copies, two destinations, one offsite), document that here too.
In ProBackup, retention is configurable per account: 3 months, 6 months, 2 years, or 4 years depending on your plan. Premium users can request longer retention by contacting support. The right setting depends on your compliance requirements and how quickly your team typically notices data issues.
Assigning ownership and access controls
A backup policy without an owner is a document nobody reads. Name a specific person (not a team, a person) who is responsible for:
- Making sure all critical SaaS apps are connected and backing up successfully. This includes verifying that new workspaces created by other teams get added to the backup scope.
- Reviewing backup status reports weekly. ProBackup sends weekly status emails on Pro and Premium plans, but the owner needs to actually read them and act on failures.
- Responding to smart alerts when unusual deletion activity is detected. A spike in deletions could mean a disgruntled employee, a misbehaving integration, or just a big clean-up. The owner should investigate within one business day.
- Adding new SaaS apps to the backup scope when the organisation adopts them. This is the one that slips most often. Someone signs up for Notion or Airtable, the team migrates data into it, and nobody thinks to connect it to the backup tool until something goes wrong.
- Updating the policy itself when scope, frequency, or retention changes. The policy is only useful if it reflects reality.
Access controls matter too. Not everyone on the team needs the ability to restore data. In ProBackup, the admin user has full access to all backup data and billing. Invited users can be scoped per-platform with granular permissions: view only, export, or restore. Your policy should define who gets which level of access and under what circumstances.
This is also where you document the authentication setup. ProBackup supports two-factor authentication and Google SSO on all plans, with enterprise SSO (SAML) on Premium. Your policy should require 2FA for anyone with restore access, at minimum. The irony of a compromised backup account is not lost on anyone who's been through it.
Testing and audit requirements
Backups you've never tested are assumptions, not safeguards. Your policy should mandate regular restore tests and document the procedure.
A straightforward testing process: once per quarter, pick a recent backup snapshot, select a small set of records (a project, a handful of tasks, a few CRM records), restore them, and verify the result against the originals. In ProBackup, restored items are created as new copies in the original location, so this is completely non-destructive. You restore, compare, confirm the data matches, and delete the test copies.
What to do when a test fails. Sometimes the restored data won't match what you expected. A custom field might be empty. An attachment might be missing. Comments might not be included for a particular app. This doesn't necessarily mean the backup is broken. It usually means there's an API limitation you weren't aware of, a data type that can't be backed up due to platform restrictions. When this happens, document the gap in your policy's scope table (the "data types excluded" column) so it's captured as a known limitation, not a surprise during a real incident. If the missing data type is critical, evaluate whether a manual export or alternative process can cover the gap.
Document every test result. Record the date, which app and data types were tested, who performed the test, the time from trigger to completion, and whether the restored data matched expectations. This log is useful for your own confidence, but it's also exactly what an auditor will ask for during a SOC 2 or ISO 27001 assessment.
Your policy should also define how often the policy itself gets reviewed. Once a year is the minimum. Review the app inventory (has the team added new tools?), the scope (are all workspaces covered?), retention settings (do they still match your compliance needs?), and user permissions (has anyone left the company who still has backup access?).
Template: sample SaaS backup policy
Below is a starter template you can adapt. It's deliberately concise. A policy nobody reads because it's 30 pages long is worse than a one-page policy everyone follows.
[Organisation name] SaaS data backup policy
Effective date: [date]
Policy owner: [name and role]
Last reviewed: [date]
1. Purpose
This policy defines how [Organisation name] protects data stored in third-party SaaS applications from accidental loss, malicious deletion, data corruption, and compliance failures.
2. Scope
The following SaaS applications are covered under this policy:
ApplicationWorkspaces includedData types excludedBackup tool[e.g. Asana][e.g. All active workspaces][e.g. Automations, dashboard configs][e.g. ProBackup][e.g. HubSpot][Full account][e.g. Call logs, dashboards][e.g. ProBackup][e.g. Trello][e.g. Product, Engineering boards][e.g. Power-Ups, deleted cards prior to backup][e.g. ProBackup]
3. Backup frequency and retention
All applications in scope are backed up daily (every 24 hours). Backup retention is set to [e.g. 2 years]. Changes to frequency or retention settings require approval from the policy owner.
4. Access controls
Backup admin access is held by [name/role]. Restore access is granted to [names/roles]. All users with restore access must have two-factor authentication enabled. Permissions are reviewed quarterly.
5. Monitoring
The policy owner reviews weekly backup status reports and responds to automated alerts (e.g. unusual deletion activity) within [e.g. 1 business day].
6. Restore testing
A test restore is performed quarterly. The test includes selecting a previous snapshot, restoring a sample of records, verifying data accuracy, and documenting the results. Test records are summarised in the [restore test log / internal wiki / shared drive].
7. Policy review
This policy is reviewed annually, or sooner if the organisation's SaaS stack, team structure, or compliance requirements change. The review covers app inventory, backup scope, retention settings, user permissions, and testing logs.
Want a ready-to-use version? Download the complete SaaS backup policy template with pre-filled examples for common platforms, a quarterly restore test log, and a review checklist
Aligning your policy with SOC 2 and ISO 27001
If your organisation is pursuing or maintaining SOC 2 or ISO 27001 certification, your backup policy isn't just good practice. It's a control that auditors will specifically look for.
SOC 2 (specifically the Availability trust service criterion) requires organisations to demonstrate that they can restore data and systems to a defined state within documented recovery objectives. An auditor will want to see your backup policy, evidence that backups are running (status reports, logs), and records of restore testing. They'll also check that access controls on backup data are appropriate and that retention periods match your stated data handling commitments. ProBackup's Premium plan includes audit reports specifically designed to provide this evidence, and our Vanta integration automates continuous compliance monitoring.
ISO 27001 (Annex A.12.3) requires documented backup procedures, including what data is backed up, the backup schedule, retention periods, and regular testing. The standard also requires that backup media (in this case, the cloud infrastructure where backups are stored) be adequately protected. ProBackup stores all data in AWS Dublin with AES-256 encryption, and the AWS data centres themselves are ISO 27001, SOC 1 and SOC 2, and PCI Level 1 certified. Full details on our infrastructure and security controls are on our data security page.
GDPR doesn't prescribe a specific backup framework, but Article 32 requires "the ability to restore the availability and access to personal data in a timely manner." If your SaaS apps contain EU personal data (they almost certainly do), your backup policy is part of your Article 32 compliance story. Your policy should also address how GDPR deletion requests interact with backups, since personal data in a backup snapshot may persist beyond a deletion in the live app.
For a deeper look at how backup infrastructure supports these frameworks, see why backups matter for SOC 2 and ISO 27001.
What to do next
You don't need to get this perfect on the first draft. Start with the template, fill in the blanks for your current SaaS stack, and share it with whoever manages IT and security at your organisation. A rough policy is better than no policy, and you can refine it as you learn what your actual RPO needs and compliance requirements look like.
If you don't yet have a backup tool in place, start a free trial of ProBackup. Setup takes about three minutes per app, and your first snapshot runs within 24 hours. Plans start at $25/month (billed yearly) and cover unlimited apps under a single licence. See how other teams protect their SaaS data on our success stories page.
.jpg)
Take Full Control of Your Backup Storage: 4 New Ways to Manage What You Keep
Today we are rolling out one of the most-requested updates to ProBackup: far more granular control over what gets backed up and how long we keep it.
Until now, retention in ProBackup meant choosing how long to keep your versions and deleted items. That works well, but storage usage is rarely just about time. It is also about what you are storing - and most accounts have a handful of files, file types, or projects that quietly consume the majority of the space.
So we built four new ways to take charge of that.
What's new
Inside Settings > Data retention, you will now find a full toolkit for tuning your storage:
1. Adjust your data retention period (improved) Pick the retention window that fits your compliance and recovery needs: 6 months, 2 years, or 4 years, depending on your plan. Shortening this is still the fastest way to cut storage in one click. Premium users can request unlimited retention period.
2. Exclude files by size or skip attachments entirely Not every file needs the same protection. You can now back up all attachments, skip anything larger than 10 MB, 100 MB, or 1 GB, or exclude attachments altogether. Big media files like .mov, .mp4, .tiff, .raw, .avi, and .zip are the usual storage hogs — now you can decide whether they belong in your backup at all.
3. Exclude files by extension Filter out specific file types you do not need protected. Choose extensions like .pdf, .png, or anything else from the dropdown, and ProBackup will leave them out of future backups.
4. Exclude files by upload date Sometimes the files eating your storage are the old ones nobody touches anymore. The new Delete old attachments option shows you exactly how much space you would reclaim by clearing out active files uploaded more than 3 months, 6 months, 1 year, or 2 years ago. (For safety, this change is confirmed by emailed verification code rather than a single click.)
5. Request a Storage Usage Report and exclude your biggest projects or lists This one is a game-changer for larger accounts. Generate a report for your connected app and see exactly which projects and lists are driving your storage usage. Spot the outliers, then exclude them from your backup scope in a couple of clicks.
Why this matters
Backup storage tends to grow quietly. A few oversized attachments here, a legacy project there, file types you never actually need to restore... over months and years, that adds up. The result is teams paying for storage they do not strictly need, and admins with no easy way to see where it all went.
With this update, the picture becomes clear and the levers become obvious:
- See it: generate a report and find out where your storage is actually going.
- Trim it: exclude by size, type, age, or scope.
- Keep what matters: without overpaying for what does not.
For teams under tighter compliance regimes, this also means cleaner retention policies that better reflect what your business actually needs to keep.
Try it now
Head to Settings > Data retention in your ProBackup account to explore the new controls. If you are not sure where to start, the Storage Usage Report is a great first step — most accounts find an easy win within minutes.
Full step-by-step guide: How to control your data storage
As always, let us know what you think. Many of these options exist because customers asked for them. Keep the feedback coming!
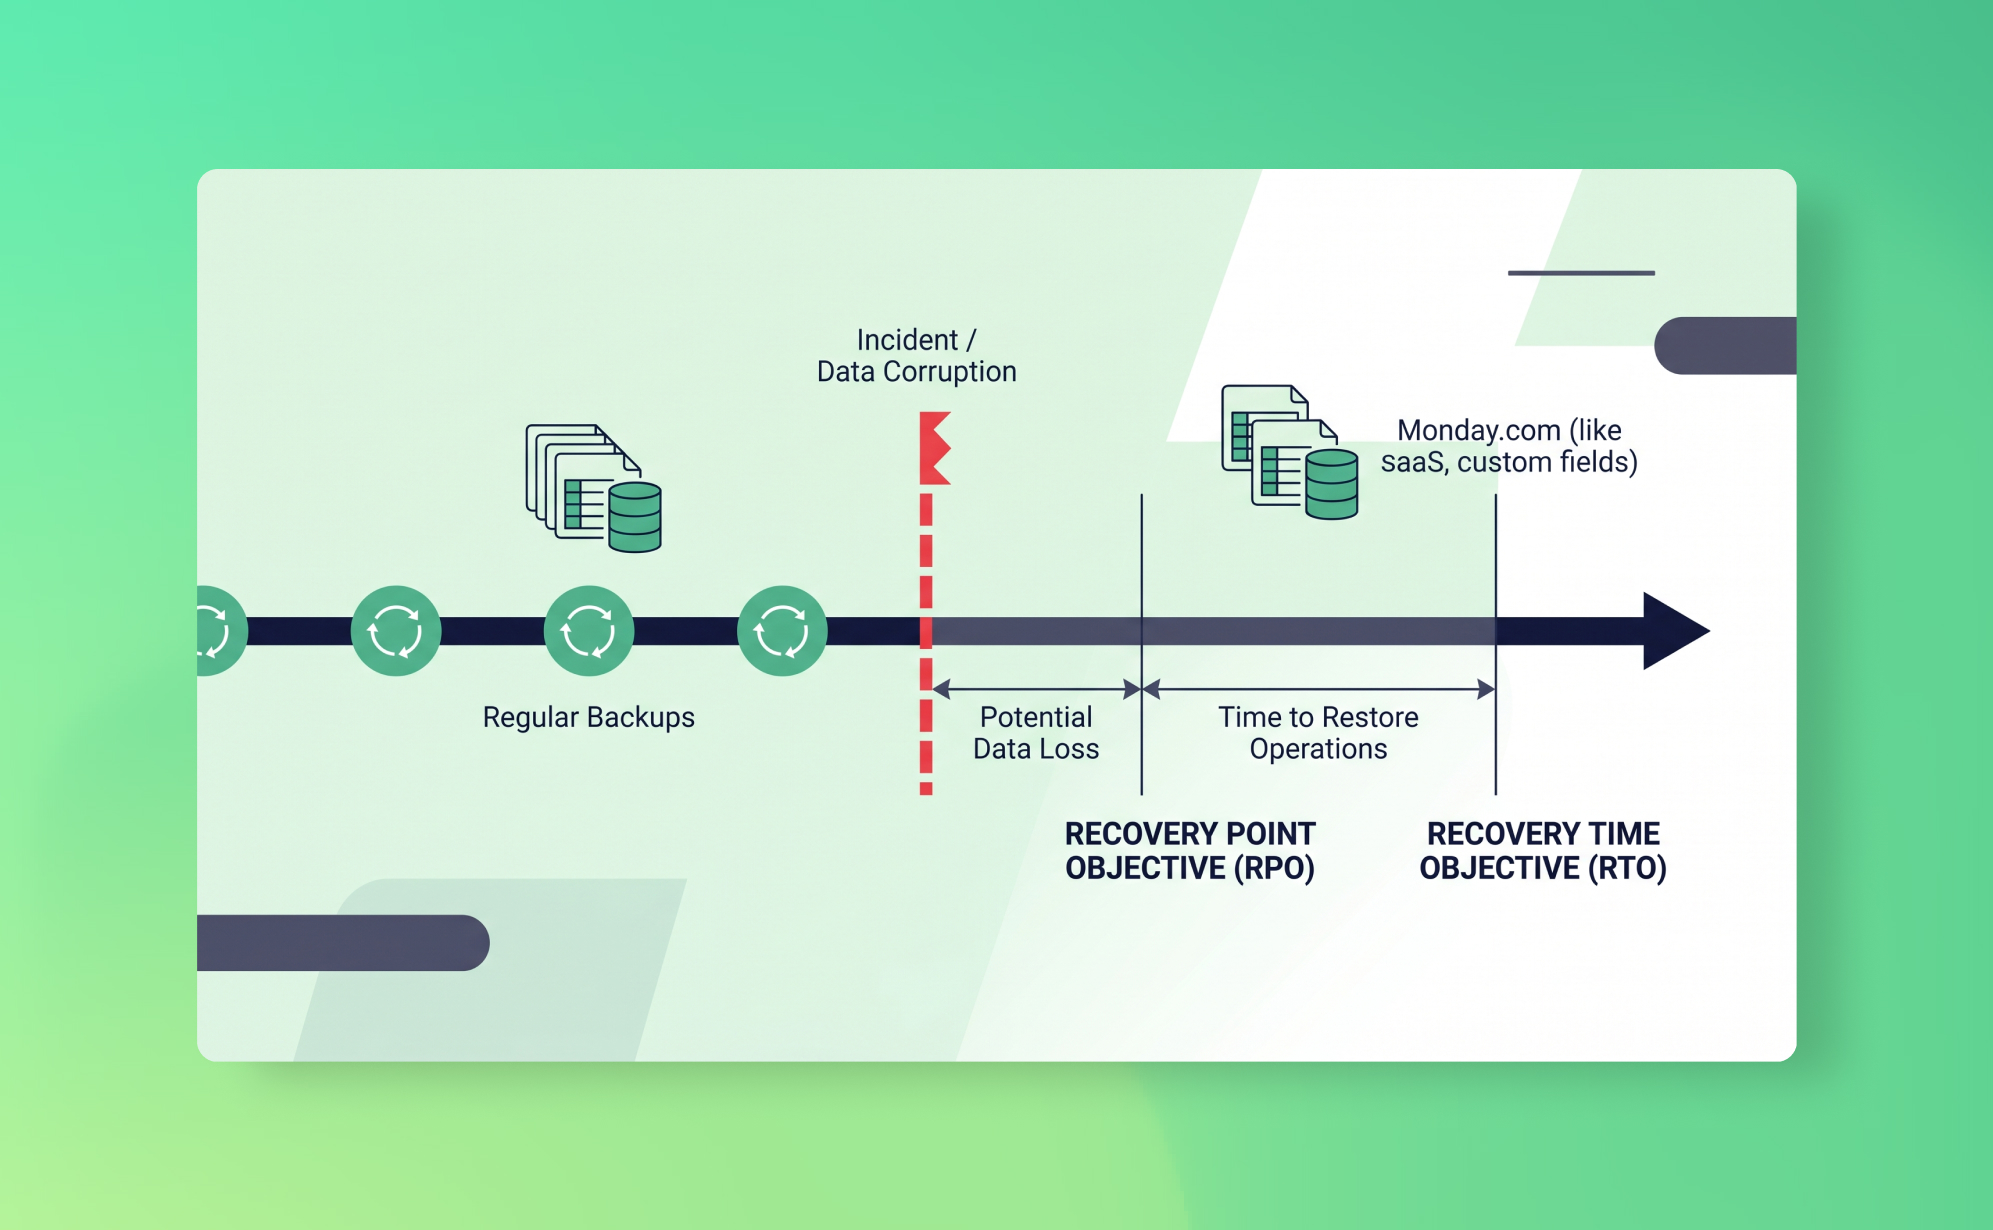
RTO and RPO Explained: What They Mean for Your SaaS Backup Strategy
Last Tuesday, your ops lead ran a CSV import into Monday.com. It was supposed to update project statuses. Instead, it overwrote 300 custom field values across six boards. Nobody noticed until Friday. By then, three days of real work had been layered on top of the corrupted data, and Monday.com's recycle bin had nothing to offer because nothing was deleted. The data was just wrong.
Two questions determine how badly this hurts: how long until the data is usable again, and how much work did you lose? In disaster recovery, those questions have names. The first is your Recovery Time Objective (RTO). The second is your Recovery Point Objective (RPO). Together, they define what "acceptable" looks like when things go wrong, and they should be shaping your backup strategy right now, before you need them.
What is RTO?
Recovery Time Objective is the maximum amount of time your team can tolerate being without access to usable data after an incident. Not how fast your backup tool runs. How long your business can function without the data.
An RTO of zero means you need instant failover, no downtime at all. That's what banks and hospitals aim for. An RTO of 24 hours means you can survive a full working day without the affected system. An RTO of one week means the data is important but not operationally critical on a daily basis.
For most SaaS-dependent teams, the honest answer is somewhere between a few hours and one business day. If your project management tool's data is corrupted or your CRM records are gone, you can probably limp through the morning. But by afternoon, people are blocked: they can't see task assignments, client history, deal stages, or project timelines.
What people get wrong about RTO is assuming it only applies to total outages. It doesn't. The Monday.com import scenario above isn't an outage. The platform works fine. But your team is locked out of accurate data until someone fixes it, and that's an RTO scenario just the same.
Your RTO isn't just an abstract number. It determines what kind of restore process you need. If your RTO is four hours, you need a backup solution where you can identify affected records, select a clean snapshot, and restore them within that window. If your RTO is "whenever we get around to it," you don't have an RTO. You have a hope.
What is RPO?
Recovery Point Objective is the maximum amount of data loss your organisation can tolerate, measured in time. It answers the question: if we had to restore from a backup right now, how far back is acceptable?
An RPO of zero means you can't lose any data at all. Every transaction, every field update, every comment needs to be captured in real time. An RPO of 24 hours means you can accept losing up to one day's worth of changes. An RPO of one week means losing a week of work is tolerable if it comes to that.
RPO is the metric that most directly determines your backup frequency. If your RPO is 24 hours, you need daily backups at minimum. If it's one hour, you need near-real-time replication. If it's a week, weekly backups might work, though you'd want a strong reason for accepting that level of risk.
Back to the Monday.com scenario. If you had a daily backup and noticed the problem on the same day, your RPO of 24 hours means you restore from last night's snapshot and lose, at most, a few hours of work done before the import. Annoying, but manageable. But the problem wasn't noticed until Friday. Now your RPO is fine (you have yesterday's snapshot), but the right snapshot to restore from is Tuesday's, before the import ran. Whether that snapshot still exists depends on your retention period. RPO tells you the maximum gap between backups. Retention tells you how far back those backups go. You need both.
Why RTO and RPO matter for SaaS apps
In traditional IT, RTO and RPO planning is standard practice. You have servers, backup schedules, and someone on the infrastructure team has documented recovery procedures and tested them.
With SaaS apps, most of that planning disappears. The provider handles infrastructure, and teams assume that means recovery is handled too. It isn't. The shared responsibility model means your provider recovers from their infrastructure failures. Account-level data loss, deletions, overwrites, corruption from integrations, is yours to deal with.
Without defined RTO and RPO objectives, teams default to whatever their SaaS app's native recovery offers. And those native features have hard limits. Recycle bins expire after 30 days on most platforms. Trello has no recycle bin for deleted cards. None of them protect against field-level overwrites or bulk import errors, which are among the most common data loss scenarios.
The practical consequence: when data loss happens without a backup, your actual RTO becomes "however long it takes someone to manually reconstruct the data." We've seen teams spend an entire week rebuilding a project board from screenshots and Slack messages. Your actual RPO, meanwhile, becomes "whenever someone last happened to export a spreadsheet." That's not a strategy. That's luck.
How to calculate your RTO and RPO
You don't need a consultant for this. You need honest answers to a few questions, applied to each SaaS app your team depends on.
For RTO, ask: If this app's data became unusable right now, how long before it affects revenue, client commitments, or team output? Be specific. "We'd lose some productivity" is not an RTO. "The sales team couldn't update pipeline for a full day, which means the Monday forecast review is based on stale data and we might miss a renewal" is an RTO of roughly one business day.
Then ask: can our recovery process actually meet that window? If your RTO is four hours but your only recovery option is manually rebuilding from memory, you've already exceeded it. If you have a backup tool, time the process: how long to find the right snapshot, select the affected records, trigger the restore, and verify the result? That's your real RTO.
For RPO, ask: If we had to restore from a backup, how much lost work could we absorb? Think about what changes daily. A CRM where reps log 50 calls and update 30 deal stages per day has very different RPO needs than a knowledge base that gets edited twice a week.
Walk through your critical apps one by one. Your CRM probably has a tighter RPO than your design tool. Your project management platform sits somewhere in the middle. Not everything needs the same recovery objectives, and acknowledging that is part of the exercise.
What happens when you exceed your RPO
Your RPO is exceeded when the data loss stretches further back than your most recent usable backup can cover.
The most common way this happens isn't dramatic. Someone modifies a batch of records via import, or a third-party integration quietly overwrites field values over several days. Nobody notices for three weeks. The recycle bin expired two weeks ago, and if your backup retention is shorter than the detection window, the clean version is gone from your backups too.
The result is manual reconstruction. Someone pieces together what the data should look like from memory, client emails, exported spreadsheets, screenshots in Slack threads. It's slow, error-prone, and deeply demoralising for the team doing it.
This is also where compliance risk lives. If your RPO was 24 hours on paper but the actual loss was three weeks of data, that's a control failure. The major frameworks all have something to say about this:
- SOC 2 (Availability trust principle) requires organisations to demonstrate they can restore data within documented recovery objectives.
- ISO 27001 (Annex A.12.3) requires documented backup procedures with regular testing.
- GDPR (Article 32) requires "the ability to restore the availability and access to personal data in a timely manner." It doesn't mandate a specific RPO, but failing to meet your own documented objectives is a problem.
An auditor seeing a three-week gap against a 24-hour RPO will flag that as a control failure. For more on how backups support these frameworks, see our post on why backups matter for SOC 2 and ISO 27001.
Two things determine whether you'll exceed your RPO: backup frequency (how often snapshots are taken) and retention period (how long those snapshots are kept). Frequent backups with short retention won't help if the problem isn't discovered for months. Infrequent backups with long retention leave too large a gap between the incident and the last clean snapshot.
Daily backups vs real-time: what makes sense
If shorter RPO is better, why not back up everything in real time?
For databases and financial systems, real-time replication makes sense. The data changes constantly, every transaction matters, and losing even a few minutes is costly.
For SaaS productivity and CRM tools, the calculus is different. Real-time backup sounds ideal, but it runs into practical limits:
- API rate limits. SaaS platforms restrict how many requests you can make per minute. A single Asana workspace with 10,000 tasks requires thousands of API calls to fully capture. Running that every few minutes would exhaust your rate limit and could affect your team's normal use of the platform.
- Cost. Real-time or near-real-time SaaS backup solutions exist, but they're significantly more expensive and designed for enterprise environments with specific regulatory needs. For most teams, the additional cost doesn't match the marginal RPO improvement.
- Diminishing returns. Most SaaS data doesn't change by the second. It changes by the day. A project board updated 20 times across a workday looks functionally the same whether you snapshot it hourly or nightly.
The more useful question is: does a 24-hour RPO actually cover your risk?
For the vast majority of SaaS use cases, it does. Most data loss is either immediate and obvious (someone deletes a board, the team notices within hours) or slow and silent (a bad integration corrupts data over days or weeks). For the first category, a 24-hour-old snapshot means you lose at most one day of work. For the second category, what matters is retention depth, not backup frequency. Backing up every hour won't help if nobody notices the corruption for a month. What helps is having a clean snapshot from before it started.
That's a retention question, not a frequency question.
How ProBackup's daily snapshots fit your RPO
ProBackup runs a complete snapshot of your connected SaaS apps every 24 hours, giving you an effective RPO of 24 hours.
Every evening (based on your local time), our backup engine captures the current state of your workspace: tasks, records, cards, comments, files, custom field values, and field configurations. Each snapshot is stored as a separate version, encrypted with AES-256, in our AWS infrastructure in Dublin. The backups are incremental (we only process what changed since the last cycle) but the result is a complete, point-in-time picture of your data for every day within your retention window.
Retention is configurable: 3 months, 6 months, 2 years, or 4 years depending on your plan. Premium users can request longer retention by contacting support. That depth matters because it determines how far back you can reach when a problem isn't caught quickly.
When something goes wrong, the restore process is designed to keep your RTO short. You pick a date in the ProBackup vault, browse or search for the affected items, select what you need, and click restore. ProBackup creates a new copy in the original location, so nothing in your current workspace gets overwritten. Restoring a single task, including its comments and attachments, takes a few clicks. Restoring an entire board creates a new copy with "restore" and the date appended to the name. You can track progress in the Restore Report page, and large restores typically complete within a few minutes.
For the Monday.com scenario from the intro: you'd open ProBackup, navigate to the affected boards, select Tuesday's snapshot (before the bad import), identify the 300 records with corrupted custom field values, and restore them. The original corrupted records stay in place, and the clean copies appear alongside them for you to verify and reconcile. Total time from "we have a problem" to "we have clean data back": probably under 30 minutes, depending on the volume.
On the Pro and Premium plans, proactive alerts notify you when unusual deletion activity is detected, which helps close the detection gap that makes slow-burn data loss so dangerous. If 50 tasks disappear in an hour, you'll know before the recycle bin even becomes relevant.
We support 18+ platforms under a single licence, including Asana, Monday.com, ClickUp, Trello, Notion, HubSpot, Jira, Airtable, and Slack. Plans start at $25/month (billed yearly). See how teams have used ProBackup to recover from real data loss on our success stories page.
If you want to map your RTO and RPO across your full SaaS stack, the ultimate backup and recovery guide walks through the full strategy. Or just start a free trial and have your first snapshot within 24 hours.
SaaS Shared Responsibility Model: Who Protects Your Data?
Most teams assume their SaaS provider has their back when something goes wrong. Deleted board? Corrupted import? Surely there's a way to get it all back.
There isn't. Or at least, not in the way you'd expect.
SaaS providers operate under what's called the shared responsibility model. The short version: they keep the platform running, and you keep your data safe. If your Asana workspace gets wiped because someone ran a bad CSV import at 4pm on a Friday, that's on you. The provider will shrug, point to their terms of service, and wish you luck.
This misunderstanding is remarkably common. Teams discover it after a data loss incident and say some version of "I thought Asana/Monday/Trello handled that." They didn't. And the terms of service said so all along.
This post explains where the model came from, how it works in practice, and what you can do about it.
What is the shared responsibility model?
The concept started in cloud infrastructure. When AWS popularised it in the early 2010s, the split was relatively intuitive: AWS secures the physical servers, the network, and the hypervisor. You secure everything you put on top, including your operating system, your application code, and your data.
It made sense because IaaS customers were already used to managing servers. They understood that renting compute power didn't mean outsourcing security.
The model has since been adopted by virtually every cloud and SaaS provider. Sometimes it's spelled out explicitly. Sometimes it's buried in legal fine print you'd need a lawyer to find. Microsoft, Google, Salesforce, Atlassian: they all describe some version of it in their documentation. The language varies, but the principle is the same. The provider is responsible for the platform. You are responsible for what you do with it.
How it applies to SaaS apps
Here's where things get tricky. With IaaS, the division of labour is fairly obvious. You're managing virtual machines and storage buckets. You know you're in charge.
With SaaS, the abstraction is much higher. You don't see the infrastructure. You log in, create boards, assign tasks, upload files, and everything just works. It feels like the provider is handling everything, including protecting your data.
They're not.
What SaaS providers typically handle is platform-level resilience: replication across data centres, disaster recovery for their own infrastructure, uptime SLAs. If their servers go down, they'll recover. If you delete a project, or a rogue integration overwrites 500 records, or a former employee nukes your workspace on their way out? That's your problem.
Most SaaS apps offer some recovery features. Trash folders, undo buttons, version history. But these have limits. Asana's recycle bin keeps deleted items for 30 days. Trello's undo is even more limited. Monday.com's Recycle Bin also caps at 30 days. And none of these features protect against the scenarios where you really need them: bulk data corruption from a bad integration, malicious deletion by a compromised account, or silent data loss you don't notice until weeks later when the recycle bin has already emptied itself.
What SaaS providers are (and aren't) responsible for
Let's be specific. Most B2B SaaS apps invest heavily in platform security: encryption at rest and in transit, SOC 2 compliance, regular penetration testing. That's real, and it matters.
But there's a gap between "platform security" and "your data is protected" that catches a lot of teams off guard.
What the provider typically covers: infrastructure uptime and disaster recovery, physical security of data centres, encryption of data at rest and in transit, platform-level vulnerability patching, and providing authentication systems (though whether you actually configure MFA is on you).
What you're responsible for: who has access to your account and what permissions they have, whether MFA is enabled for all users, recovering from accidental or malicious deletions within your workspace, protecting against data corruption from integrations and imports, maintaining independent backups of your account data, and meeting your own compliance obligations around GDPR data retention, audit trails, and similar regulatory requirements.
The most common causes of SaaS data loss, human error, malicious insiders, and faulty integrations, all fall squarely on the customer side of the line. That's an uncomfortable thing to sit with if you've been assuming your provider had it covered.
When the model fails: real-world incidents
The shared responsibility model works fine when both sides hold up their end. The problem is that many organisations don't realise they have a side until something breaks.
CodeSpaces (2014)
CodeSpaces was a code-hosting provider built on AWS. In June 2014, an attacker gained access to their AWS EC2 control panel during a DDoS attack. When extortion negotiations broke down, the attacker systematically deleted all EBS snapshots, S3 buckets, and machine images over a 12-hour window.
The company had backups. But they were stored in the same AWS account the attacker had compromised. Every redundancy layer they'd built was inside the blast radius.
CodeSpaces shut down permanently within 24 hours. Their website had previously advertised "full redundancy" and a "proven" recovery plan. It didn't help that AWS had offered MFA and IAM best practices that CodeSpaces apparently hadn't implemented. A textbook shared responsibility failure: the provider offered the tools, the customer didn't use them, and when things went wrong, there was nothing to fall back on.
Snowflake customer breaches (2024)
This one deserves a closer look, because it's the clearest recent example of what happens when the shared responsibility model meets reality at scale.
In mid-2024, attackers used stolen credentials, harvested from infostealer malware on employee machines, to access Snowflake customer environments. The credentials worked because the affected accounts hadn't enabled multi-factor authentication. Snowflake's platform itself wasn't breached. The attackers just logged in with valid usernames and passwords.
The scale was staggering. Over 160 organisations were targeted. Confirmed victims included AT&T (call metadata for nearly all US customers compromised), Ticketmaster, Santander Bank, Lending Tree, and Neiman Marcus. The personal data of over 500 million individuals was exposed. AT&T reportedly paid $370,000 in ransom.
Snowflake's response was firm and consistent: this wasn't a platform vulnerability. Customers were responsible for enabling MFA and managing their own access controls. And technically, Snowflake was right. Their shared responsibility documentation made it clear that customers manage their own credentials.
But "technically right" doesn't undo a breach affecting hundreds of millions of people.
Here's what we keep coming back to about the Snowflake incident. Snowflake didn't require MFA. They offered it as an option and left enforcement to each customer. Many customers assumed their cloud data warehouse provider was handling that sort of thing. The result was a grey zone between what the provider offered and what the customer configured. Attackers walked straight through it.
Snowflake has since made MFA mandatory for new accounts. But the damage was already done, financially and reputationally. There's now consolidated litigation in US federal court involving Snowflake, AT&T, Ticketmaster, and several other defendants.
The lesson isn't necessarily that Snowflake did something wrong (though you could argue they should have enforced MFA sooner). The lesson is that the model creates gaps. And those gaps are easy to miss when the provider's platform feels secure enough that you stop thinking about your own obligations.
How to protect your side
Knowing the model exists is step one. Acting on it is harder, mostly because it requires admitting that your SaaS provider, however good, is not your backup plan.
1. Audit what your SaaS apps actually retain, and for how long
Log into each platform your team relies on and check the data retention policy. Look for recycle bin time limits, version history depth, and what happens when you downgrade or cancel your plan. You'll probably find the recovery window is shorter than you assumed. This is especially true for project management tools where native archiving and undo features have significant gaps.
If you're subject to GDPR, SOC 2, or similar regulations, also check whether your provider's native retention meets your compliance obligations. Often it doesn't, and that gap becomes your problem.
2. Enforce MFA everywhere
The Snowflake breach happened because accounts lacked MFA. That's it. Stolen passwords are common. MFA stops them from being useful. If your SaaS app offers it, turn it on. If it doesn't, that should factor into your vendor evaluation.
3. Review permissions quarterly
Who has admin access? Who left the company three months ago but still has an active account? Who has write access but only needs read? Malicious or careless insiders are one of the most common causes of data loss, and access reviews are the simplest way to reduce that risk.
This isn't glamorous work. But it closes one of the most exploitable gaps in the shared responsibility model.
4. Set up independent, automated backups
This is the one we obviously care about most, but also the one that matters most practically.
If your SaaS provider's recovery features are your only safety net, you don't really have a safety net. You need backups stored independently from the source platform, with their own authentication and retention policies. That way, a compromised SaaS account can't take your backup data with it. This is exactly what CodeSpaces lacked: their backups lived in the same environment as the data they were supposed to protect.
This is exactly what ProBackup does. We run daily automated snapshots of your SaaS data across 18+ apps, including Asana, Trello, Monday.com, ClickUp, HubSpot, Jira, and Notion. Everything is stored in our own encrypted AWS infrastructure in Dublin, using AES-256 encryption with separate credentials that are completely isolated from your SaaS accounts. If something goes wrong in any of your connected apps, you can restore individual records, comments, files, or entire projects from any previous snapshot.
Plans start at $25/month (billed yearly) and include unlimited apps. See how other teams use ProBackup to recover from data loss on our success stories page.
5. Test your restores
Having backups you've never tested is barely better than having no backups at all. Pick a date from last month. Try restoring a project or a set of records from that snapshot. If it works, you're covered. If it doesn't, better to find out now than during an actual incident.
What to do next
The shared responsibility model isn't going away. It's a reasonable division of labour, and honestly, it makes sense. Providers can't anticipate every way their customers might misconfigure access or accidentally destroy data. The model just requires both sides to understand what they own.
Most data loss doesn't come from dramatic infrastructure failures. It comes from someone on your team making a mistake, an integration misfiring, or a compromised credential that nobody noticed. Those are your problems to solve.
Audit your retention policies. Enforce MFA. Clean up permissions. Back up your data independently. Test your restores.
If you want to see what automated SaaS backups look like in practice, start a free trial. Setup takes about three minutes, and you'll have your first snapshot within 24 hours.
The Complete Guide: Airtable Data Backup, Recovery, and Integrity
Why this guide matters for Airtable users
Airtable is mission-critical for teams managing operations, projects, client work, and business data. But here's the reality: a surprising number of teams experience data loss from accidental deletion, human error, or system issues.
This comprehensive guide shows you:
✓ How to safely delete and restore data in Airtable
✓ What Airtable's native recovery can and CAN'T do
✓ How to prevent permanent data loss
✓ A complete backup strategy for business continuity
Who this guide is for:
- IT Administrators managing Airtable for their company
- Operations Managers protecting business-critical data
- Project Managers responsible for team workflows
- Compliance Officers ensuring data retention requirements
👉 Start your 7-day free trial at ProBackup: https://app.probackup.io/onboarding
Understanding Airtable's data structure
The hierarchy of Airtable data
Before you delete anything, understand how Airtable organizes data. Deletion flows downward — removing a high-level container removes everything inside it.
Airtable Data Hierarchy:
Workspace
└── Base
    ├── Table
    │   ├── Records (rows)
    │   ├── Fields (columns)
    │   ├── Record comments
    │   └── Attachments
    ├── Views
    ├── Interfaces
    ├── Automations
    └── Extensions
Important: Deleting a Workspace or Base removes:
❌ All bases, tables, and records inside it
❌ All comments and communication history
❌ All file attachments
❌ All views, interfaces, automations, and extensions
❌ All custom field data and record history
How to delete data in Airtable
Best practice: Archive vs. Delete
🟢 Archive / Hide: Recommended 99% of the time
- Removes item from active view without deleting data
- Preserves all data and history
- Can be restored at any time
- No permanent consequences
🔴 Delete: Use with extreme caution
- Moves to Trash with a limited retention window
- Permanently erased after retention period expires
- Cannot be undone once trash is emptied
| Action | ✅ Good for | ❌ Not recommended for |
|---|---|---|
| Hide a field or view | Keeping data but reducing clutter in a base | Actually removing data from the base |
| Delete a record | Duplicate entries, data created by mistake | Anything you might need to reference later — goes to base trash for only 7 days |
| Delete a table or field | Tables/fields that are genuinely no longer needed | Data you may need in the future — restoring from trash can be complex |
| Delete a base | Compliance/GDPR deletion, duplicate bases | Completed projects you might need to reference — use a snapshot instead |
| Delete a workspace | Fully decommissioned workspaces only | Active or recently active teams — 30-day recovery window only |
How to delete records
- Select the record(s) you want to delete in any table view
- Right-click and select Delete record, or press the Delete/Backspace key after selecting
- Confirm the deletion in the popup
- The record moves to the base trash — recoverable for 7 days
How to delete a field (column)
- Click the dropdown arrow on the field header
- Select Delete field
- Confirm the action
- Field goes to base trash — recoverable for 7 days
How to delete a table
- Right-click the table tab at the top of the base
- Select Delete table
- Confirm the deletion
- Table goes to base trash — recoverable for 7 days
How to delete a base
- From the Airtable home screen, right-click the base card
- Select Delete base
- Confirm the action
- Base moves to workspace trash — recoverable for 30 days (up to 180 days on Enterprise)
How to delete a workspace
- From the Airtable home screen, click the workspace name
- Open workspace settings
- Scroll to the danger zone and select Delete workspace
- Confirm the deletion
- Workspace moves to trash — recoverable for 30 days
How to restore data in Airtable
Airtable has two levels of trash: base-level trash (tables, fields, records — 7-day window) and workspace-level trash (bases and workspaces — 30-day window).
How to restore deleted records, fields, or tables (base trash)
- Open the base where data was deleted
- Click the base history icon (next to "Share" in the top-right corner)
- Click Trash
- Find the item you want to recover
- Click Restore next to it
How to restore a deleted base or workspace (workspace trash)
- Go to your Airtable home screen
- Click your profile icon in the top-right corner
- Select Trash
- Find the deleted base or workspace
- Click Restore
Trash retention limits by data type
| Data type | Where it goes | Recovery window | Notes |
|---|---|---|---|
| Records | Base trash | 7 days | Restorable by Editors and above |
| Fields (columns) | Base trash | 7 days | Restorable by Creators and above |
| Tables | Base trash | 7 days | Restorable by Creators and above |
| Views | Base trash | 7 days | Restorable by Editors and above |
| Interfaces & interface pages | Base trash | 7 days | Managed at base trash level |
| Bases | Workspace trash | 30 days (up to 180 on Enterprise) | Requires Owner permissions to restore |
| Workspaces | Workspace trash | 30 days | Requires Owner permissions to restore |
| Individual cell values | Revision history only | Plan-dependent | Can be reviewed but not "restored" as a one-click action |
Airtable snapshots: your safety net for base-level recovery
Airtable automatically takes snapshots of your bases based on activity and also lets you take manual snapshots. A snapshot captures everything in a base: tables, records, views, interfaces, automations, and extensions.
Snapshot retention by plan
| Plan | Snapshot history |
|---|---|
| Free | 2 weeks |
| Team | 1 year |
| Business | 2 years |
| Enterprise Scale | 3 years |
How to take a manual snapshot
- Open the base you want to snapshot
- Click the base history icon in the upper-right corner
- Click Snapshots, then Take a snapshot
How to restore from a snapshot
- Open the base you want to restore
- Click the base history icon in the upper-right corner
- Select your preferred snapshot
- Name the restored base and click Create
⚠️ Important: Restoring a snapshot creates a new base — it does not overwrite your existing one. Your original base is unaffected. The new base will have a new base ID, though record, view, table, and interface IDs are preserved. Restored bases will not have revision history but will include record comments.
What snapshots can and can't do
| Feature | ✅ Can do | ❌ Cannot do |
|---|---|---|
| Base snapshots | Restore all tables, records, views, interfaces, automations, and extensions at a point in time | Overwrite an existing base; restore individual records or fields in isolation; schedule automatic snapshots |
| Automatic snapshots | Capture base state based on usage frequency — more activity = more snapshots | Guarantee a snapshot at a specific time each day; cannot be scheduled manually |
| Manual snapshots | Capture a base state before a risky bulk change or import | Be taken in rapid succession — there is a minimum cooldown period between manual snapshots |
What can't be restored natively in Airtable
Airtable's trash and snapshot features are helpful for immediate mistakes, but they have critical limitations that can lead to permanent data loss.
A. Short trash windows at the record/field level
Base trash only retains deleted records, fields, and tables for 7 days. For workspace-level items (bases), the window is 30 days — or as few as 14 days if the base was sitting in a Free plan workspace at the time. Once the window closes, the data is gone.
B. No version history for individual cell edits
Airtable does not offer rollback for bulk data changes. You can review what changed in a record's revision history, but you cannot one-click revert a field to how it looked yesterday across thousands of records.
Common causes of silent data corruption:
- ✗ A broken automation overwrites field values across all records
- ✗ A third-party integration syncs incorrectly and bulk-updates statuses
- ✗ An API script runs against the wrong base
- ✗ A bulk import pastes incorrect data over existing content
C. Snapshots can't restore granular items
Restoring a snapshot brings back the whole base as a new copy — there's no way to extract a single record or table from a snapshot without manually copying it over.
D. What Airtable support can and cannot do
| Airtable Support | |
|---|---|
| ✅ Can do | Advise on using trash and snapshots; investigate if a deletion was caused by a platform bug; sometimes restore data if a verified system error caused the deletion (rare) |
| ❌ Cannot do | Recover data deleted beyond the trash retention period; recover individual cell values or comments deleted permanently; roll back bulk changes made by automations or integrations; undo data from emptied trash |
Common data loss scenarios & solutions
Scenario 1: "I accidentally deleted a base with months of client work"
What happened: A team member deleted an active client base instead of archiving it. They noticed 3 weeks later.
Native solution:
✓ Go to workspace trash (profile icon → Trash)
✓ Find the base and click Restore
✓ All tables, records, and history come back
Time to fix: 5 minutes — if within 30 days
If it happened 31+ days ago:
✗ Data is permanently gone
✗ Must reconstruct from emails, exports, or memory
Scenario 2: "Someone deleted a table inside an active base"
What happened: A collaborator deleted a table thinking it was a duplicate. The team noticed 10 days later.
Native solution:
✗ Base trash only retains deleted tables for 7 days
✗ After 7 days, table and all its records are permanently gone
✗ Airtable support cannot recover it
Scenario 3: "Our automation overwrote all our records"
What happened: An Airtable automation had a logic error and set the "Status" field on 500 records to the wrong value. The records exist — the data inside them is just wrong.
Native solution:
✗ Records weren't deleted, so trash doesn't help
✗ No version rollback for bulk field changes
✗ Must manually correct each record or re-import from a CSV
Time to fix: Hours
Scenario 4: "We need to prove what a client approved 6 months ago"
What happened: A client disputes the original project scope. You need to show what the Airtable base looked like when sign-off happened.
Native solution:
✗ Snapshots exist — but only for up to 3 years on Enterprise (2 weeks on Free)
✗ No way to view "what the base looked like on a specific date" in the UI without restoring a full copy
✗ Restored snapshot creates a new base - not directly shareable as a point-in-time audit trail
Scenario 5: "A departing employee deleted all their bases before leaving"
What happened: An admin-level employee deleted 5 bases and emptied the workspace trash before their last day.
Native solution:
✗ If trash was manually emptied, data is immediately gone — the 30-day window doesn't apply
✗ Airtable support cannot recover from an emptied trash
✗ No audit trail to confirm what existed before
Quick reference: "I lost data — what should I do?"
| Situation | First step | If that fails |
|---|---|---|
| Deleted a record / field / table within 7 days | Check base trash (base history icon → Trash) | Restore from a base snapshot or ProBackup |
| Deleted a base or workspace within 30 days | Check workspace trash (profile icon → Trash) | Restore from ProBackup if past 30 days |
| Data was changed (not deleted) — automation / integration error | Review record revision history | Restore from base snapshot or ProBackup (native can't bulk-revert) |
| Data deleted more than 30 days ago | Check if a base snapshot covers the date | Restore from ProBackup; if no backup exists, data is permanently lost |
| Trash was manually emptied | Data is immediately and permanently gone from native Airtable | Restore from ProBackup only |
Why Airtable's native tools aren't enough for professional teams
Native Airtable recovery is a safety net for immediate mistakes — not a disaster recovery plan. Here's how it stacks up:
| Feature | ✅ Good for | ❌ Not sufficient for |
|---|---|---|
| Base trash (7 days) | Quickly recovering records, fields, or tables deleted in the past week | Anything older than 7 days; tables deleted more than a week ago |
| Workspace trash (30 days) | Recovering a deleted base within the retention window | Bases deleted more than 30 days ago; manually emptied trash |
| Base snapshots | Full base restoration after a catastrophic event; reverting a bad import | Granular record/field recovery; scheduled daily backups; Free plan teams (only 2 weeks) |
| Revision history | Seeing who changed a cell value and what it used to be | Rolling back bulk changes across many records at once |
| ProBackup | Automated daily backups, unlimited retention, point-in-time recovery, granular restore, compliance documentation | — |
Compliance & data retention
Data retention requirements by industry
| Industry | Typical retention requirement | Airtable native covers this? |
|---|---|---|
| Finance & Accounting | 7 years | ❌ No (max 3 years on Enterprise snapshots) |
| Healthcare (HIPAA) | 6–10 years | ❌ No |
| Legal | 7 years | ❌ No |
| General business contracts | 3–5 years | ⚠️ Partially (Enterprise only) |
| EU GDPR | As long as purpose requires + deletion on request | ⚠️ Partial — deletion on request requires extra steps |
GDPR Compliance: the "Right to Be Forgotten"
When an EU citizen requests deletion of their personal data, you must delete it from both production systems and backups, and document it within 30 days.
How this works with Airtable + ProBackup:
Step 1: Delete user data from Airtable — remove the person from your workspace, delete their records, and purge personal data from custom fields.
Step 2: Request deletion from ProBackup — open a support ticket specifying the user and date range. ProBackup purges that data from backup storage.
Step 3: Export a deletion certificate from ProBackup for your GDPR compliance documentation.
👉 Read our full GDPR guide: Handling GDPR Deletion Requests in Your Backup System
SOC 2 & ISO 27001: what auditors look for
| Auditor requirement | Airtable native | Airtable + ProBackup |
|---|---|---|
| Automated daily backups | ❌ Snapshots are usage-triggered, not scheduled | ✅ Daily automated backups |
| Documented backup procedures | ❌ Not provided | ✅ Documented and auditable |
| Tested restore process | ⚠️ Manual — teams must self-test | ✅ Tested and verifiable |
| SOC 2 certified backup vendor | N/A | ✅ ProBackup is SOC 2 Type II certified |
| Configurable retention policy | ❌ Fixed by plan tier | ✅ Unlimited retention |
| Audit trail of backup activity | ❌ Not available | ✅ Full audit log |
Protect your Airtable tables today
Don't wait for a data loss disaster to implement backup. The most common causes — accidental deletion, automation errors, and integration mishaps — can strike any team at any time.
ProBackup for Airtable gives you:
✓ Automated daily backups of all your Airtable data
✓ Unlimited retention (no expiring windows)
✓ Point-in-time recovery (restore from any date)
✓ Granular restore (one record, one table, or everything)
✓ Google Drive sync (you own your data)
✓ SOC 2 Type II certified (enterprise-ready)
✓ 5-minute setup (no technical knowledge needed)
👉 Start your 7-day free trial at ProBackup: https://app.probackup.io/onboarding
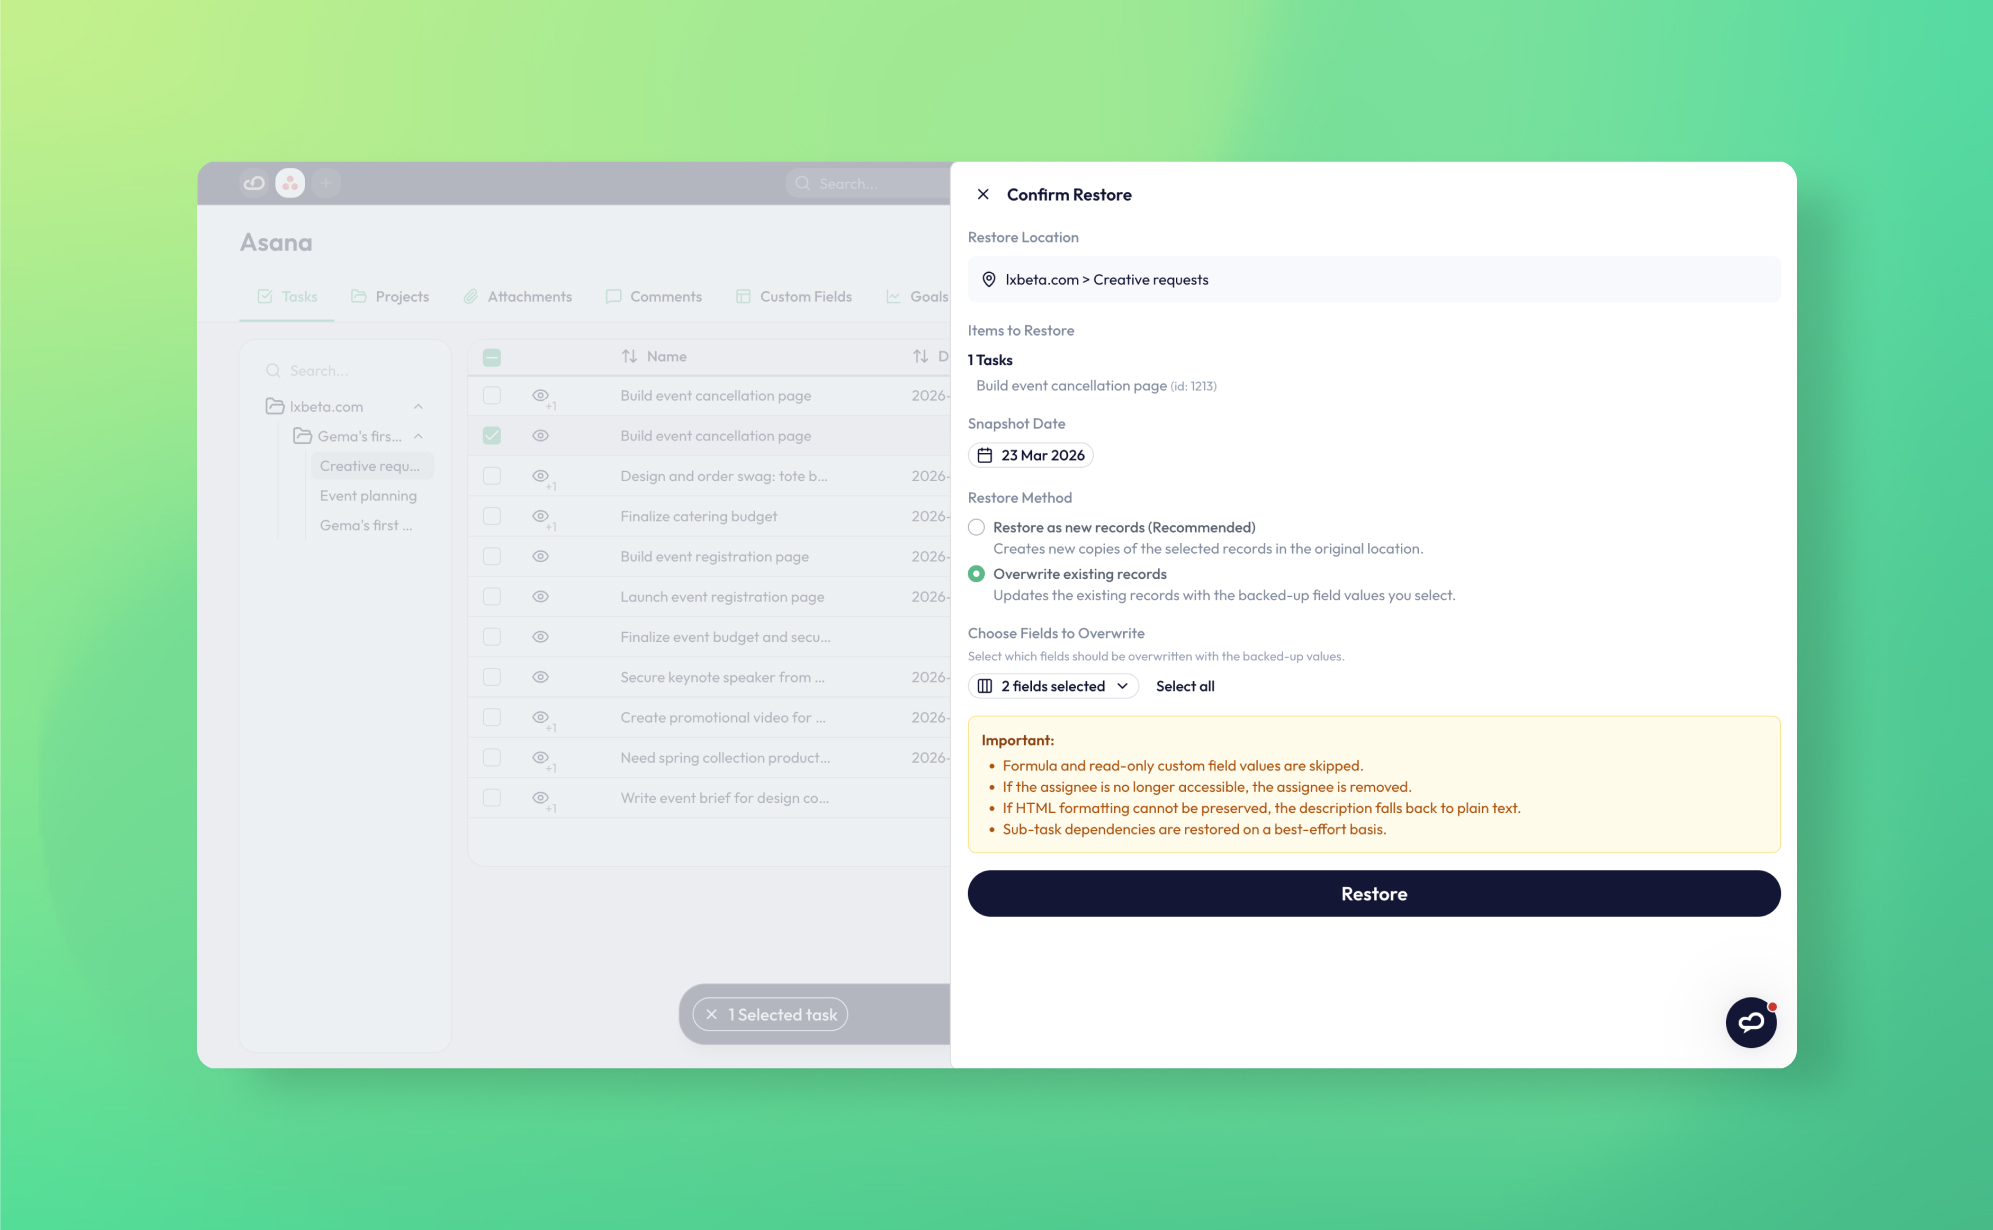
New: Overwrite existing records when restoring data
We've just shipped a significant upgrade to ProBackup's restore experience. and if you've ever needed to roll back changes to a record that's still live in your app, this one's for you.
What's new
Until now, ProBackup always restored data as new records. That's still the safest and most common approach, but it isn't always what you need. Sometimes a record wasn't deleted; it was changed. Someone updated the wrong fields, an automation went sideways, or an AI agent touched things it shouldn't have. The record still exists, but the data inside it is wrong.
Starting today, you can restore directly into existing records, overwriting only the specific fields you choose.
How it works
When you select a record and click "Restore...", a restore pane opens on the right. You'll now see a Restore method option with two choices:
- Restore as new records (recommended): The existing behaviour. Creates a fresh copy of the record in its original location without touching anything currently in your app.
- Overwrite existing records: Updates the live record with values from a previous backup. When you select this option, a field picker appears so you can choose exactly which fields to overwrite. Everything else stays untouched.
You can also adjust the snapshot date directly in the pane using the date picker, so you're not limited to the most recent backup, you can restore the record as it looked on any date ProBackup has captured.
At the bottom of the pane, ProBackup surfaces any restore constraints for the data type you're working with. For example, formula fields and read-only custom fields can't be restored for Asana tasks. These are shown upfront so there are no surprises.
When to use each method
| Scenario | Recommended method |
|---|---|
| Record was deleted and needs to come back | Restore as new records |
| Record exists but has wrong field values | Overwrite existing records |
| You want to roll back specific fields only | Overwrite existing records + field picker |
| You're unsure | Restore as new records (always safe) |
Why this matters
As teams adopt more automation and AI-driven workflows, the risk of bulk, unintended changes to live records has grown significantly. An agent that updates the wrong fields across a hundred tasks, or an automation that fires at the wrong time — these are exactly the scenarios where surgical field-level recovery makes the difference between a five-minute fix and a painful manual cleanup.
Overwrite restore gives you that precision.
ProBackup: built for the complexity of SaaS data
Backup is only as valuable as the restore capabilities behind it. Field-level overwrite restore is part of our broader commitment to building the most capable, granular recovery tooling available for SaaS platforms - going well beyond the basic export-and-reimport approaches that most solutions still rely on.
Whether you need to recover a deleted record, roll back a handful of fields, or undo the aftermath of a runaway automation, ProBackup gives you the control to respond precisely and confidently. That's what best-in-class cloud backup for SaaS looks like in practice.
Getting started
The new restore experience is available now for all ProBackup users. For a full walkthrough of the restore flow, see How to recover deleted data in our Help Center.
As always, if you run into anything or have feedback, we'd love to hear from you.
.jpg)
Your data, your region: Choose where your backups live
From today, you decide where your data is stored.
Until now, all backups were stored in Europe - Dublin, specifically. It worked fine, but we heard you: some teams need their data closer to home, others have compliance requirements that make European storage a non-starter, and some just want the assurance of knowing exactly where their backups sit.
So we built it.
Choose Your Region
When you add your first app, you'll be asked to choose a data location. Pick the one that fits your team, your compliance requirements, or your geography:
- 🇦🇺 Oceania - Sydney, Australia
- 🇨🇦 Canada - Montreal
- 🇸🇬 Asia - Singapore
- 🇮🇪 Europe - Dublin, Ireland
- 🇩🇪 Germany - Frankfurt
- 🇧🇷 Latin America - São Paulo, Brazil
- 🇮🇱 Israel - Tel Aviv
- 🇬🇧 United Kingdom - London
- 🇺🇸 United States - North Virginia
Your choice applies to your entire account: Every app you back up will be stored in the same location. You only make this decision once.
Why Data Residency Matters, and Why Your Compliance Team Is Asking About It
We hear this a lot from customers: "We'd love to use ProBackup, but our legal team needs to know where the data lives." It's not bureaucracy for the sake of it. The regulations driving these conversations are real, and in several countries they're getting stricter.
Here's a quick overview of what's in play across some of our most common customer regions:
🇬🇧 United Kingdom: UK GDPR & Data Protection Act 2018
After Brexit, the UK kept its own version of the EU's GDPR framework. The UK GDPR - together with the Data Protection Act 2018 and the Privacy and Electronic Communications Regulations - defines the modern rules of engagement for businesses that use data of UK residents (source: Usercentrics). While the law doesn't mandate that data never leave the country, transfers outside the UK require mechanisms like Standard Contractual Clauses, Binding Corporate Rules, or adequacy decisions to ensure equivalent protection (source: eSignGlobal). For many organisations, especially in financial services and the public sector, keeping data in the UK outright is simply the cleaner compliance path. With our London region, that's now a one-click decision.
🇦🇺 Australia: Privacy Act 1988 & Australian Privacy Principles
Australia's data framework is built around the Australian Privacy Principles (APPs), which govern how personal information is collected, stored, and transferred. In the case of health data, stringent data sovereignty and residency requirements are in place - data related to health records and all associated information, including backups, must never be processed, stored, transmitted, or managed outside Australia (source: InCountry). Beyond healthcare, the Security of Critical Infrastructure Act 2018 introduced mandatory compliance frameworks for critical infrastructure sectors, with data storage and processing identified as a priority area. Macquariedatacentres Australian customers - particularly in regulated industries - regularly tell us that local storage isn't optional for them. Our Sydney region solves that.
🇩🇪 Germany: BDSG & GoBD
Germany goes further than most EU countries. On top of the GDPR, Germany's BDSG utilises national "opening clauses" to add layers of complexity, and the GoBD introduces strict immutability requirements for electronic records - meaning Germany demands a level of digital sovereignty that goes beyond simple data protection. German businesses must also notify when transferring data outside of the country (source: Captaincompliance), making local storage the default preference for many. Our Frankfurt region was built with exactly this customer in mind.
The Bigger Picture
The broader trend is clear: data residency requirements are tightening globally. Research by the United Nations found that 130 countries now have data privacy laws (source: Computer Weekly), and that number keeps growing. What was once a concern mainly for large enterprises is now a question that teams of every size are fielding from their legal and compliance stakeholders.
Data residency is one of the first questions serious compliance teams ask when evaluating a backup solution. With nine regions across six continents, ProBackup now covers the vast majority of those requirements out of the box — and we think that puts us firmly in the conversation as the most complete cloud backup and restore solution available for SaaS teams.
A Few Things Worth Knowing
This setting is permanent. Once chosen, it can't be changed - so take a moment to pick the right region for your team. And for existing customers: your data stays in Dublin. We can't migrate existing backups, but if you have questions about what that means for your account, just reach out.
No pricing change, no new plan required - this is available to all customers starting today.
Start backing up your SaaS today 👉 https://app.probackup.io/onboarding
The legal summaries above are intended as a general overview to help you start the conversation internally, not as legal advice. We always recommend checking with your own legal or compliance team for requirements specific to your organisation and industry.
.jpg)
Access your deleted HubSpot records without leaving HubSpot
Managing deleted CRM data just got significantly easier. ProBackup now lives directly inside your HubSpot account, giving you instant access to deleted records, backup status, and key settings from the interface you already use every day.
Why this matters for HubSpot users
HubSpot's native trash permanently deletes records after 90 days. If someone accidentally removes a contact six months ago, it's gone. ProBackup has always protected against this, but until now you needed to switch to a separate app to recover anything.
With this update, your safety net is built right into HubSpot.
A dedicated object for deleted records
ProBackup now creates a custom object called "ProBackup Deleted Records" in your HubSpot account. Every contact, deal, or CRM record that gets deleted automatically appears here.
This isn't just a log. You can search by type, date, or ID. You can filter, select multiple records, and even add them to workflows. Each record links directly to your ProBackup vault for full history and one-click restoration.
The key difference from HubSpot's trash: ProBackup retains deleted records according to your retention settings, which can extend to years rather than 90 days.
Your backup status at a glance
The new ProBackup homepage inside HubSpot shows everything you need in one view:
- When your last backup completed
- Your current storage usage
- Quick access to deleted records
- A direct link to your full ProBackup vault
No more wondering whether your backups are running. The status is visible whenever you need it.
Configure settings without switching apps
You can now adjust ProBackup settings directly from HubSpot's Connected Apps section. Choose your status email frequency, set retention periods for record versions, and configure how long deleted items are kept.
Everything stays in sync with your main ProBackup account. Change a setting in HubSpot, and it applies everywhere.
Getting started
If you already use ProBackup for HubSpot, the deleted records object and homepage are available now. Simply click the Marketplace icon in HubSpot's left menu and select ProBackup.
Not using ProBackup yet? Start your free trial today to protect your HubSpot data:https://app.probackup.io/onboarding
Trello Backup & Data Recovery: Complete Guide [2026] | ProBackup
Why this guide matters for Trello users
Trello's card-based interface makes it one of the most approachable project management tools on the market. It is also one of the most unforgiving when it comes to data recovery. Unlike most platforms, Trello has no trash bin. When a card, list, or board is permanently deleted, it leaves Trello's servers immediately and permanently — with no recovery window, no escalation path, and no way to ask Atlassian support to retrieve it.
This comprehensive guide shows you:
✓ How to safely archive and delete data in Trello
✓ What Trello's native recovery can and cannot do
✓ How to prevent permanent data loss
✓ A complete backup strategy for business continuity
Who this guide is for:
- IT Administrators managing Trello for their company
- Project Managers responsible for team workflows
- Operations Managers protecting business-critical data
- Compliance Officers ensuring data retention requirements
👉 Start your 7-day free trial at ProBackup: https://app.probackup.io/onboarding
Understanding Trello's data structure
The hierarchy of Trello data
Trello is structured simply, but deletion cascades downward through that hierarchy. Removing a container removes everything inside it — permanently, with no recovery path if you chose Delete rather than Archive.
Trello Data Hierarchy:
Workspace
└── Board
    └── List (column)
        └── Card
            ├── Description
            ├── Checklists & checklist items
            ├── Comments
            ├── Attachments
            ├── Labels
            ├── Members
            └── Due dates & custom fields
Important: Deleting a Board removes:
❌ All Lists inside it
❌ All Cards inside every List
❌ All checklists, checklist items, and descriptions on every Card
❌ All comments and activity history on every Card
❌ All file attachments
❌ All labels, members, and due date data
⚠️ The critical difference from other platforms: Every other tool covered in this series (monday.com, ClickUp, Asana, HubSpot, Airtable) holds deleted items in a trash bin for at least 30 days. Trello does not. A permanently deleted item is gone from Trello's servers the moment you confirm the deletion. There is no timer, no recovery window, and no support escalation that can retrieve it.
How to archive and delete data in Trello
Archive vs. Delete: the most important distinction in Trello
In Trello, this distinction matters more than on any other platform. The reason is simple: archive is reversible indefinitely; delete is immediately and permanently irreversible.
🟢 Archive: The correct choice in almost every situation
- Removes the card, list, or board from your active view
- Preserves all data, comments, attachments, and history indefinitely
- Can be restored at any time from the Archived items menu — no time limit
- Archived cards also improve board performance on large boards
- No countdown clock, no risk of permanent loss
🔴 Delete: Only for data that must be destroyed
- Trello requires you to archive an item before the Delete option appears — this two-step process is your last warning
- Once you click Delete and confirm, the data is gone from Trello's servers immediately and permanently
- Trello support confirms: deleted items cannot be recovered under any circumstances
- The only legitimate reasons to delete are items created by mistake, obvious test data, or GDPR/compliance-driven removal
| Action | ✅ Good for | ❌ Not recommended for |
|---|---|---|
| Archive a card | Completed tasks, cards you may reference later, anything you are not 100% certain you want gone forever | Cards that must be provably destroyed for compliance — use Delete only for those |
| Archive a list | Completed sprint columns, old workflow stages, entire phases of work you want to preserve | Lists where you haven't verified every card inside is safe to remove from active view |
| Close a board | Hiding a completed project board from your active workspace view while preserving all its data | Boards that any team member might still be actively referencing — closing is visible to all admins |
| Delete a card (permanent) | Test cards, duplicates, or data that must be destroyed for compliance reasons | Anything with comments, checklists, or attachment history — all of this is gone immediately with no recovery path |
| Delete a list (permanent) | GDPR-driven removal of specific list contents only — and only after verifying every card inside | Any list with cards you haven't individually reviewed — deleting a list permanently deletes all open and archived cards it contains |
| Delete a board (permanent) | Only when the board and every card inside it genuinely needs to be destroyed | Completed or inactive projects — close the board instead and leave it closed indefinitely |
How to archive a card
Method 1 — From the card back:
- Click the card to open it
- In the Actions menu on the right sidebar, click Archive
- The card disappears from the board but is fully preserved
Method 2 — From board view:
- Hover over the card
- Click the pencil/edit icon that appears
- Select Archive
Keyboard shortcut: Hover over any card and press C to archive it instantly.
To permanently delete after archiving: reopen the archived card → click the red Delete button that now appears in the Actions menu → confirm. This action is irreversible.
How to archive a list
- Click the three dots (...) next to the list title
- Select Archive this list
- All cards inside the list are archived with it, fully preserved
To permanently delete a list after archiving: open the board menu → More → Archived items → switch to Lists → find the list → click Delete → confirm. This permanently deletes the list and all of its cards, including any cards that were previously archived within it.
⚠️ Warning: Deleting an archived list does not just delete the list structure — it permanently deletes every card the list ever contained, including ones you archived months ago. Verify the full contents before confirming a list deletion.
How to close (archive) a board
- Click the three dots (...) menu in the top-right corner of the board
- Select ...More
- Click Close board
- Confirm — the board is hidden from your active workspace but fully preserved
To permanently delete a closed board: go to your workspace home → find the closed board → open it → click ...More → Permanently delete board → confirm. Workspace admins on paid plans can also delete closed boards they don't own if they have the board URL.
⚠️ Warning: Board deletion is permanent and cannot be recovered. If you want to get rid of a board without losing its content, close it and leave it closed.
How to restore archived data in Trello
If you followed the archive-first approach, restoration is straightforward and has no time limit.
Restoring archived cards
- Open the board where the card lived
- Click the three dots (...) menu in the top-right corner
- Select ...More → Archived items
- Use the search bar to find your card by name or keyword
- Click Send to board to restore it to its original list position
Restoring archived lists
- Open the board where the list lived
- Click the three dots (...) menu → ...More → Archived items
- Toggle to the Lists view
- Find the list and click Send to board
- The list and all its cards return to the board
Restoring a closed board
- Go to your Trello workspace home page
- Find the closed board (it appears with a closed indicator in your board list)
- Open it
- Click Reopen board
Archive and restore summary
| Data type | Archive available? | Recovery window (archived) | Recovery window (permanently deleted) | Notes |
|---|---|---|---|---|
| Cards | ✅ Yes — indefinitely | Indefinite — no time limit | None — immediately permanent | Must archive before the Delete option appears; restore via Archived items menu |
| Lists | ✅ Yes — indefinitely | Indefinite — no time limit | None — deletes list and ALL cards inside it permanently | Deleting an archived list also permanently deletes every card it ever contained |
| Boards | ✅ Yes (via Close board) — indefinitely | Indefinite — reopen at any time | None — board and all contents gone immediately | Must close before the permanent delete option appears; workspace admins can delete closed boards on paid plans |
| Checklist items | ❌ No | None | Immediately permanent | No archive step, no undo — deleted immediately on click |
| Comments | ❌ No | None | Immediately permanent | No archive step, no undo, no recovery window |
| Workspaces | ❌ No archive | None | Immediately permanent | Deleting a workspace removes all boards inside it with no recovery path |
What can't be restored natively in Trello
Trello's archive is an excellent tool for keeping workspaces tidy without losing data. It is not a backup. Here is where native recovery ends.
1. Permanently deleted items have zero recovery path
This deserves to be stated plainly. Unlike every other platform in this series, Trello has no trash bin that holds deleted items for any period of time. The moment you confirm a permanent deletion, the data is gone from Trello's servers. There is no 30-day window, no 7-day window, no support ticket that can retrieve it, and no escalation path. Atlassian's own documentation confirms this.
2. Checklist items and comments are gone immediately
Deleting a checklist item or a comment bypasses the archive step entirely. There is no two-step process, no archive-then-delete flow, no toast notification with an undo button. A single click confirms the deletion and the data is gone immediately and permanently.
For teams that use card comments to record decisions, client approvals, or project context — or use checklists to track process steps — this is a significant and often-overlooked exposure.
3. No version history or rollback
Trello's activity log on each card shows a history of changes: when a card moved between lists, when a due date was set, when a member was added. What it cannot do is restore a previous state of the card's data.
If a Power-Up or integration updates card descriptions or custom fields in bulk, or if Butler automation fires on the wrong condition and modifies hundreds of cards, the activity log tells you it happened. It does not give you a way to reverse it.
Common causes of silent data corruption:
- A Butler automation rule fires on a broader set of cards than intended, moving them between lists or updating labels at scale
- A third-party Power-Up integration writes incorrect data to card descriptions or custom fields
- A team member bulk-archives or bulk-deletes cards using the board menu without reviewing each one
- Atlassian Intelligence or a connected AI tool takes action on cards based on an ambiguous instruction
4. What Trello support can and cannot do
✅ Can do:
- Advise on using the Archived items menu and board restoration
- Investigate if data loss was caused by a platform bug
- Sometimes restore data if a verified system error caused the loss (rare)
❌ Cannot do:
- Recover permanently deleted cards, lists, or boards
- Recover deleted comments or checklist items
- Roll back bulk changes made by Butler automations or Power-Up integrations
- Provide any recovery path for items deleted through the standard Delete flow
Common data loss scenarios & solutions
Scenario 1: "A board with months of client work was permanently deleted"
What happened: A workspace admin was cleaning up old boards and permanently deleted an active client board, thinking it was a completed test project. There is no confirmation showing what is inside before the final delete step.
Native solution:
✗ Board deletion in Trello is immediate and permanent
✗ There is no trash bin, no recovery window, and no timer
✗ Trello support cannot retrieve permanently deleted boards
✗ Must reconstruct from emails, screenshots, or memory
Scenario 2: "An archived board was deleted... and took all its cards with it"
What happened: A team member deleted an archived board to clean up the Archived items menu, not realising that deleting an archived board permanently deletes every card it ever contained - including cards that had been archived months earlier.
Native solution:
✗ Deleting an archived list permanently destroys all its cards - both open and previously archived
✗ There is no recovery path for any of those cards
✗ The activity log shows the list was deleted but cannot restore it
Scenario 3: "Comments recording a client approval were deleted"
What happened: A team member tidied up a card by deleting old comment threads. The comments included written client approval of a project scope. The client is now disputing what was agreed.
Native solution:✗ Deleted comments have no archive step and no recovery path in Trello✗ Gone immediately and permanently on click✗ The card's activity log shows comments were added and deleted but does not show the comment content✗ Trello support cannot retrieve deleted comment text
Scenario 4: "A Butler automation moved 300 cards to the wrong list"
What happened: A Butler rule was misconfigured and triggered on a broader set of cards than intended, moving 300 cards from their correct lists into a "Done" list. The cards still exist, but all workflow context (which stage each card was in) is lost.
Native solution:
✗ Cards were moved, not deleted = the archive offers no help
✗ Activity log shows each card's movement but moving 300 cards back manually is hours of work
✗ No bulk undo or rollback mechanism in Trello
Scenario 5: "A departing employee permanently deleted all their boards"
What happened: A team member with admin access deleted 6 boards before their last day. All work history, checklists, and client communication stored in those boards is gone.
Native solution:
✗ Permanently deleted boards cannot be recovered, not by admins, not by Atlassian support
✗ There is no audit log showing what data existed in the boards before deletion
✗ No time window to recover, deletion is immediate
Scenario 6: "Checklists were deleted from cards across a process board"
What happened: A team member deleted checklist items from 40 cards while "cleaning up" a process board, removing the step-by-step process documentation attached to each task.
Native solution:
✗ Checklist items deleted directly have no archive step and no recovery path
✗ Gone immediately on click with no undo mechanism
✗ No way to restore them through any native Trello feature
Quick reference: "I lost data — what should I do?"
| Situation | First step | If that fails |
|---|---|---|
| Accidentally archived a card or list | Board menu (three dots) → More → Archived items → find item → Send to board | Archive is indefinite — the item will always be there unless it was permanently deleted |
| Accidentally closed a board | Workspace home → find closed board → open it → Reopen board | Closed boards can be reopened indefinitely — no time limit |
| Permanently deleted a card, list, or board | No native recovery — permanently deleted items cannot be restored by any means in Trello | Restore from ProBackup only; if no backup exists, data is permanently lost |
| Deleted a comment or checklist item directly | No native recovery — these have no archive step and no undo mechanism | Restore from ProBackup only |
| Card data was changed by an automation or Power-Up | Check card activity log to understand the scope of changes | Native tools cannot bulk-revert card data — restore from ProBackup to roll back to the pre-change state |
| Need to find a card you archived a long time ago | Board menu → More → Archived items → search by name or keyword → Send to board | If the board was closed, reopen it first to access its archived items |
Summary: Why Trello's archive isn't enough for professional teams
Trello's archive is one of the most straightforward data preservation tools in the category — indefinite retention with simple restoration. But it was built to keep workspaces tidy, not to serve as a disaster recovery system. And crucially, it offers zero protection against permanent deletion, which in Trello is immediate, irreversible, and happens with a single confirmation click.
| Feature | ✅ Good for | ❌ Not sufficient for |
|---|---|---|
| Archive (cards and lists) | Hiding completed items from active view while preserving all data indefinitely — the right default for almost all cleanup | Protection against permanent deletion; recovering comment or checklist data deleted directly; version rollback |
| Close board | Preserving a complete board with all its cards while removing it from active workspace view | Protection against permanent board deletion; version history of board contents over time |
| Archived items menu | Restoring archived cards, lists, and reopening closed boards — no time limit | Recovering permanently deleted items; recovering comments or checklist items deleted directly |
| Activity log (per card and per board) | Seeing who moved a card, changed a due date, or added a comment — and when | Rolling back bulk changes from automations or integrations; showing deleted comment content |
| ProBackup | Automated daily backups, unlimited retention, point-in-time recovery, granular restore, compliance documentation | — |
Compliance & data retention
Data retention requirements by industry
| Industry | Typical retention requirement | Trello native covers this? |
|---|---|---|
| Finance & Accounting | 7 years | ❌ No — archived boards persist but there is no versioned audit trail or point-in-time history |
| Healthcare (HIPAA) | 6–10 years | ❌ No |
| Legal | 7 years | ❌ No |
| General business / contracts | 3–5 years | ⚠️ Partially — archived boards and cards persist indefinitely, but there is no point-in-time history or exportable audit trail |
| EU GDPR | As long as purpose requires + deletion on request within 30 days | ⚠️ Partial — card and board deletion is straightforward and permanent (useful for erasure requests), but proving backup purge requires a third-party solution |
GDPR Compliance: the "Right to Be Forgotten"
When an EU citizen requests deletion of their personal data, you must delete it from production systems and backups, and document it within 30 days.
How this works with Trello + ProBackup:
Step 1: Delete user data from Trello — remove the person from the workspace, permanently delete cards containing their personal data, and remove personal data from card descriptions and comments.
Step 2: Request deletion from ProBackup — open a support ticket specifying the user and date range. ProBackup purges that data from backup storage.
Step 3: Export a deletion certificate from ProBackup for your GDPR compliance documentation.
👉 Read our full GDPR guide: Handling GDPR Deletion Requests in Your Backup System
SOC 2 & ISO 27001: what auditors look for
| Auditor requirement | Trello native | Trello + ProBackup |
|---|---|---|
| Automated daily backups | ❌ No automated backup system — archive only, with no versioning | ✅ Daily automated backups |
| Documented backup procedures | ❌ Not provided | ✅ Documented and auditable |
| Tested restore process | ⚠️ Manual — teams must self-test Archived items restoration | ✅ Tested and verifiable |
| SOC 2 certified backup vendor | N/A | ✅ ProBackup is SOC 2 Type II certified |
| Configurable retention policy | ❌ Archive is indefinite but unversioned; no point-in-time history | ✅ Unlimited retention with point-in-time history |
| Audit trail of backup activity | ❌ Not available | ✅ Full audit log |
Protect your Trello data today
Trello's simplicity is one of its greatest strengths. But that same simplicity extends to its deletion model: there is no confirmation screen that shows you what you are about to destroy, no trash bin to fish things out of afterwards, and no support escalation that can retrieve what's gone. For Trello specifically, the question is not whether you need a backup — it is how recent your last snapshot needs to be.
ProBackup gives you:
✓ Automated daily backups of all your Trello data
✓ Unlimited retention (no expiration, ever)
✓ Point-in-time recovery (restore from any date)
✓ Granular restore (one card, one board, or everything)
✓ Google Drive sync (you own your data)
✓ SOC 2 Type II certified (enterprise-ready)
✓ 5-minute setup (no technical knowledge needed)
👉 Start your 7-day free trial at ProBackup: https://app.probackup.io/onboarding
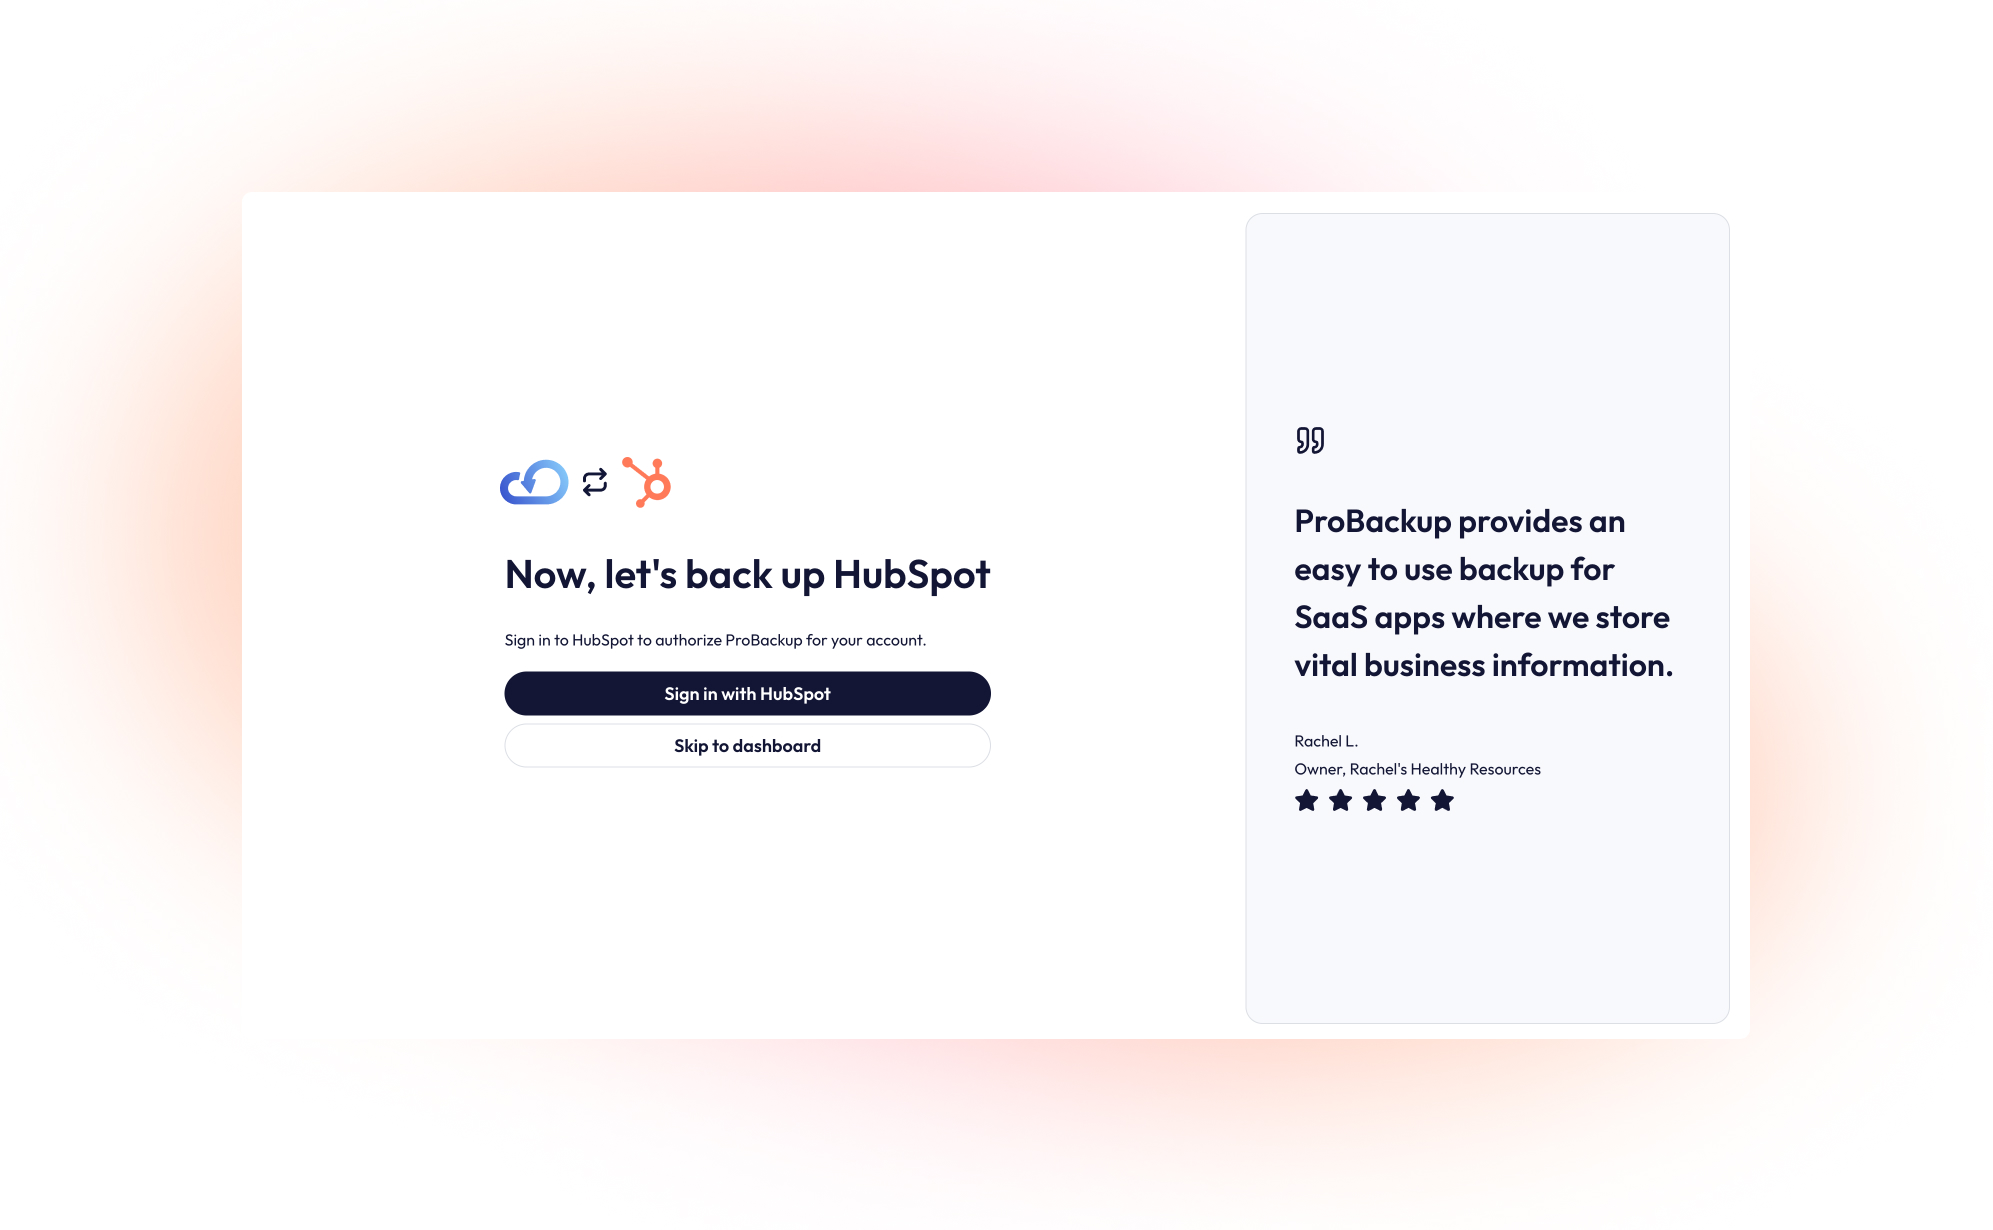
How to secure your HubSpot data: A step-by-step guide to backing up HubSpot
HubSpot is a leading customer platform for business of all sizes, covering all aspects to manage your CRM, marketing, sales, services, content management & operations. While you rightfully trust cloud apps like HubSpot to be secure and reliable, managing your business's critical data on any single platform opens the door to potential risks.
Using HubSpot to manage your CRM can expose your team to issues such as accidental data deletion from human error, malicious actions by disgruntled employees, or data loss due to technical glitches and downtime. Losing an important contacts, notes or deals can set your team back hours.
To gain peace of mind and protect your CRM, implementing an automated backup solution is essential. This guide will walk you through setting up a daily, automated backup for your HubSpot account using ProBackup.
Part 1: Create a ProBackup Account
Getting started is easy and comes with a 7-day free trial.
- Visit the ProBackup for HubSpot page by navigating to https://www.probackup.io/backup/hubSpot
- Click on the Start free 7 day trial button.
- Select HubSpot as the app you would like to back up and click Continue
- Fill in your email, first name, and last name, then click Continue.
- Verify your email address by following the instructions sent to your inbox.
Part 2: Connect HubSpot and Start Your First Backup
Once your ProBackup account is created and verified, you can connect your HubSpot account.
We recommend that you sign in to the right HubSpot account first, before connecting your account.
- In ProBackup, click on Sign in with HubSpot. This will redirect you to HubSpot to authorize the connection. If you are not signed in to HubSpot, then you will have to sign in first.
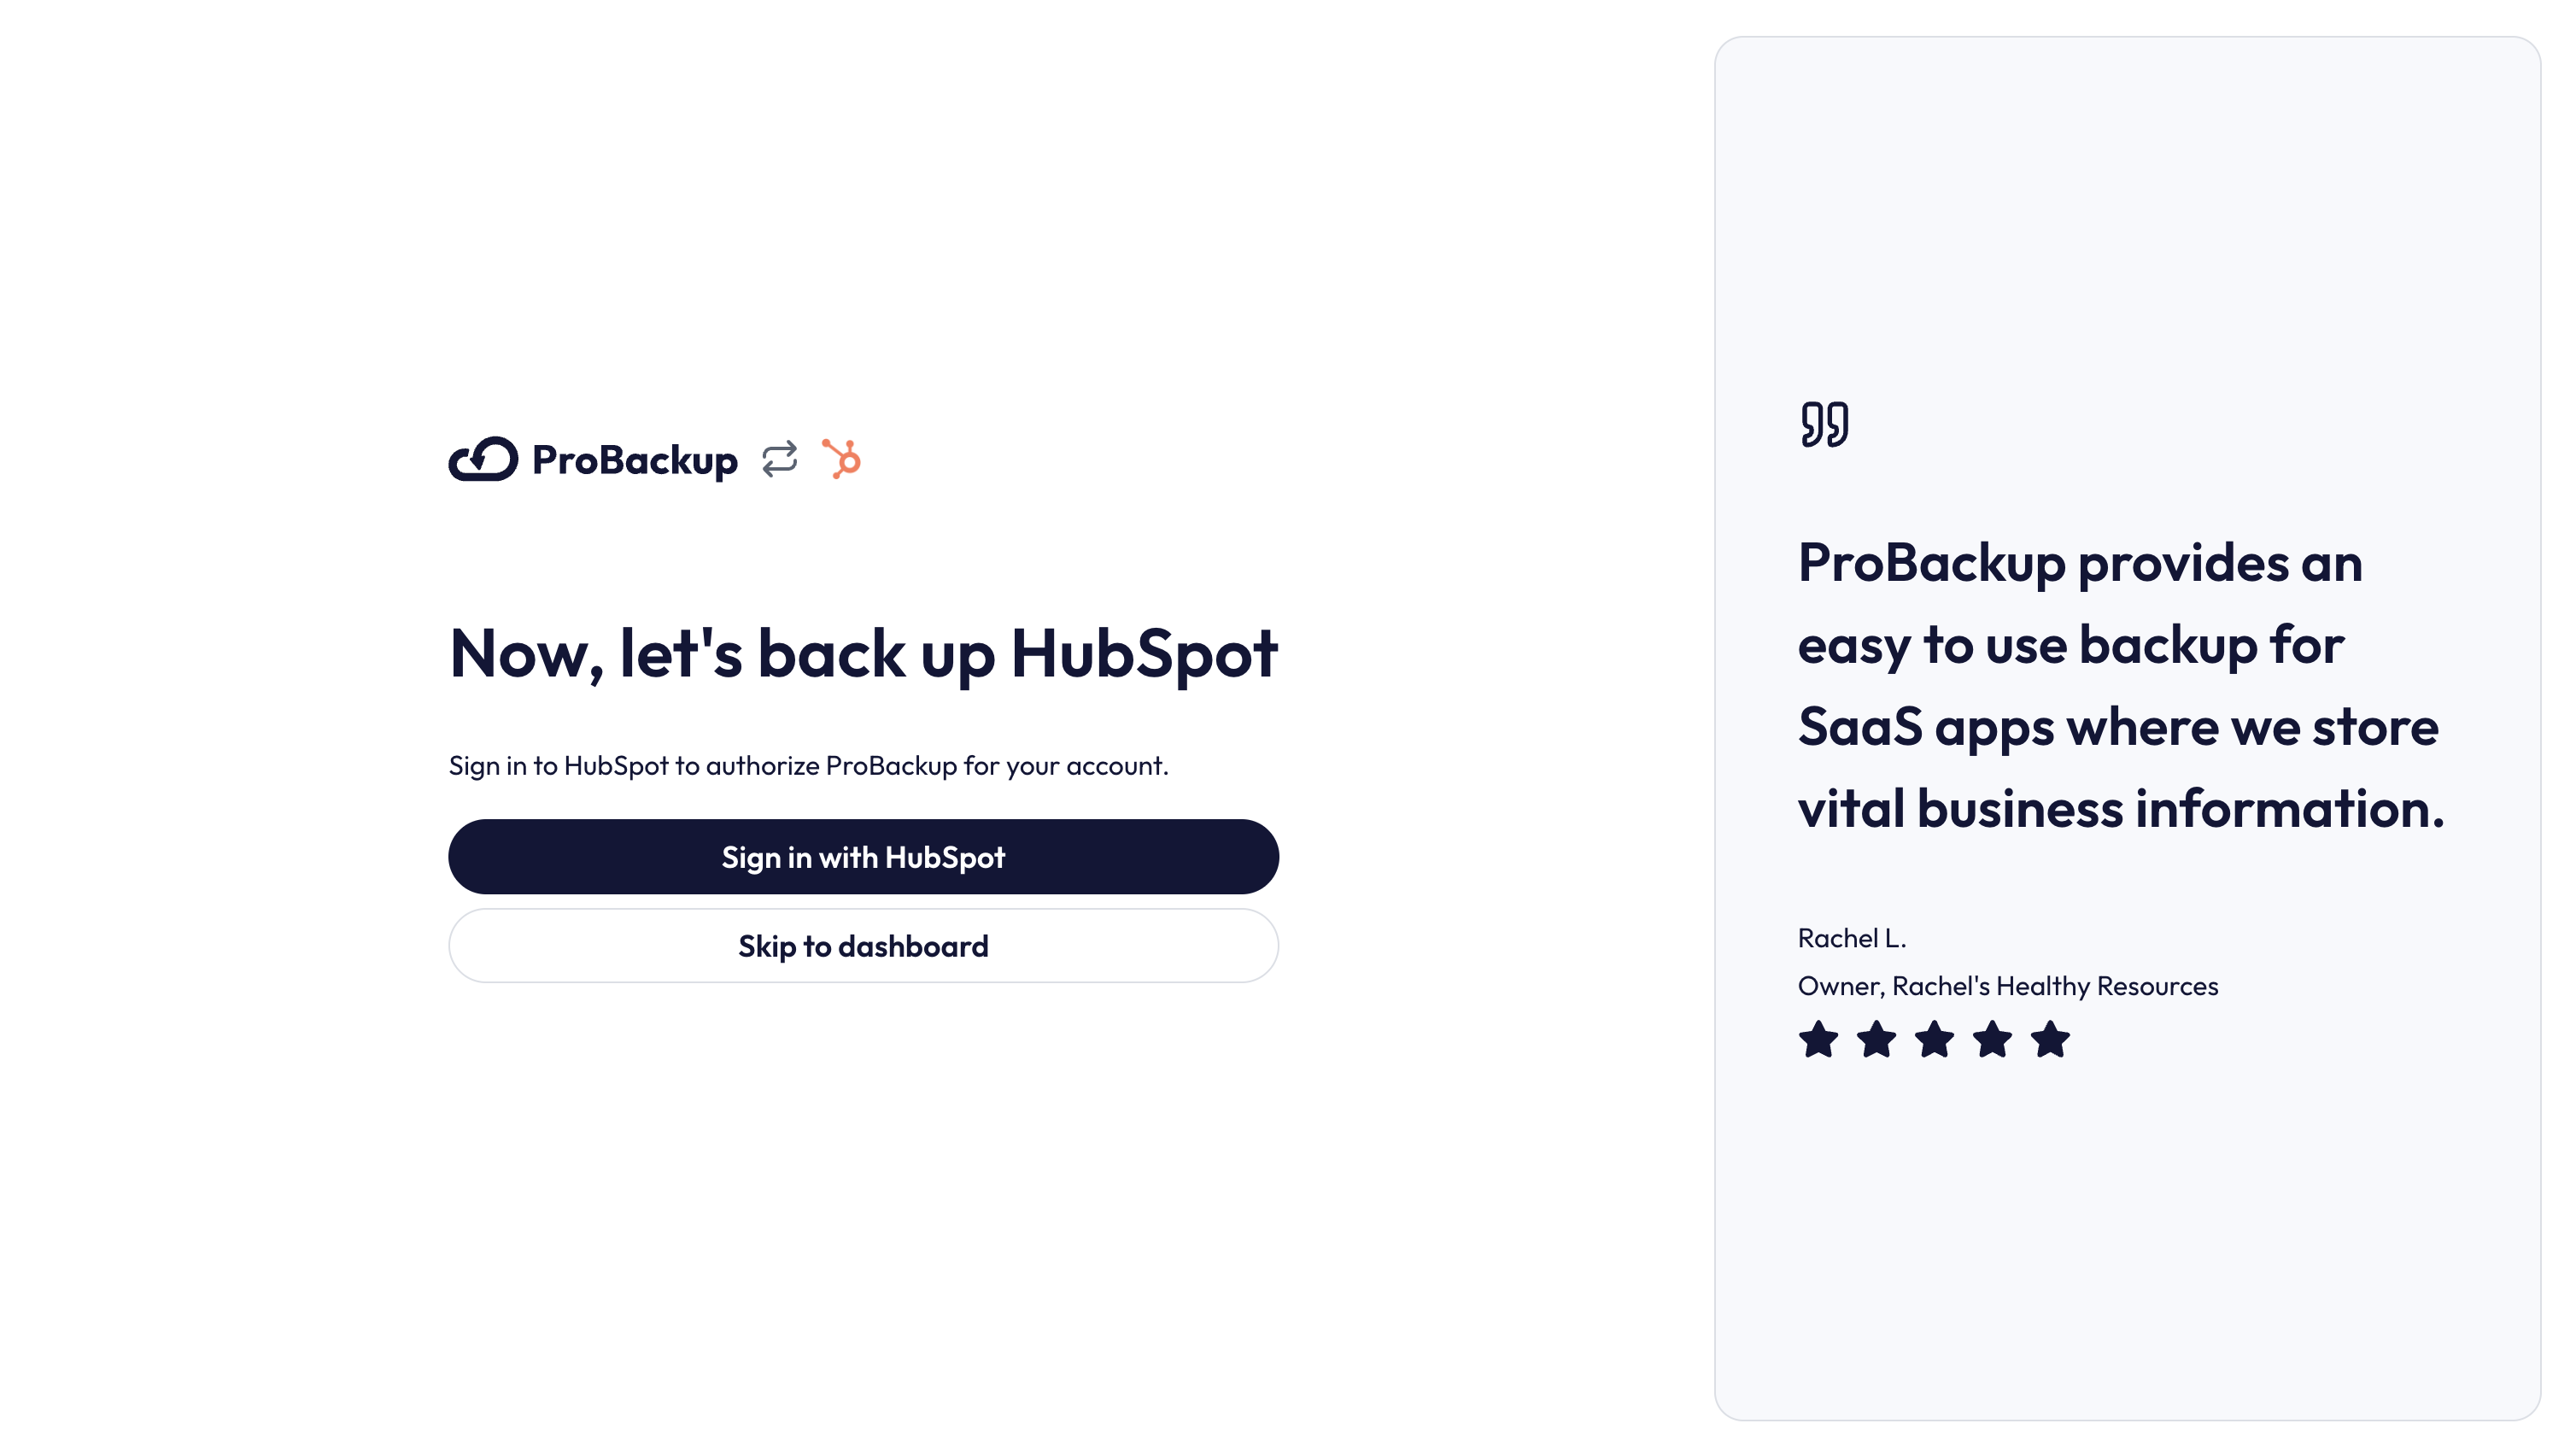
- On the HubSpot authorization page, select the account you would like to back up
- Click on Choose Account

- On the next step of the onboarding wizard, click on Start Backup to start your first backup.
What Happens Next?
After you confirm, the initial backup of your selected HubSpot will begin automatically. Our backup app will fetch all relevant data types such as contacts, organizations, deals, quotes and related information such as notes, tasks and emails. Depending on the size of your HubSpot account, the initial backup can take up to a few hours. You will be notified by email as soon as the first backup is complete.
Click on Go to HubSpot to view the data that is already backed up.
That’s it! Your HubSpot account is now protected with daily automated backups, ensuring your data is safe and easily restorable when you need it most.
.jpg)
How to Delete and Restore Data in ClickUp: The Complete Guide
.png)
Why this guide matters for ClickUp users
ClickUp is mission-critical for project management, operations, and client delivery. Teams use it to track every task, conversation, and decision. But here's the reality: 3 out of 4 teams will experience data loss from accidental deletion, human error, or system issues at some point.
This comprehensive guide shows you:
- How to safely delete and restore data in ClickUp
- What ClickUp's native recovery can and cannot do
- How to prevent permanent data loss before it happens
- A complete backup strategy for business continuity and compliance
Who this guide is for:
- IT Administrators managing ClickUp for their organization
- Project Managers responsible for team workflows and deliverables
- Operations Managers protecting business-critical data
- Compliance Officers ensuring data retention requirements are met
👉 Start your 7-day free trial at ProBackup: https://app.probackup.io/onboarding
Understanding ClickUp's data structure
Before you delete anything, understand how ClickUp organizes data. Deletion flows downward — removing a high-level container removes everything inside it.
ClickUp Data Hierarchy:
Workspace
└── Space
    ├── Folder (optional)
    │   └── List
    │       ├── Task
    │       │   ├── Subtask
    │       │   ├── Comments
    │       │   ├── Attachments
    │       │   └── Time entries
    │       └── Checklist
    └── List (standalone, no Folder)
Important: Deleting a Space removes:
❌ All Folders and Lists inside it
❌ All Tasks and Subtasks
❌ All comments and communication history
❌ All file attachments
❌ All time entries (permanently — even if restored from Trash, time entries are gone)
❌ All custom field data and task history
How to archive and delete data in ClickUp
Best practice: Archive vs. Delete
🟢 Archive: Recommended 99% of the time
- Removes item from active view without deleting data
- Preserves all data and history indefinitely
- Can be restored at any time
- Archived Spaces don't count toward Free plan limits
- Automations in archived Spaces continue to run; items remain searchable
🔴 Delete: Use with extreme caution
- Moves to Trash with a 30-day retention window
- Permanently erased after 30 days
- Comments, files, and time entries may not be recoverable even within 30 days
- Cannot be undone after the Trash is emptied or the window expires
| Action | ✅ Good for | ❌ Not recommended for |
|---|---|---|
| Archive a Space | Completed projects, old clients, inactive teams — data preserved indefinitely | Compliance removal or permanent deletion |
| Archive a Folder or List | Completed phases or project stages you may reference later | Permanent removal — use Delete only if data is truly unwanted |
| Delete a Task | Duplicate entries, tasks created by mistake | Tasks with time entries (time is permanently lost) or tasks you might need later |
| Delete a List, Folder, or Space | GDPR deletion requests, truly obsolete structures | Anything you might need to reference — 30-day recovery window only |
How to archive a Space
- In your Sidebar, hover over the Space name and click the ellipsis (...) menu
- Select Archive
- The Space is hidden from your active Sidebar but fully preserved
- To view archived Spaces, use All Spaces and toggle archived items visible
- To restore: hover over the archived Space → ellipsis (...) → Restore
How to delete a Space
- First archive the Space (you can only delete an archived Space in ClickUp)
- Show archived items in the Sidebar
- Hover over the archived Space → ellipsis (...) → Delete
- Confirm deletion
- Space moves to Trash — recoverable within 30 days by Workspace owners, admins, or the member who created and deleted it
How to archive a Folder or List
- In your Sidebar, hover over the Folder or List and click the ellipsis (...) menu
- Select Archive
- The Folder or List is hidden from active view but data is preserved
- To restore: find the archived item → ellipsis (...) → Restore
How to delete a Folder or List
- Hover over the Folder or List in the Sidebar and click the ellipsis (...) menu
- Select Delete
- Confirm the action
- Item moves to Trash — recoverable within 30 days by Workspace owners, admins, or the member who created and deleted it
How to delete a Task
- Open the task and click the ellipsis (...) in the upper right, then click Delete— OR —
- Hover over a task, click the task selector checkbox, then click the trash icon in the Bulk Action Toolbar— OR —
- Right-click a task and select Delete from the Task Action Menu
- Task moves to Trash — recoverable within 30 days
⚠️ Warning: If a task has time entries, a warning is displayed before deletion. Time entries are permanently deleted even if the task is later restored from Trash.
How to archive or delete multiple Tasks
- Switch to List or Table view.
- Select the tasks you want by checking the boxes.
- Click the Archive or Delete icon in the action bar that appears.
How to restore data in ClickUp
ClickUp has a unified Trash that holds all deleted items — Spaces, Folders, Lists, Tasks, Docs, and more — for 30 days before permanent deletion.
How to access the Trash
As a Workspace owner or admin:
- Click your Workspace avatar in the upper-right corner
- Select Settings
- In the left sidebar, click Trash
As a member (for items you deleted yourself):
- Click your profile avatar in the bottom-left corner
- Select Trash from the dropdown menu
How to restore deleted Tasks
- Open Trash (steps above)
- Search for the task by name, or filter by item type, Space, or date deleted
- Hover over the task and click the ellipsis (...)
- Select Restore
- The task returns to its original List

How to restore deleted Folders and Lists
- Open Workspace Trash (owner/admin access required)
- Filter by item type: Folder or List
- Click the ellipsis (...) next to the item
- Select Restore
- The Folder or List — along with all its contents — is restored to its original location
How to restore deleted Spaces
- Open Workspace Trash (owner/admin access required, or member who both created and deleted the Space)
- Filter by item type: Space
- Click Restore next to the Space
- All Folders, Lists, and Tasks inside the Space are restored
Trash retention and permissions summary
| Data type | Recovery window | Who can restore | Notes |
|---|---|---|---|
| Tasks & Subtasks | 30 days | Owners, admins; members can see their own deleted tasks | Time entries are permanently lost even if task is restored |
| Lists | 30 days | Owners, admins, or the member who created and deleted it | Restoring a List restores all tasks inside it |
| Folders | 30 days | Owners, admins, or the member who created and deleted it | Restoring a Folder restores all Lists and tasks inside it |
| Spaces | 30 days | Owners, admins, or the member who created and deleted it | Restoring a Space restores everything inside it |
| Docs | 30 days | Owners and admins | Recoverable from Trash like other item types |
| Comments | None | — | Deleted comments do not go to Trash — permanently gone immediately |
| Individual attachments | None (in most cases) | — | Single deleted attachments may not appear in Trash |
| Time entries | None | — | Permanently deleted when a task is deleted, even if task is restored |
| Custom field values (when field deleted) | None | — | Data inside a deleted custom field is not recoverable |
What can't be restored natively in ClickUp
ClickUp's Trash is a useful safety net for immediate mistakes — but it has critical limitations that can lead to permanent data loss.
A. Granular data is gone immediately
When you delete the following items, they disappear permanently and do not appear in the Trash:
- Individual comments on tasks
- Single file attachments (in most cases)
- Time entries (lost even when a task is later restored)
- Custom field values when the field itself is deleted
- Activity log entries
B. No version history or rollback
ClickUp does not offer a way to view or restore previous versions of your data. If tasks exist but the data inside them has changed, there is no native rollback.
Common causes:
- ✗ A third-party integration syncs incorrectly and bulk-updates task statuses or custom fields
- ✗ An automation rule fires unexpectedly and changes values across hundreds of tasks
- ✗ An API script runs against the wrong List or Workspace
- ✗ A bulk import pastes incorrect data over existing content
C. What ClickUp support can and cannot do
✅ Can do:
- Advise on using Trash and archive features
- Investigate if deletion was caused by a platform bug
- Sometimes restore data if a verified system error caused the loss (rare)
❌ Cannot do:
- Recover data deleted more than 30 days ago
- Recover deleted comments, time entries, or individual attachments
- Roll back bulk changes made by automations or integrations
- Restore data from an emptied or expired Trash
Common data loss scenarios & solutions
Scenario 1: "I accidentally deleted a Space with 6 months of client work"
What happened: A PM was cleaning up the Workspace and deleted an active client Space instead of archiving it. Noticed the mistake 2 weeks later.
Native solution:
✓ Open Workspace Trash (Settings → Trash)
✓ Filter by Space, find the item, click Restore
✓ All Folders, Lists, and Tasks come back
✓ Must be done within 30 days
If it happened 31+ days ago:
✗ Data is permanently gone
✗ No native recovery option
✗ Must rebuild from emails, exports, or memory
Scenario 2: "Someone deleted all comments on our tasks"
What happened: A team member "cleaned up" a project by deleting comment threads across 60 tasks. All decision history and client communication is now gone.
Native solution:
✗ Comments do not go to Trash
✗ Once deleted, they are immediately and permanently gone
✗ ClickUp support cannot recover them
✗ No workaround exists
Impact:
- Lost context on why decisions were made
- Can't prove what was approved by the client
- Team has to reconstruct decisions from memory or email
Scenario 3: "Our integration overwrote all our task statuses"
What happened: A third-party integration had a sync error and updated 400 task statuses to the wrong values. The tasks still exist, but all status data is corrupted.
Native solution:
✗ Tasks weren't deleted, so Trash doesn't help
✗ No version history to roll back to
✗ No "undo" for bulk field value changes
✗ Must manually correct each task
Time to fix: 10+ hours
Scenario 4: "We need to recover a project from 6 months ago for a dispute"
What happened: A client claims the agreed deliverables were different from what was delivered. You need the original List structure and task descriptions from 6 months ago to prove what was scoped.
Native solution:
✗ If archived: you can restore, but only the current state - no point-in-time view
✗If deleted more than 30 days ago: data is permanently gone
✗ No version history means no view of "what it looked like on a specific date"
Scenario 5: "A departing employee deleted everything on their way out"
What happened: An admin-level team member deleted 6 Spaces and emptied the Trash before their last day. The deletion was intentional.
Native solution:
✗ If Trash was emptied manually, items are immediately and permanently gone
✗ The 30-day window doesn't apply once Trash is manually purged
✗ ClickUp support cannot recover from an emptied Trash
✗ No audit trail showing what existed before
Quick reference: "I lost data... what should I do?"
| Situation | First step | If that fails |
|---|---|---|
| Deleted a Task, List, Folder, or Space within 30 days | Open Trash (Settings → Trash for admins; profile avatar → Trash for members) | If not found, check if a parent container was also deleted and restore that instead |
| Deleted a comment or time entry | No native recovery — these are permanently gone immediately | Restore from ProBackup only |
| Data was changed, not deleted (automation / integration error) | Native tools cannot help — no version rollback exists in ClickUp | Restore from ProBackup to roll back to the pre-change state |
| Deleted more than 30 days ago | Native recovery is not possible | Restore from ProBackup; if no backup exists, data is permanently lost |
| Trash was manually emptied | Data is immediately and permanently gone from ClickUp | Restore from ProBackup only |
Summary: Why native Trash isn't enough for professional teams
ClickUp's Trash is a safety net for immediate mistakes, not a disaster recovery plan. If your team relies on ClickUp for revenue-generating work or compliance requirements, native Trash alone is insufficient.
| Feature | ✅ Good for | ❌ Not sufficient for |
|---|---|---|
| Archive (Spaces, Folders, Lists) | Hiding completed work while preserving all data indefinitely | Point-in-time recovery or exporting data outside ClickUp |
| Trash (30-day window) | Recovering recently deleted Spaces, Folders, Lists, and Tasks | Comments, time entries, or attachments; anything older than 30 days; manually emptied Trash |
| Activity log | Seeing who changed what and when | Rolling back to a previous version of your data |
| ProBackup | Automated daily backups, unlimited retention, point-in-time recovery, granular restore, compliance documentation | — |
Compliance & data retention
Data retention requirements by industry
| Industry | Typical retention requirement | ClickUp native covers this? |
|---|---|---|
| Finance & Accounting | 7 years | ❌ No — 30-day Trash is far below requirement |
| Healthcare (HIPAA) | 6–10 years | ❌ No |
| Legal | 7 years | ❌ No |
| General business contracts | 3–5 years | ❌ No — archived data is preserved but no point-in-time audit trail |
| EU GDPR | As long as purpose requires + deletion on request within 30 days | ⚠️ Partial — deletion from production is straightforward, but proving backup purge requires a third-party solution |
GDPR Compliance: the "Right to Be Forgotten"
When an EU citizen requests deletion of their personal data, you must delete it from production systems and backups, and document it within 30 days.
How this works with ClickUp + ProBackup:
Step 1: Delete user data from ClickUp — remove the person from your Workspace, delete tasks assigned to them, and purge personal data from custom fields.
Step 2: Request deletion from ProBackup — open a support ticket specifying the user and date range. ProBackup purges that user's data from backup storage.
Step 3: Export a deletion certificate from ProBackup for your GDPR compliance documentation.
👉 Read our full GDPR guide: Handling GDPR Deletion Requests in Your Backup System
SOC 2 & ISO 27001: what auditors look for
| Auditor requirement | ClickUp native | ClickUp + ProBackup |
|---|---|---|
| Automated daily backups | ❌ No automated backup system — Trash only | ✅ Daily automated backups |
| Documented backup procedures | ❌ Not provided | ✅ Documented and auditable |
| Tested restore process | ⚠️ Manual — teams must self-test Trash restores | ✅ Tested and verifiable |
| SOC 2 certified backup vendor | N/A | ✅ ProBackup is SOC 2 Type II certified |
| Configurable retention policy | ❌ Fixed 30-day Trash only | ✅ Unlimited retention |
| Audit trail of backup activity | ❌ Not available | ✅ Full audit log |
Protect your ClickUp data today
Don't wait for a data loss disaster to implement backup. Accidental deletion, automation errors, and integration mishaps can strike any team at any time — and ClickUp's 30-day Trash gives you no buffer against granular data loss or bulk changes.
ProBackup gives you:
✓ Automated daily backups of all your ClickUp data
✓ Unlimited retention (no 30-day expiration)
✓ Point-in-time recovery (restore from any date)
✓ Granular restore (one task, one List, or everything)
✓ Google Drive sync (you own your data)
✓ SOC 2 Type II certified (enterprise-ready)
✓ 5-minute setup (no technical knowledge needed)
👉 Start your 7-day free trial at ProBackup: https://app.probackup.io/onboarding
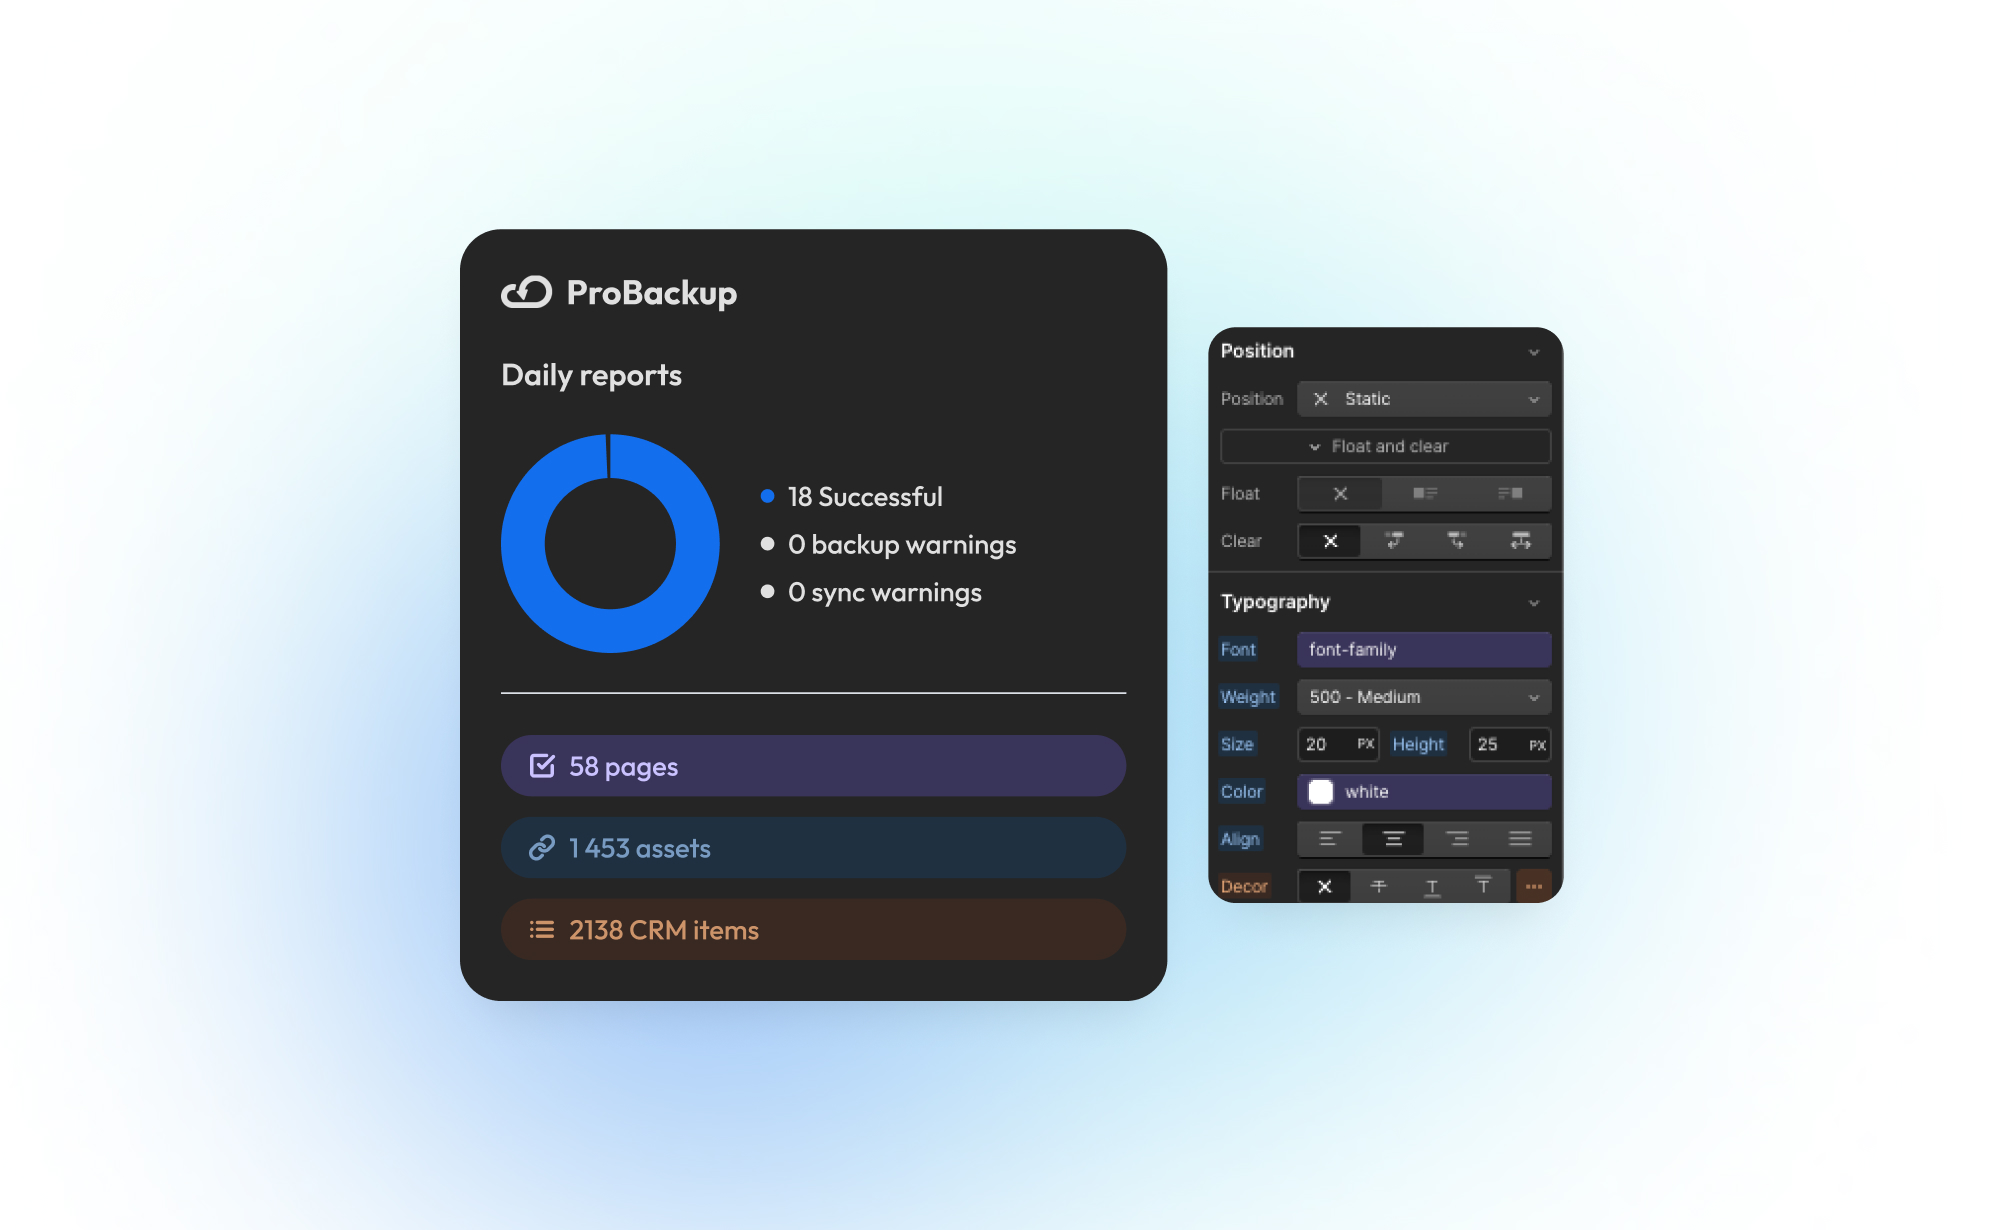
ProBackup launches integration for Webflow
We are excited to announce that ProBackup now supports Webflow, our first-ever website builder integration! This marks an important milestone in our mission to become the one-stop backup solution for SMEs relying on SaaS applications.
What is Webflow?
Webflow is a powerful website-building platform that allows users to design, build, and launch websites visually, without the need for traditional coding. It combines the flexibility of custom development with the ease of a drag-and-drop editor.
Why Webflow?
Many SMEs, designers, and marketers rely on Webflow for its intuitive interface, robust customization options, and ability to create pixel-perfect, responsive websites. Since a large portion of our customers already use Webflow, adding backup support was a logical step in expanding our services. It’s a favorite among SMEs, designers, and marketers who need an intuitive yet powerful tool to build and manage their online presence. Since many of our customers already use Webflow, this integration was a natural next step.
What This Means for You
- Automated Backups for Webflow: Keep your Webflow projects safe with daily backups.
- Free for Existing Customers: If you're a paid user, you can now back up Webflow alongside your other SaaS apps at no additional cost.
- More Website Builder Support? Let us know if we should add more website apps!
How to Add Webflow to ProBackup
- Log in to your ProBackup account.
- Click the "+ New App" button.
- Select the Webflow app to start connecting and authorize ProBackup.
- Start automatic backups
More Integrations Coming Soon
Webflow is the first of a series of new updates. We are actively working on integrations for Figma and Canva, and we're also working on a complete revamp of the user interface. Stay tuned for more product updates.
Try our new Webflow integration today and keep your websites secure with ProBackup!
.jpg)
The Complete Guide: Monday.com Data Backup, Recovery, and Integrity
Why this guide matters for monday.com users
Monday.com is mission-critical for teams running sales pipelines, project workflows, engineering sprints, onboarding processes, and client operations. But here's the reality: 55% of teams experience data loss from accidental deletion, human error, or system issues.
This comprehensive guide shows you:
✓ How to safely delete and restore data in monday.com
✓ What monday.com's native recovery can and CAN'T do
✓ How to prevent permanent data loss
✓ A complete backup strategy for business continuity
Who this guide is for:
- IT Administrators managing monday.com for their company
- Project Managers responsible for team workflows
- Operations Managers protecting business-critical data
- Compliance Officers ensuring data retention requirements
👉 Start your 7-day free trial at ProBackup: https://app.probackup.io/onboarding
Understanding monday.com's data structure
The hierarchy of monday.com data
Before you delete anything, understand how monday.com organizes data. Deletion flows downward, removing a high-level container removes everything inside it.
Monday.com Data Hierarchy:
Account
└── Workspace
    ├── Folder / Sub-folder (optional)
    │   └── Board
    │       ├── Group
    │       │   ├── Item (row)
    │       │   │   ├── Subitem
    │       │   │   ├── Updates (comments)
    │       │   │   └── File attachments
    │       │   └── Columns (Status, Date, Text, People…)
    │       └── Views
    ├── Dashboard
    └── Workdoc
Important: Deleting a Workspace or Board removes:
❌ All boards, groups, and items inside it
❌ All subitems and their data
❌ All updates (comments) and communication history
❌ All file attachments
❌ All column data across every item
❌ All views, dashboards connected to that board
How to archive and delete data in monday.com
Best practice: Archive vs. Delete
🟢 Archive: Recommended 99% of the time
- Removes item from active view without deleting any data
- Preserves all data and history indefinitely
- Can be restored at any time, even years later
- Archived items can be automated — set up rules to archive completed items automatically
- No permanent consequences
🔴 Delete: Use with extreme caution
- Moves to Trash with a 30-day retention window
- Permanently erased after 30 days — monday.com support cannot recover it
- Comments and certain file types may not be recoverable even within 30 days
- Cannot be undone after the Trash window expires
| Action | ✅ Good for | ❌ Not recommended for |
|---|---|---|
| Archive an item or group | Completed tasks or project phases you may need to reference later — data preserved indefinitely | Compliance removal or permanent deletion |
| Archive a board | Completed projects, old client boards — hidden from active view but fully restorable | Boards with active automations or dashboards that depend on them |
| Delete an item, group, or column | Duplicate entries, data created by mistake | Anything you might need later — 30-day recovery window only; columns delete data across all items instantly |
| Delete a board | GDPR deletion requests, genuine duplicates | Completed or inactive projects — archive instead |
| Delete a workspace | Fully decommissioned workspaces only | Any workspace with boards you haven't explicitly archived or exported — restoring the workspace does not restore its boards automatically |
How to archive an item
- Select the item in the board view
- Click the three dots (...) in the item popup at the bottom of the screen
- Choose Archive
- Confirm the action — the item disappears from the active board but is preserved
To restore: open the board → three-dot menu (...) → View archive/trash → Archive tab → find the item → Restore
How to archive a group
- Click the three-dot menu (...) to the left of the group name on your board
- Select Archive group
- Confirm — the group and all its items are preserved
To restore: open the board → three-dot menu (...) → View archive/trash → Archive tab → filter by Group → Restore
How to archive a board
- Click the three-dot menu (...) next to the board name in the left sidebar
- Select Archive board
- The board moves to the Board Archive, hidden from the active workspace
To restore: click the three-dot menu (...) in the workspace navigation bar → View archive/trash → Archive → find the board → Restore. You can also use Search Everything (magnifying glass icon) → Archived Boards → open the board → board menu → Unarchive board
How to delete an item
- Select the item in the board
- Click the three-dot menu (...) in the item popup
- Select Delete
- Confirm — item moves to Trash, recoverable for 30 days
How to delete a group
- Click the three-dot menu (...) to the left of the group name
- Select Delete
- Confirm — the group and all items inside move to Trash, recoverable for 30 days
How to delete a column
- Click the three-dot menu (...) at the top of the column header
- Select Delete column
- Confirm the action
⚠️ Warning: Deleting a column removes that data point from every single item on the board, across all groups, instantly. There is no selective undo in monday.com. The column moves to Trash, but the data values inside each item may not be fully restored even if the column is recovered. If a column is accidentally deleted, your only reliable path back is a backup that pre-dates the deletion.
How to delete a board
- Click the three-dot menu (...) next to the board name in the left sidebar
- Select Delete board
- Confirm — the board and all its contents move to Trash, recoverable for 30 days
How to delete a workspace
- Open the left side panel and hover over the workspace name
- Click the three-dot menu (...) next to its name
- Select Delete workspace
- Confirm — the workspace moves to Trash for 30 days
⚠️ Warning: Restoring a deleted workspace from Trash gives you back only the workspace container. You must restore each board inside it separately from Trash. Do not delete a workspace unless you have already archived or backed up the boards within it.
How to restore data in monday.com
Monday.com offers two parallel recovery paths: Archive (indefinite, for items you deliberately put away) and Trash (30-day window, for accidentally deleted data).
How to access the Archive
For items, subitems, groups (board-level):
- Open the board containing the archived data
- Click the three-dot menu (...) in the upper-right corner of the board
- Click View archive/trash, then select the Archive tab
- Browse or filter by type (Item, Subitem, Group), date archived, or board name
- Select the item(s) and click Restore
For archived boards:
- Click the three-dot menu (...) above the workspace navigation bar in the left panel
- Select View archive/trash → Archive
- Find the board and click Restore
How to access the Trash
- Click your avatar/profile picture in the upper-right corner
- Select Trash
- Browse deleted items — filter by type (Item, Subitem, Column, Group, Board, Doc, Dashboard), date deleted, or board name
- Click the three-dot menu (...) to the right of the item
- Select Restore
💡 Permissions note: Only admins and the person who deleted an item can see and restore it from Trash. If a board was set to "Only owners can change" permissions, non-owners will not see deleted items from that board in Trash.
Restoration options and retention summary
| Data type | Archive available? | Trash recovery window | Who can restore | Notes |
|---|---|---|---|---|
| Items & Subitems | ✅ Yes — indefinitely | 30 days | Any member with editing access to the board | Archive is always preferred over Delete for items |
| Groups | ✅ Yes — indefinitely | 30 days | Any member with editing access to the board | Restoring a group restores all items inside it |
| Columns | ❌ No archive option | 30 days | Admins and the person who deleted it | Column structure may be restored but individual cell values are not guaranteed |
| Boards | ✅ Yes — indefinitely | 30 days | Admins and members with editing permissions on that board | Archive is always preferred; restoring from Trash recovers all groups and items |
| Workspaces | ❌ No archive option | 30 days | Admins only | Restoring a workspace does NOT restore its boards — each board must be restored separately from Trash |
| Dashboards & Workdocs | ❌ No archive option | 30 days | Admins and the person who deleted it | Stored in Trash like other data types |
| Updates (comments) | ❌ No | None | — | Deleted comments are immediately and permanently gone — no Trash, no recovery |
| Files uploaded directly to an item | ❌ No | Limited | — | Files attached via the Files tab are not reliably recoverable and are not backed up via monday.com's API |
What can't be restored natively in monday.com
Monday.com's Archive and Trash are useful for catching recent mistakes, but they have critical limitations that can lead to permanent, unrecoverable data loss.
1. Comments and updates are gone immediately
When a team member deletes an update (comment) on an item, it does not go to Trash. It disappears instantly and permanently. There is no recovery path, native or otherwise, without a third-party backup.
2. No version history or data rollback
This is the limitation that causes the most damage in practice. If a board still exists but the data inside it has changed — wrong values, overwritten fields, a corrupted import — monday.com has no way to show you what it looked like before.
The activity log tells you that a change happened and who made it. It does not let you revert those changes at scale.
Common causes of silent data corruption:
- ✗ A bulk import maps columns incorrectly and overwrites existing data across hundreds of items
- ✗ An automation rule fires on unintended items and changes Status, Date, or custom field values
- ✗ monday.com's AI Sidekick misinterprets a prompt and updates records at scale
- ✗ A third-party integration syncs incorrectly and bulk-pushes wrong values
- ✗ An API script runs against the wrong board or workspace
None of these are deletions, so they don't appear in Trash. The activity log shows what happened — but reversing it manually at scale is not realistic.
3. The 30-day hard cutoff
Monday.com confirms in their own documentation that anything deleted more than 30 days ago is permanently gone. There is no extended retention window, no archive tier for deleted items, and no way to request recovery from their support team after that point.
4. Files uploaded directly to items
Files attached to an item via the Files tab are not available through monday.com's API and are not reliably recoverable after deletion. Files shared through file columns or comments can be backed up, but direct item uploads are a known gap.
5. What monday.com support can and cannot do
| Monday.com Support | |
|---|---|
| ✅ Can do | Advise on using Archive and Trash; investigate if a deletion was caused by a platform bug; sometimes restore data if a verified system error caused the loss (rare) |
| ❌ Cannot do | Recover data deleted more than 30 days ago; recover deleted comments or updates; roll back bulk data changes made by automations, integrations, or AI agents; restore data lost from column deletion; recover files uploaded directly to items |
Common data loss scenarios & solutions
Scenario 1: "I accidentally deleted a board with 6 months of client work"
What happened: A PM was tidying up the workspace and clicked Delete instead of Archive on an active client board. Noticed the mistake 3 weeks later.
Native solution:
✓ Go to your avatar menu → Trash
✓ Filter by Board, find the item, click Restore
✓ All groups, items, and history are recovered
✓ Must be done within 30 days
If it happened 31+ days ago:
✗ Data is permanently gone
✗ No native recovery option
✗ Must rebuild from emails, exports, or memory
Scenario 2: "Someone deleted all the updates on our items"
What happened: A team member "cleaned up" tasks by deleting comment threads across 80 items. All decision history, client approvals, and context are now gone.
Native solution:
✗ Deleted updates (comments) do not go to Trash
✗ Once deleted, they are immediately and permanently gone
✗ Monday.com support cannot recover them
✗ No workaround exists natively
Impact:
- Lost proof of client approvals
- No context on why decisions were made
- Team must reconstruct discussions from memory or email
Scenario 3: "A column was accidentally deleted — and took data with it"
What happened: An editor deleted a custom Priority column, thinking it was a duplicate. The column affected 300 items across 12 groups. The column appeared in Trash, but restoring it did not recover all the original cell values.
Native solution:⚠️ Column goes to Trash and can be restored within 30 days, but the individual cell values stored in that column are not guaranteed to return✗ For a column deleted more than 30 days ago: permanently gone✗ If cell values are lost even after column restoration, there is no further native recovery path
Scenario 4: "Our automation overwrote all our item statuses"
What happened: An automation rule was misconfigured and updated the Status column on 500 items across three boards to the wrong value. The items still exist: The data inside them is just wrong.
Native solution:
✗ Items weren't deleted, so Trash doesn't help
✗ Activity log shows what changed but cannot revert it at scale
✗ No version history to roll back to✗ Manual correction across 500 items: 10+ hours of work
Scenario 5: "Monday.com AI Sidekick updated the wrong boards"
What happened: A team member used monday.com's AI Sidekick to bulk-update item fields. The prompt was ambiguous and the agent applied changes to the wrong workspace boards, overwriting statuses and dates across hundreds of items.
Native solution:
✗ These are data changes, not deletions, so Trash is irrelevant
✗ Activity log confirms the changes occurred but cannot undo them in bulk
✗ No rollback mechanism exists in monday.com for AI-driven updates
✗ Manual correction required
Scenario 6: "A departing employee deleted everything on their way out"
What happened: An admin-level employee deleted 9 boards and their workspace before their last day. The deletions were intentional.
Native solution:
✗ If within 30 days: boards can be restored from Trash by another admin
✗ If the workspace was also deleted: boards must be restored separately from Trash after restoring the workspace shell
✗ After 30 days: everything is permanently gone
✗ No audit trail showing what data existed before deletion
Quick reference: "I lost data — what should I do?"
| Situation | First step | If that fails |
|---|---|---|
| Deleted an item, group, or board within 30 days | Avatar menu → Trash → find the item → Restore | If not found, check if a parent container (board or workspace) was also deleted and restore that first |
| Archived an item, group, or board | Board menu → View archive/trash → Archive tab → Restore (no time limit) | Use Search Everything → Archived Boards if you can't find the board in the workspace menu |
| Deleted a comment or update | No native recovery — permanently gone immediately | Restore from ProBackup only |
| Data was changed, not deleted (automation, AI, or import error) | Check activity log to understand the scope | Native tools cannot revert bulk changes — restore from ProBackup to roll back to the pre-change state |
| Deleted a workspace and need the boards inside it | Restore the workspace from Trash first, then restore each board separately from Trash | If more than 30 days ago, restore from ProBackup only |
| Deleted more than 30 days ago | Native recovery is not possible | Restore from ProBackup; if no backup exists, data is permanently lost |
Summary: Why Archive and Trash aren't enough for professional teams
Monday.com's native recovery tools are designed to catch immediate mistakes — not to serve as a disaster recovery plan. Here is how they stack up:
| Feature | ✅ Good for | ❌ Not sufficient for |
|---|---|---|
| Archive (items, groups, boards) | Hiding completed work while preserving all data indefinitely; can be automated | Point-in-time recovery; exporting data outside monday.com; compliance deletion proof |
| Trash (30-day window) | Recovering recently deleted items, groups, columns, boards, and dashboards | Comments/updates; data changed but not deleted; anything older than 30 days; direct file attachments |
| Activity log | Seeing who changed what and when across a board | Rolling back bulk changes — it shows history but cannot revert it |
| ProBackup | Automated daily backups, unlimited retention, point-in-time recovery, granular restore, compliance documentation | — |
Compliance & data retention
Data retention requirements by industry
| Industry | Typical retention requirement | Monday.com native covers this? |
|---|---|---|
| Finance & Accounting | 7 years | ❌ No — 30-day Trash and indefinite Archive do not provide point-in-time audit trail |
| Healthcare (HIPAA) | 6–10 years | ❌ No |
| Legal | 7 years | ❌ No |
| General business contracts | 3–5 years | ⚠️ Partially — archived boards persist, but no versioned history or exportable audit trail |
| EU GDPR | As long as purpose requires + deletion on request within 30 days | ⚠️ Partial — production deletion is straightforward, but proving backup purge requires a third-party solution |
GDPR Compliance: the "Right to Be Forgotten"
When an EU citizen requests deletion of their personal data, you must delete it from production systems and backups, and document it within 30 days.
How this works with monday.com + ProBackup:
Step 1: Delete user data from monday.com — remove the person from your account, delete items assigned to them, and purge personal data from column values.
Step 2: Request deletion from ProBackup — open a support ticket specifying the user and date range. ProBackup purges that user's data from backup storage.
Step 3: Export a deletion certificate from ProBackup for your GDPR compliance documentation.
👉 Read our full GDPR guide: Handling GDPR Deletion Requests in Your Backup System
SOC 2 & ISO 27001: what auditors look for
| Auditor requirement | Monday.com native | Monday.com + ProBackup |
|---|---|---|
| Automated daily backups | ❌ No automated backup system — Archive and Trash only | ✅ Daily automated backups |
| Documented backup procedures | ❌ Not provided | ✅ Documented and auditable |
| Tested restore process | ⚠️ Manual — teams must self-test Trash and Archive restores | ✅ Tested and verifiable |
| SOC 2 certified backup vendor | N/A | ✅ ProBackup is SOC 2 Type II certified |
| Configurable retention policy | ❌ Fixed 30-day Trash; Archive has no version history | ✅ Unlimited retention with point-in-time history |
| Audit trail of backup activity | ❌ Not available | ✅ Full audit log |
Protect your monday.com data today
Don't wait for a data loss disaster to implement backup. As monday.com expands into AI-powered workflows with Sidekick and agentic automations, the risk of bulk, unintended data changes grows alongside the risk of accidental deletion. A single misconfigured agent or automation can touch every item on a board before anyone notices — and the activity log will show you it happened, but won't undo it.
ProBackup gives you:
✓ Automated daily backups of all your monday.com data
✓ Unlimited retention (no 30-day expiration)
✓ Point-in-time recovery (restore from any date)
✓ Granular restore (one item, one board, or everything)
✓ Google Drive sync (you own your data)
✓ SOC 2 Type II certified (enterprise-ready)
✓ 5-minute setup (no technical knowledge needed)
👉 Start your 7-day free trial at ProBackup: https://app.probackup.io/onboarding
.jpg)
Why Backing Up Slack Data Is Crucial After Recent Changes
Slack recently rolled out significant updates that impact users on free workspaces, limiting data retention and message history. If you manage projects or collaborate with teams on Slack’s free plan, it's crucial to understand these changes and how they affect your ability to access past conversations and files. Here’s everything you need to know about the update and why a solid backup strategy is more important than ever.
What’s Changing in Slack’s Free Workspaces?
Slack has shifted from storing messages and files indefinitely to a rolling 90-day limit on free workspaces. This means:
- Message Retention: Only messages from the past 90 days will be available. Anything older will be inaccessible unless your workspace is upgraded to a paid plan.
- File Storage: Similarly, files shared more than 90 days ago will no longer be accessible.
This change can be a major disruption for teams that rely on Slack for daily communication. Old conversations, decisions, and shared files are critical, especially in long-term projects.
Why Should You Be Concerned?
While Slack's free plan remains a valuable tool for small teams, the updates pose a risk of data loss. Without proper backups, you could lose access to important files, project discussions, or decision-making threads, which may affect future work. Key risks include:
- Loss of Historical Data: Teams often refer back to past discussions in long-term projects. Under the new Slack policy, this historical data could vanish unless you pay for a higher plan.
- Unreliable File Availability: Shared files older than 90 days will no longer be stored, which could lead to gaps in your documentation.
How ProBackup Can Help
ProBackup is designed to protect your valuable data on platforms like Slack. Our solution offers automated, scheduled backups that ensure your conversations, files, and attachments are securely stored and easily retrievable - no matter what happens on Slack’s servers.
With ProBackup, you can back up various types of data, including:
- Users: Maintain records of all team members.
- Channels: Keep a complete history of discussions across different channels.
- Threads: Save important threaded conversations for context.
- Messages: Archive all messages for future reference.
- Attachments: Securely store files shared in channels and direct messages.
- Direct Messages: Back up direct messages that you have access to, ensuring no vital communication is lost.
With ProBackup, the retention of your data depends on your subscription plan:
- Plus Plan: Retains revisions for up to 6 months.
- Pro Plan: Retains revisions for up to 2 years.
- Premium Plan: Retains revisions for up to 4 years.
This flexibility allows you to choose a plan that best fits your team's needs.
What You Can Do Now
To avoid any disruption or potential data loss, here’s what you should do:
- Evaluate Your Needs: If you rely heavily on Slack’s free version for project management, consider the potential impact of the 90-day limit.
- Upgrade or Back Up: You can either upgrade to Slack’s paid plan for longer retention or use ProBackup to ensure your data is backed up and retrievable.
- Set Up ProBackup: Automate the process of securing your Slack data, giving you continuous access to your messages and files based on your chosen retention plan.
Conclusion
Slack's changes to free workspaces introduce limits that could put your team’s data at risk. ProBackup offers a seamless solution to these challenges by ensuring your conversations and files are always backed up, accessible, and secure - so you can focus on what matters most: getting work done.

How to back up your ClickUp lists: A step-by-step guide
ClickUp is a fantastic all-in-one productivity platform that helps teams manage everything from simple tasks to complex, multi-stage projects. While you rightfully trust cloud apps like ClickUp to be secure and reliable, managing your business's critical data on any single platform opens the door to potential risks.
Using ClickUp to manage your business can expose your team to issues such as accidental data deletion from human error, malicious actions by disgruntled employees, or data loss due to technical glitches and downtime. Losing an important ClickUp task or list can set your business back hours, or even days.
To gain peace of mind and protect your workflow, implementing an automated backup solution is essential. This guide will walk you through setting up a daily, automated backup for your ClickUp account using ProBackup.
Part 1: Create a ProBackup account
Getting started is easy and comes with a 7-day free trial.
- Visit the ProBackup for ClickUp page by navigating to https://www.probackup.io/backup/clickup
- Click on the Start free 7 day trial button.
- Select ClickUp as the app you would like to back up and click Continue
- Fill in your email, first name, and last name, then click Continue.
- Verify your email address by following the instructions sent to your inbox.
Part 2: Connect ClickUp and start your first backup
Once your ProBackup account is created and verified, you can connect your ClickUp account.
We recommend that you sign in to the right ClickUp account first, before connecting your account.
- In ProBackup, click on Sign in with ClickUp. This will redirect you to ClickUp to authorize the connection. If you are not signed in to ClickUp, then you will have to sign in first.
- On the ClickUp authorization page, select the workspaces you would like to back up and click on Connect Workspaces.
- Click Start Backup to grant ProBackup access and begin your first backup.
What happens next?
After you confirm, the initial backup of your selected ClickUp workspaces will begin automatically. Our backup app will fetch all relevant data types such as lists, tasks, comments, files and ClickUp docs. Depending on the size of your ClickUp account, the initial backup can take up to a few hours. You will be notified by email as soon as the first backup is complete.
Click on Go to ClickUp to view the lists that are already backed up.
That’s it! Your ClickUp account is now protected with daily automated backups, ensuring your data is safe and easily restorable when you need it most.
Inviting other ClickUp users
During the onboarding flow of ClickUp, you choose which workspaces you want to back up. Once the initial backup is started, we can back up all data that your ClickUp account has access to. This means that any private spaces, folders or lists that you don’t have access to, will not be included in the scope of the backup. You can solve this by inviting other team members to your account.
- In ProBackup, go to Settings > Users.
- Click on Invite Team Member and confirm the popup.
Each invited team member needs to create their own ProBackup account and authorize ProBackup to their ClickUp account. Once they’ve done this, then their personal spaces, folders and lists will be added to the backup scope.
How to back up your Asana projects (and why it matters)
Asana is a leading work management platform for human and AI coordination. Whether it's managing strategic initiatives, cross-functional programs, or company-wide goals, Asana helps business bring clarity to complexity. While you rightfully trust cloud apps like Asana to be secure and reliable, managing your business's critical data on any single platform opens the door to potential risks.
Using Asana to manage your business can expose your team to issues such as accidental data deletion from human error, malicious actions by disgruntled employees, or data loss due to technical glitches and downtime. Losing an important Asana task or project can set your business back hours, or even days.
To gain peace of mind and protect your workflow, implementing an automated backup solution is essential. This guide will walk you through setting up a daily, automated backup for your Asana account using ProBackup.
Part 1: Create a ProBackup Account
Getting started is easy and comes with a 7-day free trial.
- Visit the ProBackup for Asana page by navigating to https://www.probackup.io/backup/asana
- Click on the Start free 7 day trial button.
- Select Asana as the app you would like to back up and click Continue
- Fill in your email, first name, and last name, then click Continue.
- Verify your email address by following the instructions sent to your inbox.
Part 2: Connect Asana and Start Your First Backup
Once your ProBackup account is created and verified, you can connect your Asana account.
We recommend that you sign in to the right Asana account first, before connecting your account.
- In ProBackup, click on Sign in with Asana. This will redirect you to Asana to authorize the connection. If you are not signed in to Asana, then you will have to sign in first.
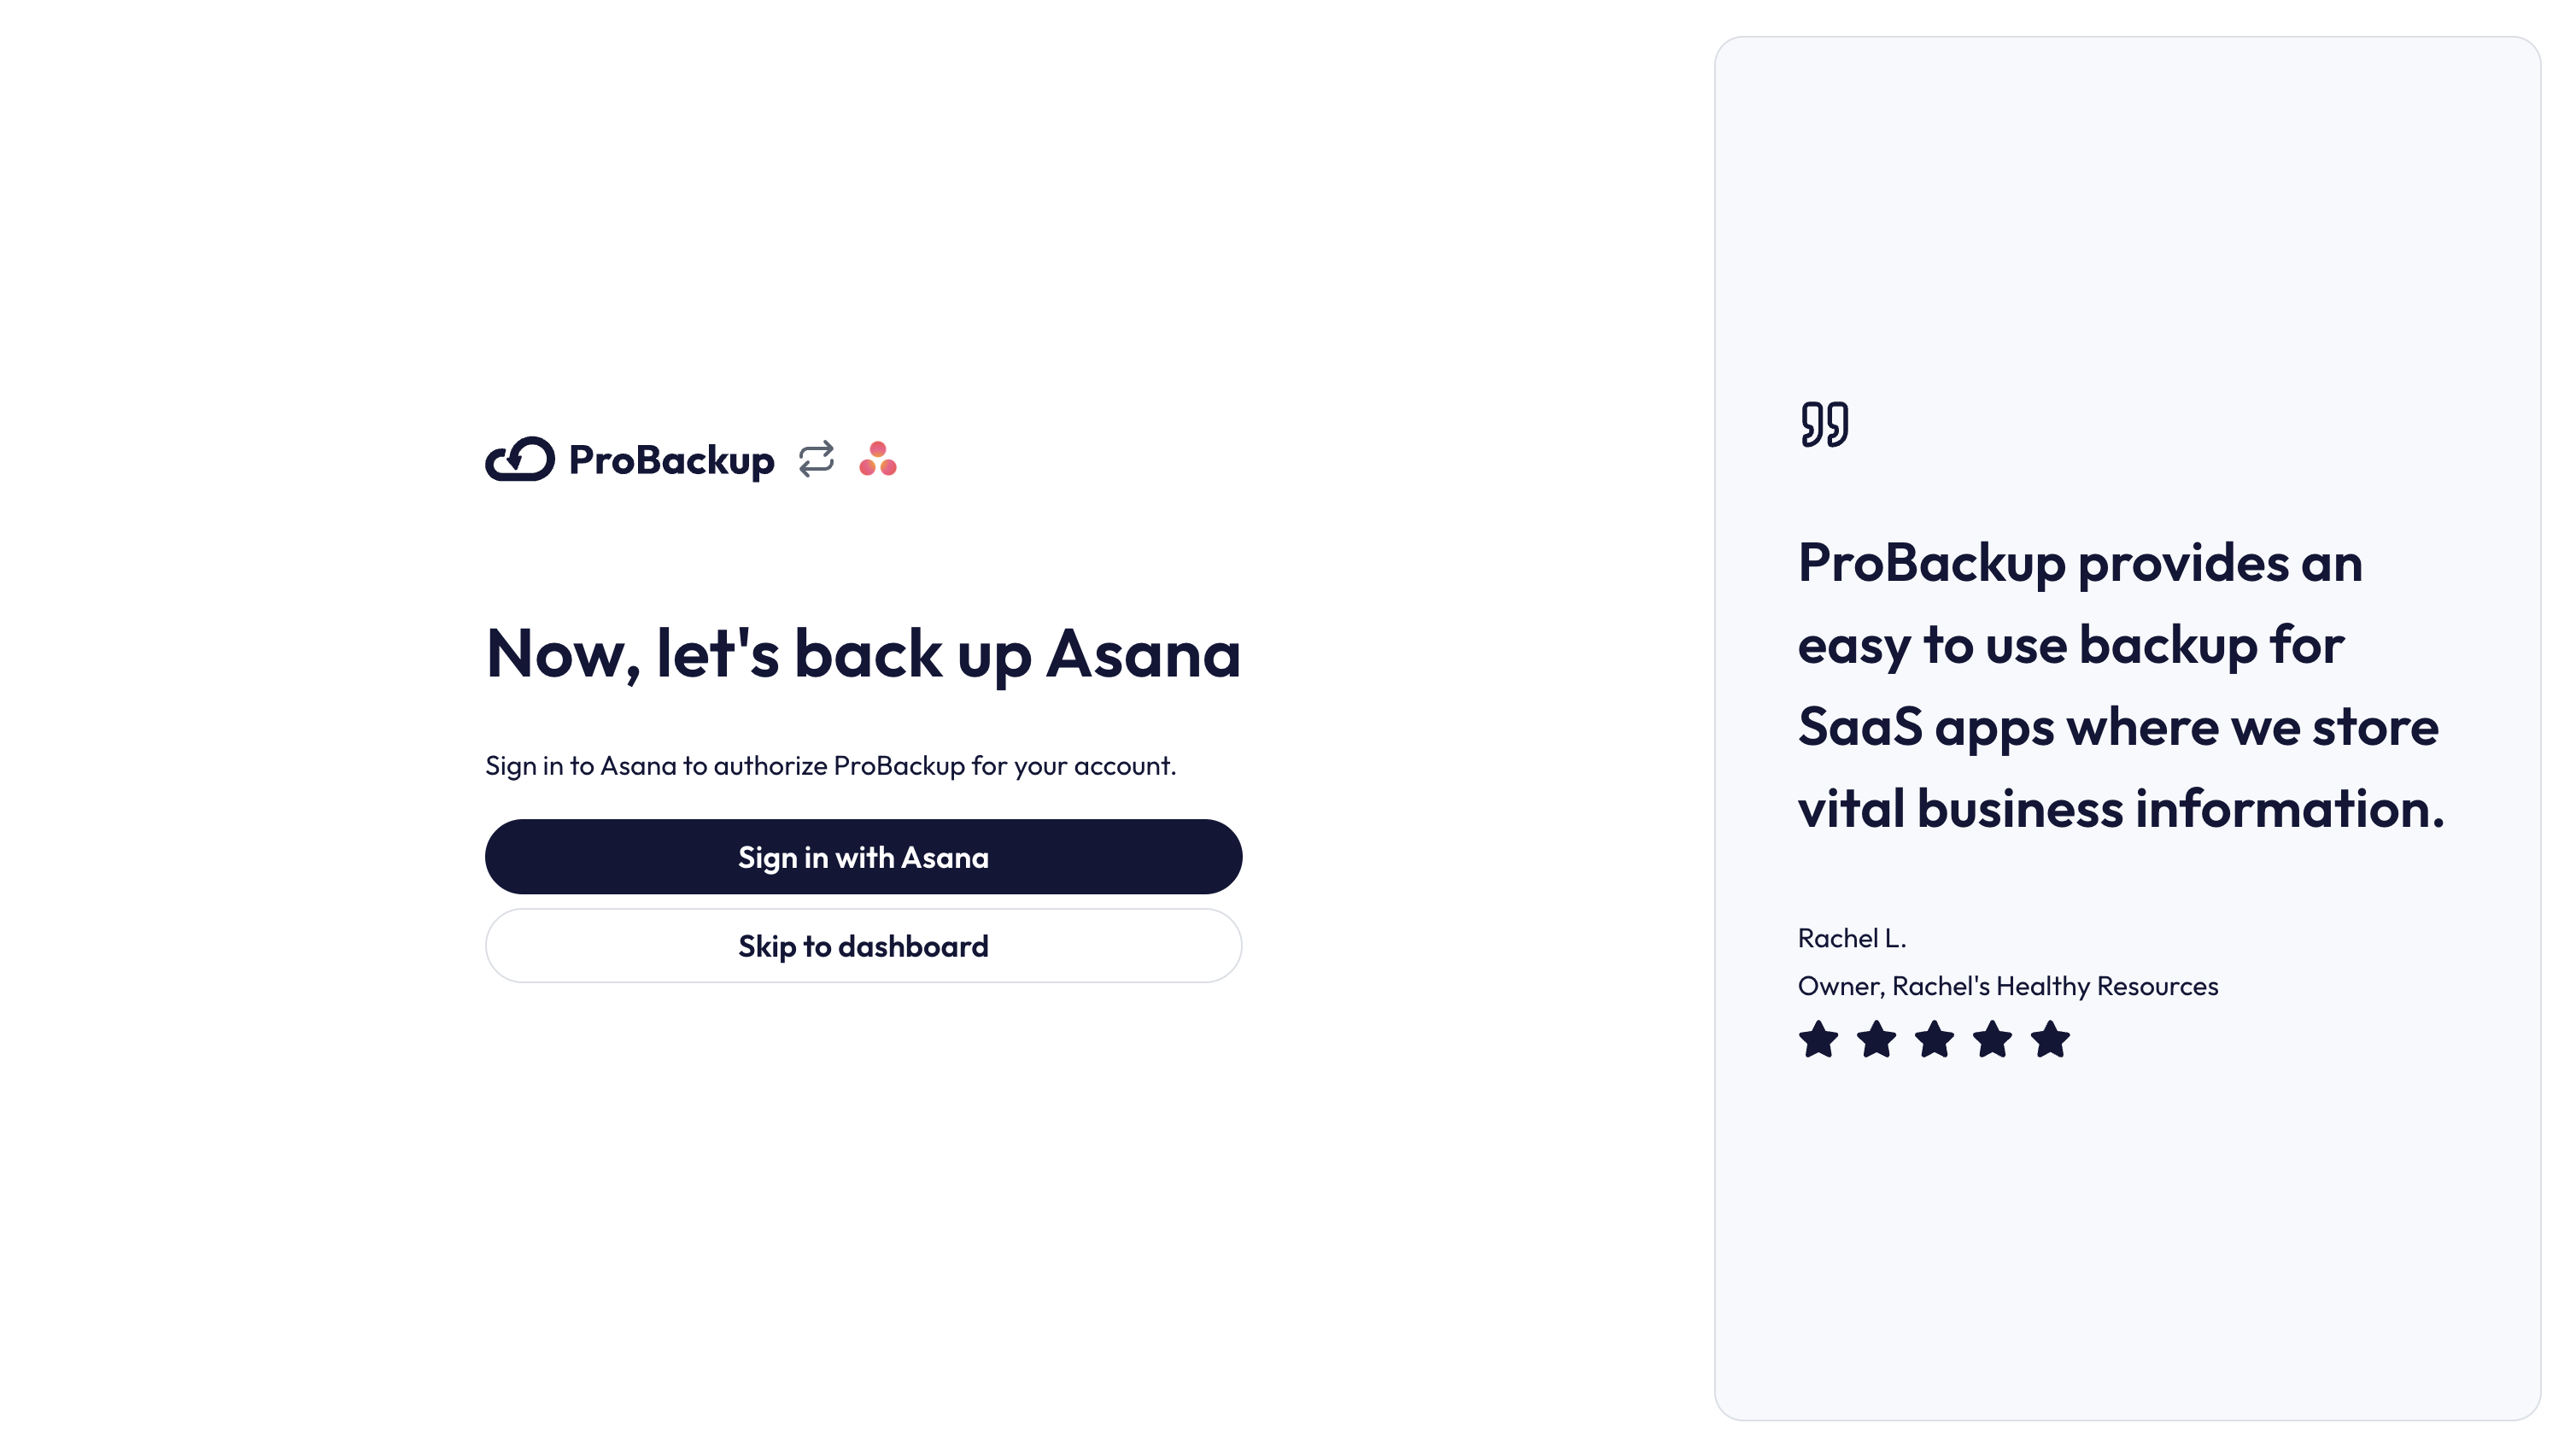
- On the Asana authorization page, click on Allow.
- On the next step of the onboarding wizard, select the workspaces you would like to back up.
- Click on Start backup to start your first backup.
What Happens Next?
After you confirm, the initial backup of your selected Asana workspaces will begin automatically. Our backup app will fetch all relevant data types such as projects, tasks, comments, files and custom fields. Depending on the size of your Asana account, the initial backup can take up to a few hours. You will be notified by email as soon as the first backup is complete.
Click on Go to Asana to view the projects that are already backed up.
That’s it! Your Asana account is now protected with daily automated backups, ensuring your data is safe and easily restorable when you need it most.
Inviting other Asana users
During the onboarding flow of Asana, you choose which workspaces you want to back up. Once the initial backup is started, we can back up all data that your Asana account has access to. This means that any workspaces or private projects that you don’t have access to, will not be included in the scope of the backup. You can solve this by inviting other team members to your account.
- In ProBackup, go to Settings > Users.
- Click on Invite Team Member and confirm the popup.
Each invited team member needs to create their own ProBackup account and authorize ProBackup to their Asana account. Once they’ve done this, then their added workspace and private projects will be added to the backup scope.
How to protect your monday.com boards: A Step-by-step guide to backing up monday.com
monday.com is a best-in-class productivity platform that allows teams to create customizable workflows to manage projects, tasks, and processes. While you rightfully trust cloud apps like monday.com to be secure and reliable, managing your business's critical data on any single platform opens the door to potential risks.
Using monday.com to manage your business can expose your team to issues such as accidental data deletion from human error, malicious actions by disgruntled employees, or data loss due to technical glitches and downtime. Losing an important monday.com board or WorkDow can set your business back hours, or even days.
To gain peace of mind and protect your work, implementing an automated backup solution is essential. This guide will walk you through setting up a daily, automated backup for your monday.com account using ProBackup.
Part 1: Create a ProBackup Account
Getting started is easy and comes with a 7-day free trial.
- Visit the ProBackup for monday.com page by navigating to https://www.probackup.io/backup/monday-com
- Click on the Start free 7 day trial button.
- Select monday.com as the app you would like to back up and click Continue
- Fill in your email, first name, and last name, then click Continue.
- Verify your email address by following the instructions sent to your inbox.
Part 2: Connect monday.com and Start Your First Backup
Once your ProBackup account is created and verified, you can connect your monday.com account.
We recommend that you sign in to the right monday.com account first, before connecting your account.
1. In ProBackup, click on Sign in with monday.com. This will redirect you to monday.com to authorize the connection. If you are not signed in to monday.com, then you will have to sign in first.
2. On the monday.com authorization page, scroll down and click on Authorize

3. On the next step of the onboarding wizard, select the workspaces you would like to back up.
4. Click on Start Backup to start your first backup.
What Happens Next?
After you confirm, the initial backup of your selected monday.com workspaces will begin automatically. Our backup app will fetch all relevant data types such as items, files, comments, fields and WorkDocs. Depending on the size of your monday.com account, the initial backup can take up to a few hours. You will be notified by email as soon as the first backup is complete.
Click on Go to monday.com to view the boards that are already backed up.
That’s it! Your monday.com account is now protected with daily automated backups, ensuring your data is safe and easily restorable when you need it most.
Inviting other monday.com users
During the onboarding flow of monday.com, you choose which workspaces you want to back up. Once the initial backup is started, we can back up all data that your monday.com account has access to. This means that any workspaces or private boards that you don’t have access to, will not be included in the scope of the backup. You can solve this by inviting other team members to your account.
- In ProBackup, go to Settings > Users.
- Click on Invite Team Member and confirm the popup.
Each invited team member needs to create their own ProBackup account and authorize ProBackup to their monday.com account. Once they’ve done this, then the additional workspaces and their private boards will be added to the backup scope.
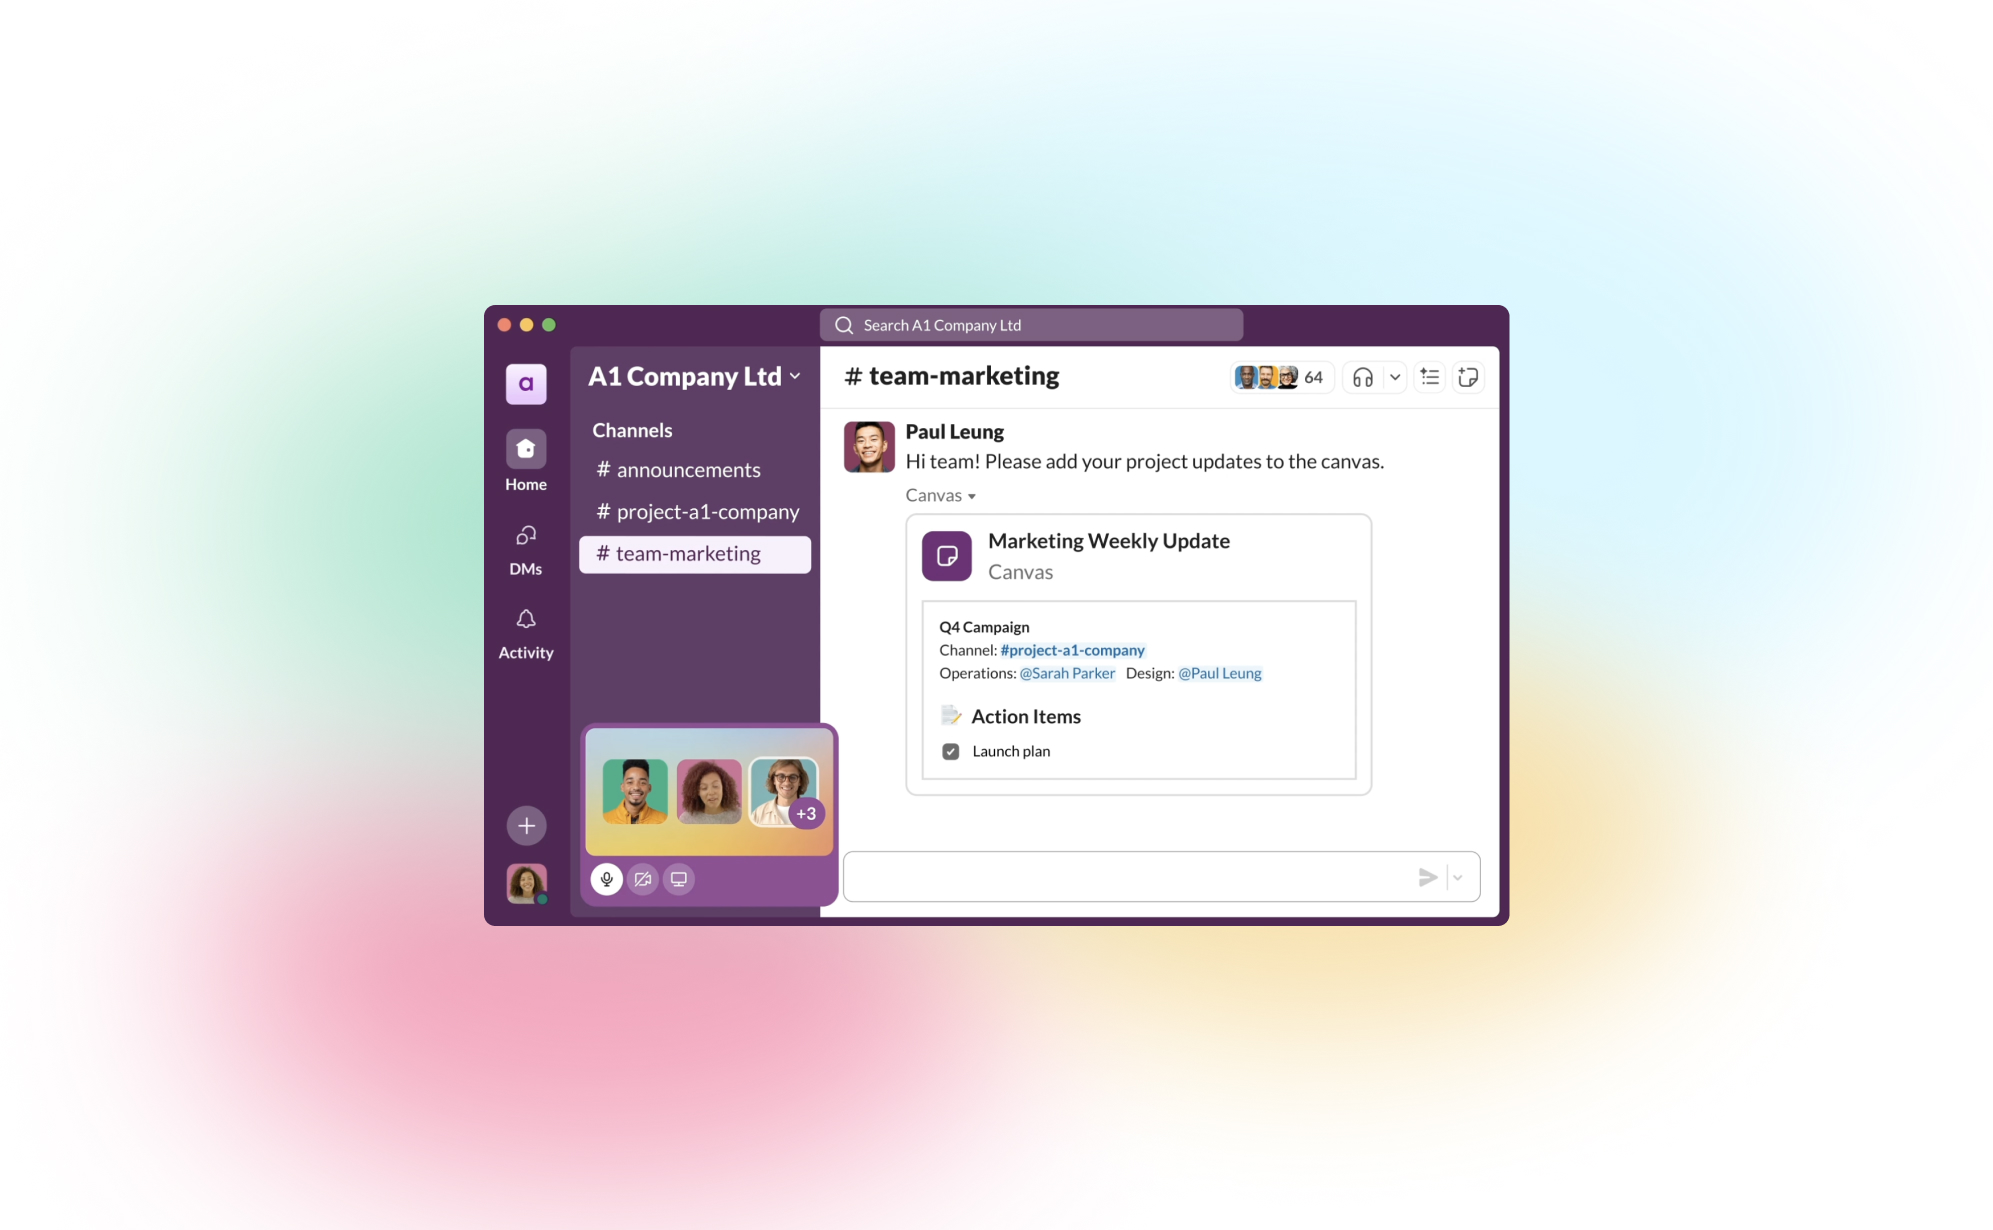
How to Back Up Your Slack Channels?
If your team uses Slack, you know it’s more than just a chat tool - it’s where important conversations, files, and decisions happen every day. But what would happen if any of that data disappeared? Mistaken deletions, account changes, or even accidental closures can result in the loss of critical information. That’s why it’s worth having a reliable backup strategy in place for your Slack channels.
In this post, we’ll walk you through why it’s essential to back up Slack and share simple ways to protect your team’s conversations.
Why Backing Up Your Slack Data is Essential
While Slack stores a lot of information, there are still good reasons to have your own backup:
- Data Loss Risks – We’ve all seen it happen: messages or files get accidentally deleted. Having a backup means you can restore that lost data with just a few clicks.
- Compliance Needs – Certain industries, like finance or healthcare, require records of communication for compliance. Backups ensure you have data stored long-term to meet these requirements.
- Business Continuity – When disruptions occur, it’s comforting to know that you can recover Slack data without missing a beat.
What ProBackup Covers
With ProBackup, you don’t have to worry about losing the most important parts of your Slack workspace. Here’s what we back up:
- Users – We capture the information of all workspace members.
- Channels – ProBackup covers both public and private channels, keeping track of all those valuable team conversations.
- Threads – Preserve context by backing up threaded conversations.
- Messages – Every message in your channels is backed up, so nothing slips through the cracks.
- Attachments – Files, images, and any other media shared in channels are backed up too.
- Direct Messages – We back up direct messages (DMs) that the workspace admin has access to, so you don’t lose any critical one-on-one discussions.
With this coverage, ProBackup gives you the peace of mind that, if needed, you can restore complete conversations and files quickly.
Three Ways to Back Up Slack Data
Let’s take a look at the main ways to create Slack backups:
1) Manual Exports
Slack allows workspace owners and admins to export data. To do this:
- Go to Settings & Administration > Workspace Settings in the Admin Dashboard.
- Head to Import/Export Data and choose Export to download your public channel messages and files.
Manual exports have some limitations, though. For example, direct messages and private channels aren’t always included on the free and standard plans, and the export format (JSON) requires extra steps if you need to review or restore content.
2) Automated Daily Backups with ProBackup
For a set-it-and-forget-it solution, ProBackup offers automated daily backups. Once you set up ProBackup, it will back up your Slack data daily without any extra work on your end. This includes:
- Continuous Backup – You won’t need to manually export or worry about missing anything, as ProBackup does this daily.
- Access Control – Customize who can access or restore the data, which is helpful if only certain admins need that responsibility.
- Customizable Retention Policies – Choose how long to retain data to meet your compliance or archival needs.
Daily backups keep your Slack data fresh and up to date, so your team’s conversations are always protected.
3) Slack’s Built-In Retention Policies
For organizations on Slack’s Enterprise Grid, there are advanced retention policies that allow you to schedule deletions of messages based on compliance requirements. While these are useful for compliance, they aren’t a true backup solution, as data is deleted once the retention period expires.
Best Practices for Slack Backups
To ensure you’re covering all your bases:
- Use Daily Backups: ProBackup’s daily automated backups make sure your Slack data stays safe without requiring any manual steps.
- Define Your Backup Scope: Identify the channels and types of messages (public, private, DMs) you want to protect.
- Consider Data Privacy: Be mindful of data privacy standards, especially if you’re backing up sensitive information.
- Test Restores: Run periodic tests to confirm that you can restore data smoothly if you need it.
Protect Your Slack Data with ProBackup
At ProBackup, we specialize in making sure your team’s data across SaaS tools, including Slack, stays safe and accessible. ProBackup offers:
- Complete Coverage – We back up channels, messages, threads, files, and DMs that you need.
- Ease of Use – Quick setup and easy integration with your worksfdfdfdfdpace.
- Security – We store your backups securely, meeting industry encryption standards.
Start protecting your Slack conversations today with ProBackup and stay prepared for whatever comes your way.
.jpg)
How to secure your Trello boards: A step-by-step guide to backing up Trello
Trello is a powerful, visual collaboration tool that uses boards, cards and lists to help teams and businesses organize and prioritize their projects and collaborate effictively.
As Trello can be used for a wide range of projects, from simple to-do lists to complex workflows, it's a popular choice for many businesses across all verticals. While you rightfully trust cloud apps like Trello to be secure and reliable, managing your team's work in one cloud app opens the door to potential risks. It can expose your team to issues such as accidental data deletion from human error, malicious actions by disgruntled employees, or data loss due to technical glitches and downtime. Losing an important Trello card or board can set your business back hours, or even days.
To gain peace of mind and protect your work, implementing an automated backup solution is essential. This guide will walk you through setting up a daily, automated backup for your Trello boards using ProBackup.
Part 1: Create a ProBackup Account
Getting started is easy and comes with a 7-day free trial.
- Visit the ProBackup for Trello page by navigating to https://www.probackup.io/backup/trello
- Click on the Start free 7 day trial button.
- Select Trello as the app you would like to back up and click Continue
- Fill in your email, first name, and last name, then click Continue.
- Verify your email address by following the instructions sent to your inbox.
Part 2: Connect Trello and Start Your First Backup
Once your ProBackup account is created and verified, you can connect your Trello account.
We recommend that you sign in to the right Trello account first, before connecting your account.
- In ProBackup, click on Sign in with Trello. This will redirect you to Trello to authorize the connection. If you are not signed in to Trello, then you will have to sign in first.
- On the Trello authorization page, scroll down and click on Allow.

- On the next step of the onboarding wizard, select the workspaces you would like to back up.
- Click on Start Backup to start your first backup.
What Happens Next?
After you confirm, the initial backup of your selected Trello workspaces will begin automatically. Our backup app will fetch all relevant data types such as cards, files, comments and check lists. Depending on the size of your Trello account, the initial backup can take up to a few hours. You will be notified by email as soon as the first backup is complete.
In the meantime, you can click on Go to Trello to view the cards that are already backed up.
That’s it! Your Trello account is now protected with daily automated backups, ensuring your data is safe and easily restorable when you need it most.
Inviting other Trello users
During the onboarding flow of Trello, you choose which workspaces you want to back up. Once the initial backup is started, we can back up all data that your Trello account has access to. This means that any workspaces or private boards that you don’t have access to, will not be included in the scope of the backup. You can solve this by inviting other team members to your account.
- In ProBackup, go to Settings > Users.
- Click on Invite Team Member and confirm the popup.
Each invited team member needs to create their own ProBackup account and authorize ProBackup to their Trello account. Once they’ve done this, then their workspaces and personal boards will be added to the backup scope.